


Installing your Barco display controller
30
7.
Align the display controller(s) for your B
ARCO
C
ORONIS
Display
System with the slot(s) and press it(them) in firmly until the
card(s) is(are) fully seated.
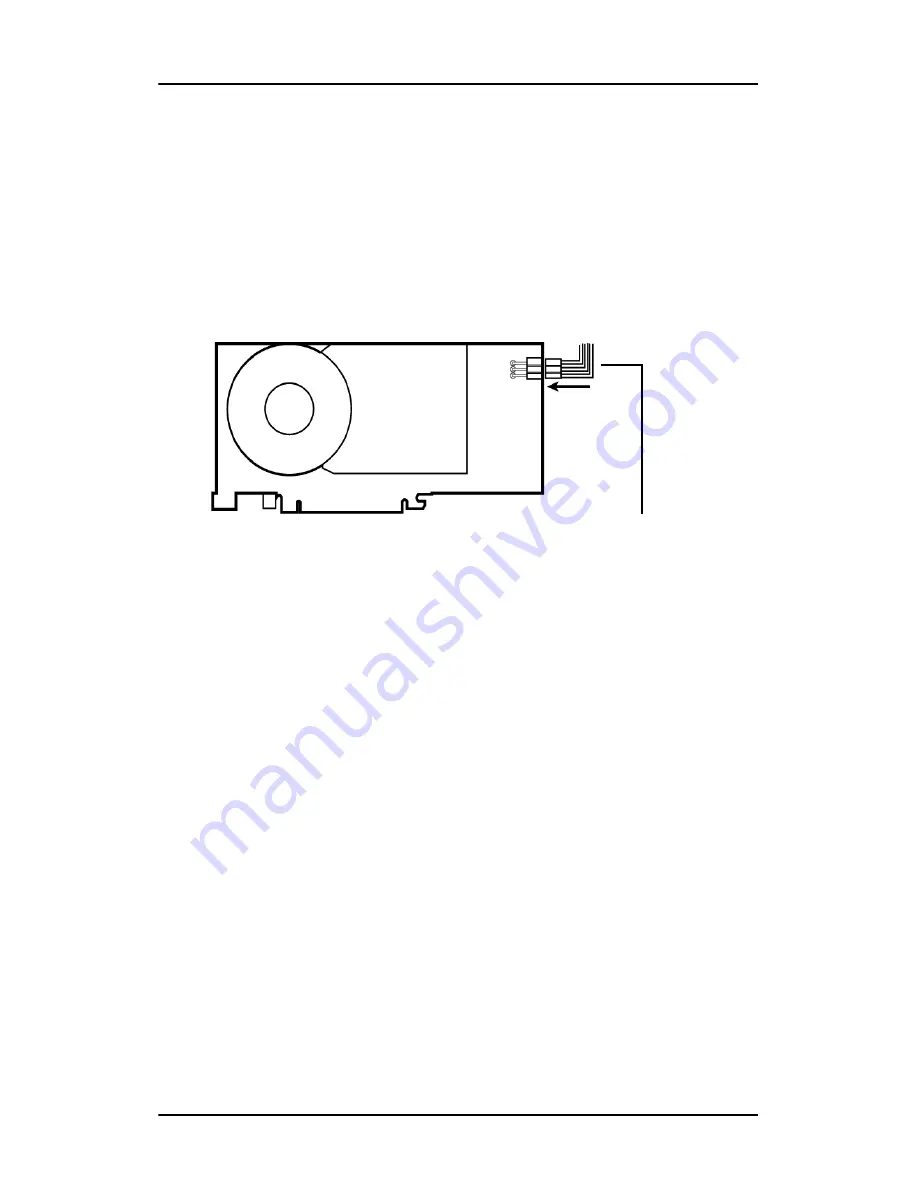
8.
Note:
This step applies only to the MXRT 5100 and MXRT 7100.
Connect the power cable to the 6-pin power connection on the
graphics card. Make sure the cables are not interfering with
anything inside the computer (for example, a cooling fan).
Figure 9: Power connection for the MXRT 5100 and 7100 controllers
9.
Screw in or fasten the display controller securely. Replace and
secure the computer cover.
10.
Connect your B
ARCO
C
ORONIS
Displays to the display controller(s) for
your B
ARCO
C
ORONIS
Display System using the cables supplied. Make
sure all cables are securely connected before turning on your
system. Figures 10 and 11 show the types of connections are
available:
6-pin graphics controller
power cable
Summary of Contents for Coronis MDCC 2121
Page 1: ...MDCC 2121 MDCC 3120 MDCG 2121 MDCG 3120 MDCG 3121 MDCG 5121 Getting started guide...
Page 2: ...This page intentionally left blank 2 This page intentionally left blank...
Page 4: ...This page intentionally left blank 4 This page intentionally left blank...
Page 7: ...7 Preface...
Page 17: ...17 Introduction...
Page 24: ...Display parts controls and connectors This page intentionally left blank 24...
Page 25: ...25 Display controller installation...
Page 33: ...33 Display installation...
Page 43: ...Connecting the signal cables 43 Figure 22 External DC power supply...
Page 46: ...Cable routing 46 Figure 25 Installation complete...
Page 49: ...49 Display controller software installation...
Page 60: ...Installing drivers and software This page intentionally left blank 60...
Page 61: ...61 Where to get more information...
Page 63: ...Where to get more information 63...
Page 64: ...Where to get more information This page intentionally left blank 64...
Page 65: ...65 Troubleshooting...
Page 70: ...General tips This page intentionally left blank 70...
Page 71: ...71 Warranty Statement...
Page 74: ...Warranty Statement 74...
Page 75: ...B410578 00 January 2007...


