


Sewing Large-size (Split) Embroidery Patterns
213
7
—————————————————————————————————————————————————————————————————————————————————————
3
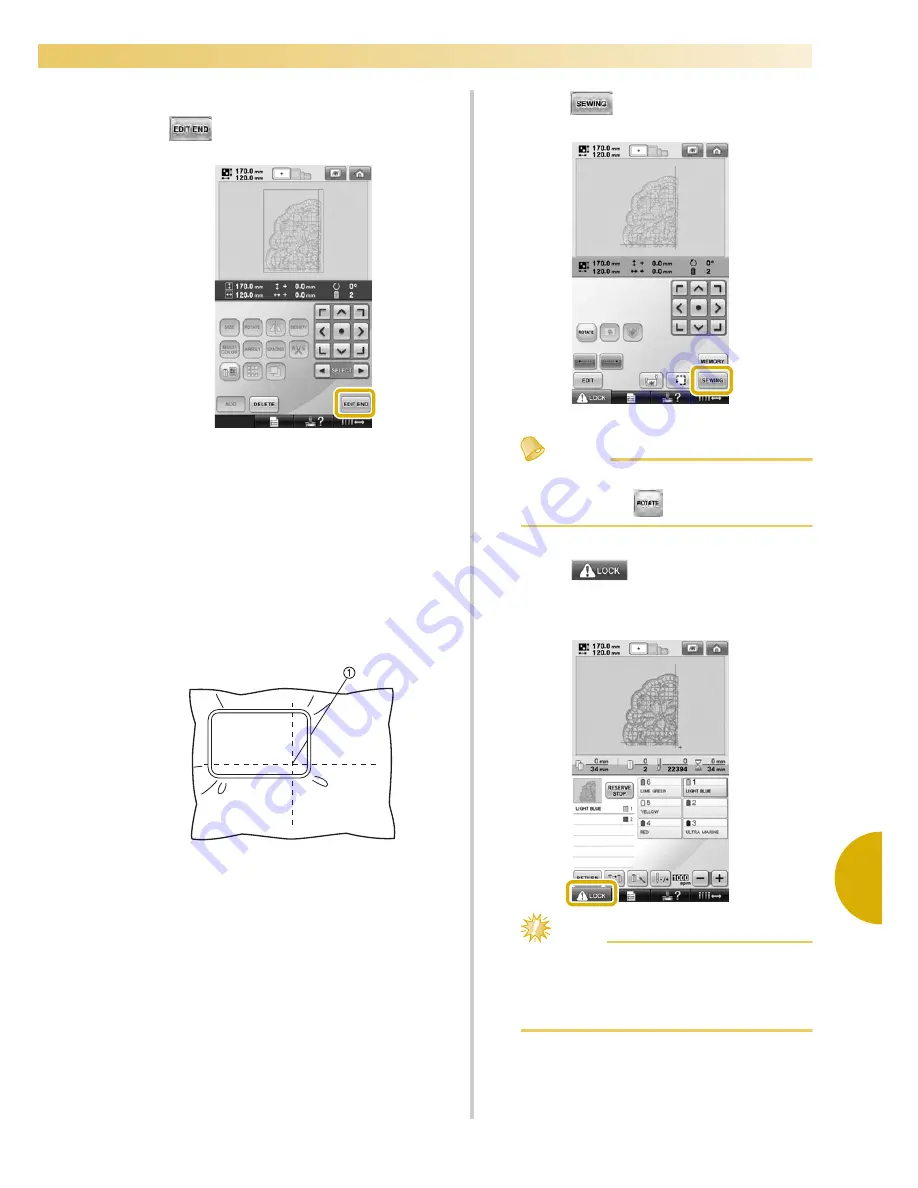
If necessary, edit the pattern. Then, touch
.
• For details, refer to “Editing the Embroidery
Pattern (Pattern Editing Screen)” on
page 160.
4
Confirm the pattern size, and then select the
appropriate fabric and the embroidery
frame.
• Be sure to select fabric of the size of
combined pattern.
5
Hoop the appropriate part of the fabric. In
this case, hoop upper-left part of the fabric.
1
Center of fabric
6
Touch .
Memo
●
The pattern can be rotated to either the left
or right when
is touched.
7
Touch
, and then press the start/
stop button to embroider the pattern
section.
Note
●
The last step of the stitching of the pattern
section will be an alignment stitching. Use
this stitching for placement of adjacent
pattern section.
Summary of Contents for Embroidery Professional PLUS BMP9
Page 1: ......
Page 20: ...18...
Page 136: ...EMBROIDERING SETTINGS 134...
Page 192: ...SELECTING EDITING SAVING PATTERNS 190...
Page 268: ...APPENDIX 266...
Page 276: ...English 885 T05 XE6418 001 Printed in Taiwan...


