Using the Optional Cap Frame
231
7
—————————————————————————————————————————————————————————————————————————————————————
3
Secure the stabilizer with the pins on the cap
frame.
1
Pins
• Make sure that the pins go through the
stabilizer to firmly secure it.
4
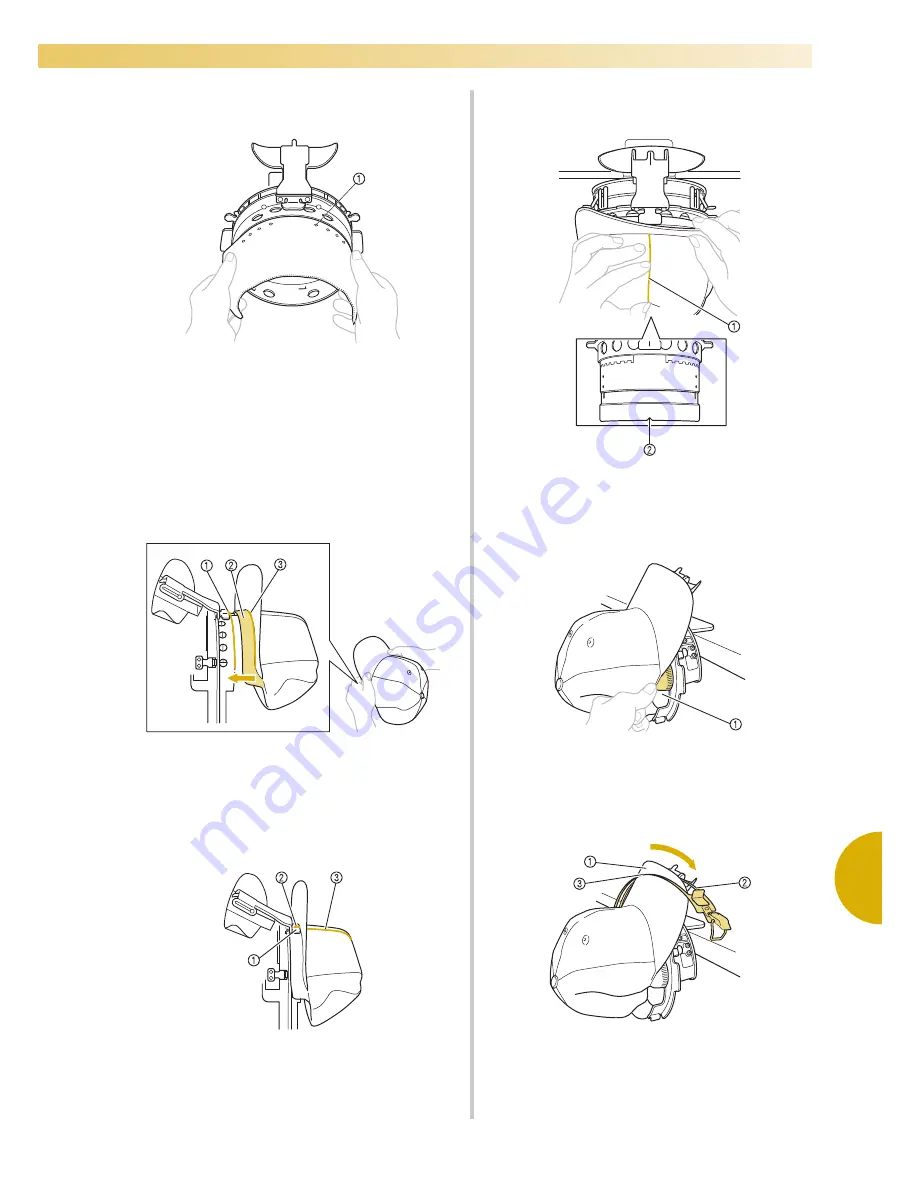
Lift up (flip) the sweat guard on the inside of
the cap, and then place the cap in the cap
frame.
Using both hands, hold both sides of the cap,
and then align the edge of the lower frame
with the base of the brim.
1
Edge of the lower frame
2
Sweat guard
3
Base of the brim
At the same time, align the centerline of the
cap with the centerline of the sweat guard
holder on the cap frame, and then slide the
sweat guard under the sweat guard holder.
1
Sweat guard holder
2
Centerline of sweat guard holder
3
Centerline of cap
5
Align the centerline of the cap with the
notch in the mounting jig.
1
Centerline of cap
2
Notch in mounting jig
6
Place the sweat guard of the cap inside the
notch in the cap frame.
1
Notch in cap frame
7
Close the clamping frame so that the brim of
the cap passes between the inside clamping
frame and the outside clamping frame.
1
Brim of the cap
2
Inside clamping frame
3
Outside clamping frame
Summary of Contents for Embroidery Professional PLUS BMP9
Page 1: ......
Page 20: ...18...
Page 136: ...EMBROIDERING SETTINGS 134...
Page 192: ...SELECTING EDITING SAVING PATTERNS 190...
Page 268: ...APPENDIX 266...
Page 276: ...English 885 T05 XE6418 001 Printed in Taiwan...


