20
Tutorial
Auto Punch Function
Step 1
Importing image data into
Layout & Editing
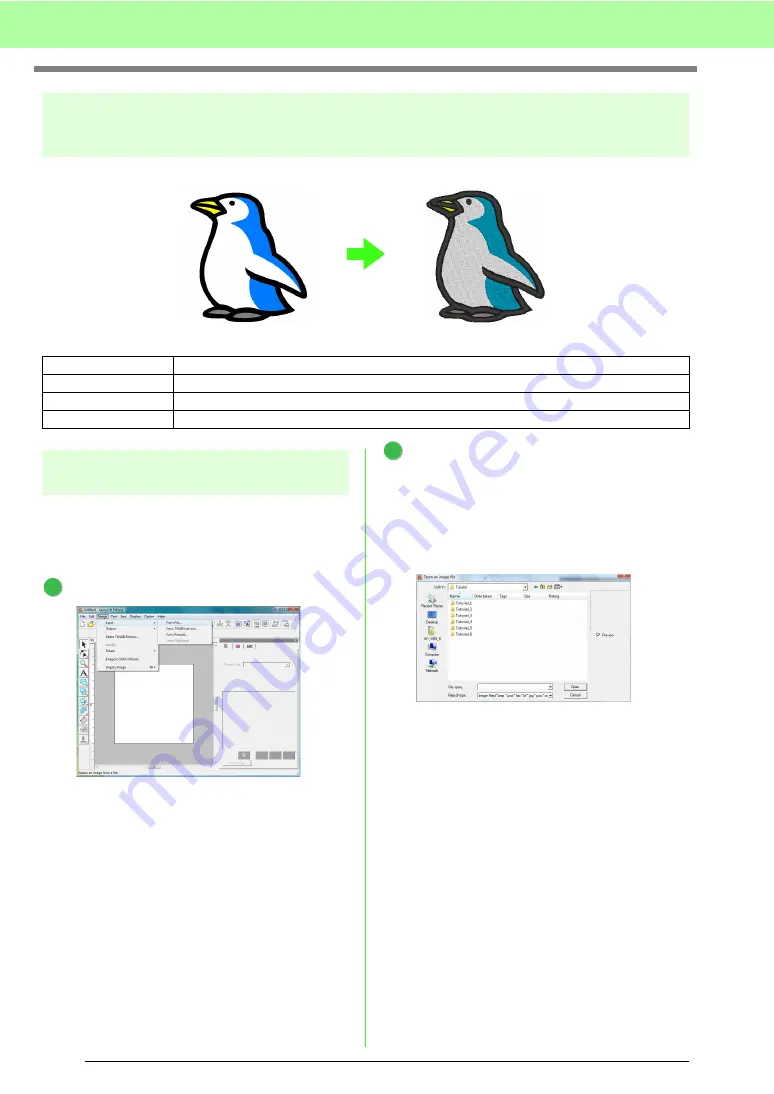
First, we need to import the image that will be
converted into an embroidery pattern.
For this example, we will use the penguin image
(penguin.bmp) provided with this application.
Click
Image
, then
Input
, then
from File
.
Double-click the
Documents
(
My Documents
)\
Palette Ver.8
\
Tutorial
\
Tutorial_2
folder to open it.
When this application is installed, the
Palette
Ver.8
folder is installed in the
Documents
(
My
Documents
) folder.
When an image is imported for the first time,
the contents of this folder are displayed.
Step 1
Importing image data into Layout & Editing
Step 2
Automatically converting the image to an embroidery pattern
Step 3
Displaying a preview of the embroidery
Step 4
1
2
Summary of Contents for ECS8
Page 1: ......
Page 146: ...144 Arranging Embroidery Designs Layout Editing ...
Page 200: ...198 Managing Embroidery Design Files Design Database ...
Page 218: ...216 Creating Custom Stitch Patterns Programmable Stitch Creator ...
Page 244: ...242 Tips and Techniques ...
Page 264: ...262 Menus Tools ...
Page 266: ...264 Troubleshooting ...
Page 271: ...English ...


