141
Arranging Embroidery Designs (Layout & Editing)
A
rr
a
ng
in
g Embr
oide
ry
D
e
s
igns
(
L
a
y
out
& E
d
iting)
c
“Specifying the Design Page Size and
Color” on page 68.
Printing
For details on printing when combining print and
embroidery, also refer to the tutorial.
c
“6. Print and Stitch” on page 42.
■
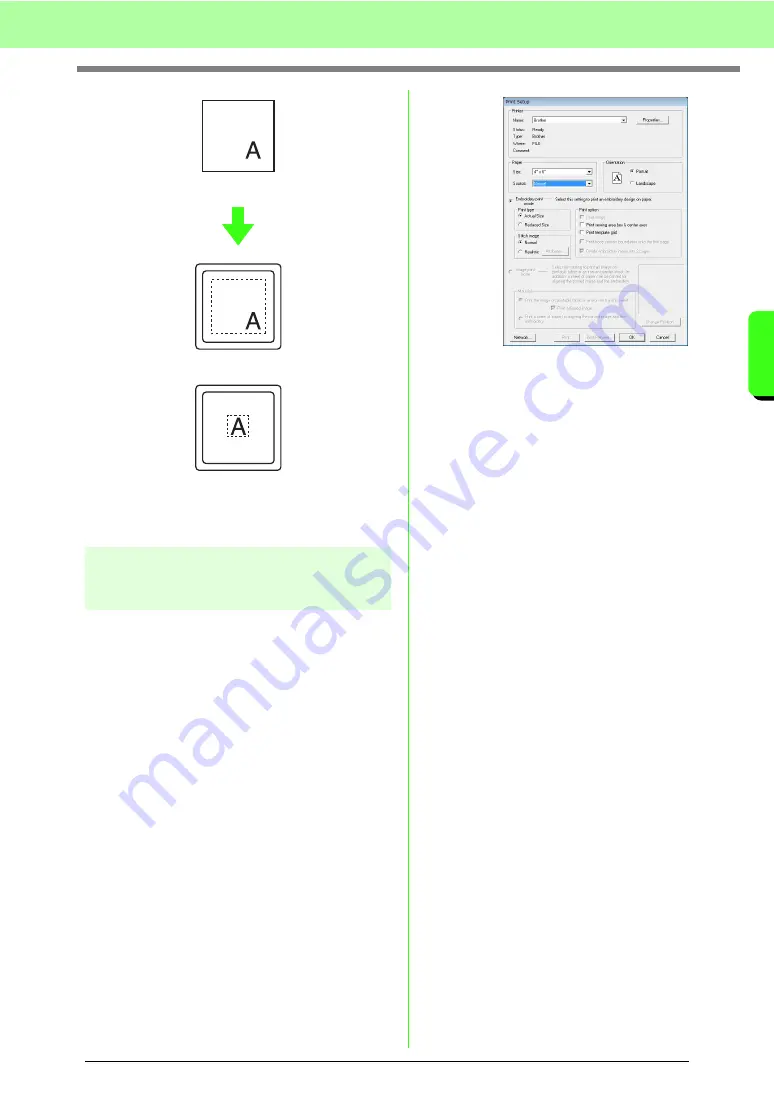
Specifying print settings
Before printing, you may need to change the print
settings for the embroidery design files.
1.
Click
File
, then
Print Setup
.
2.
Under
Paper
and
Orientation
, select the
appropriate settings.
3.
To print the embroidery pattern, select
Embroidery print mode
.
Under
Print type
,
Print option
and
Stitch
image
, select how the data is to be printed.
Print type
Actual Size:
Select this option to print the
design in actual size and the sewing
information (dimensions of the embroidery,
the sewing color order and the stitch count, the
hoop position) on separate pages.
Reduced Size:
Select this option to print a
reduced image together with all of the above-
mentioned information on a single page.
Print option
Print image:
Select this check box to print the
image imported into the Design Page in
addition to the embroidery pattern. However,
any part of the image extending out of the print
area for the embroidery will not be printed.
Print sewing area box & center axes:
Select
this check box to print black lines to indicate
the sewing area (refer to “Specifying the
sewing area” on page 140) and the center
axes for the data. (This setting is only
available when
Actual Size
is selected.)
Print template grid:
Select this check box to
print green lines to represent the grid printed
on the embroidery sheet included with the
hoop.
Print hoop section boundaries onto the
first page:
Select this check box to print the
design sections of a design for which the
Design Page has been set to a custom size or
to a multi-position hoop. The pattern sections
are printed in red.
Divide embroidery image into 2 pages:
Select this check box to print in actual size and
Design Page (on your screen)
Sewing area = Design Page area
Sewing area = Use existing design area
Summary of Contents for ECS8
Page 1: ......
Page 146: ...144 Arranging Embroidery Designs Layout Editing ...
Page 200: ...198 Managing Embroidery Design Files Design Database ...
Page 218: ...216 Creating Custom Stitch Patterns Programmable Stitch Creator ...
Page 244: ...242 Tips and Techniques ...
Page 264: ...262 Menus Tools ...
Page 266: ...264 Troubleshooting ...
Page 271: ...English ...


