4
1.3 Hardware Introduction
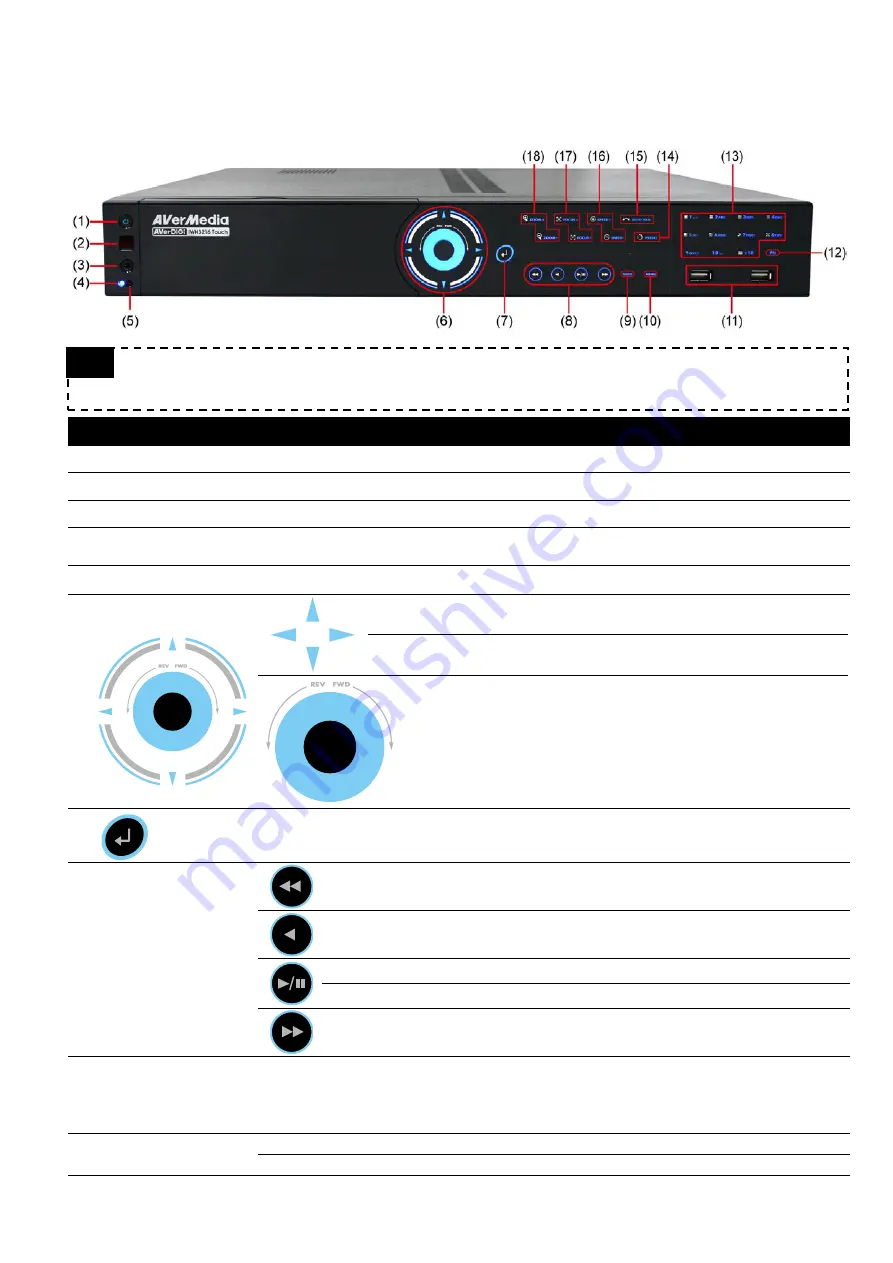
1.3.1 Front Panel
Tip
Touch the blue word, button center, blue arrow, and blue area to make a selection or functional
.
Name
Function
(1) Power
ON/OFF DVR unit
(2) IR Sensor
Receive signal from the remote control to operate the DVR unit
(3) IR Sensor port
For extended IR sensor cable(optional)
(4) System power indicator System power status indicators. Indicate running state of system. Lights when the
system is running.
(5) HDD indicator
When DVR system is recording, the light will keep flashing.
(6)
Move cursor to left, right, up, and down direction DVR application
interface and function setup window.
To move PTZ camera lens to left, right, up and down in PTZ mode
Touch the blue area to go to next or previous frame.
Go forward direction is
Next
frame and backward direction is
Previous
frame.
(7)
Confirm or make a selection
(8) Playback Control
buttons
To playback video at slower speed of 1/2x, 1/4x, 1/6x, 1/8x, 1/16x, or 1/32x.
To rewind the recorded video
To pause playback
To start playback
To playback video at faster speed of 2x, 4x, 6x, 8x, 16x, or 32x.
(9) Mode
Switch between preview, playback, and EMap mode.
In preview mode, user can switch between
Preview
,
Playback
and
EMap
mode.
In playback mode, user can switch between
Preview
and
Playback
mode.
In EMap mode, user can switch between
Preview
and
Emap
mode.
(10) Menu
Call out system setup menu on preview mode
Call out playback menu on playback mode


