129
3. Check the information beside the calendar.
-
Selected Files:
Show the number of files selected.
-
Require Space:
Show the total size of the selected file.
4. Enable Auto partition and select to divide the file size into DVD-R or CD-R. DVR automatically
backup and divide the file sizes to facilitate burning into DVD or CD disc.
5. If you do
NOT
want to keep the recorded file in the storage folder, enable
Delete files after
Backup
check box.
6. Click
to set the path on where to store the backup file.
7. Click
to start archiving the selected file.
8.
In the Processing… dialog box, to stop archiving press
Abort
. When done, in the Backup Path
list, shows the archived item. Select the item in the list and click
Burn
. Click
Exit
to end this
procedure and burn it later.
9. In CD/DVD Backup, enable/disable Delete file after burning check box to remove the archived
file after burning. Click
Burn
to start and
Exit
to cancel this process.
5.6.1
Setup Quick Backup
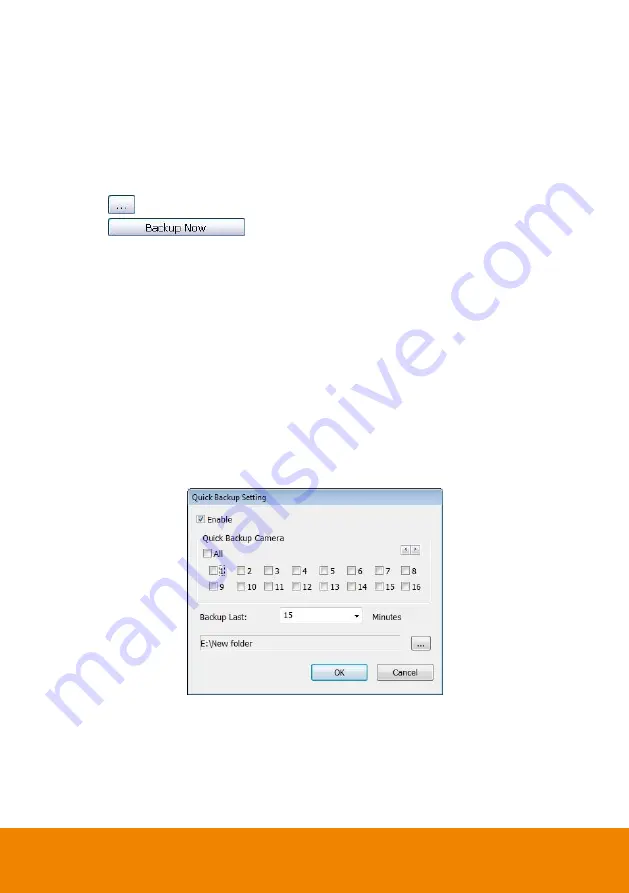
Set a quick backup rule for user can pressing
Ctrl + B
to execute backup instantly.
1. Click
Quick Backup
.
2. In Quick Backup Setting, mark
Enable
.
3. And then, select the channels that want to backup.
4.
Backup Last:
Set the time before minutes to backup. For example: time before 60 minutes
means backup the recorded file from now backward 60 minutes. Present time is 13:00, the
system will backup start from 12:00 when press quick backup button.
Summary of Contents for IWH5000 Series
Page 1: ...IWH5000 series IWH5416 16 IWH5416 Touch II User s Manual v 1 1 0 0 ...
Page 54: ...46 9 User can select the Date Camera and Cycle to view the report of object counts In Out ...
Page 65: ...57 3 Select and click one in the bookmark list to preview the file ...
Page 238: ...230 7 Select Add Zone Domians Service to register the domain name ...


