


56
9.
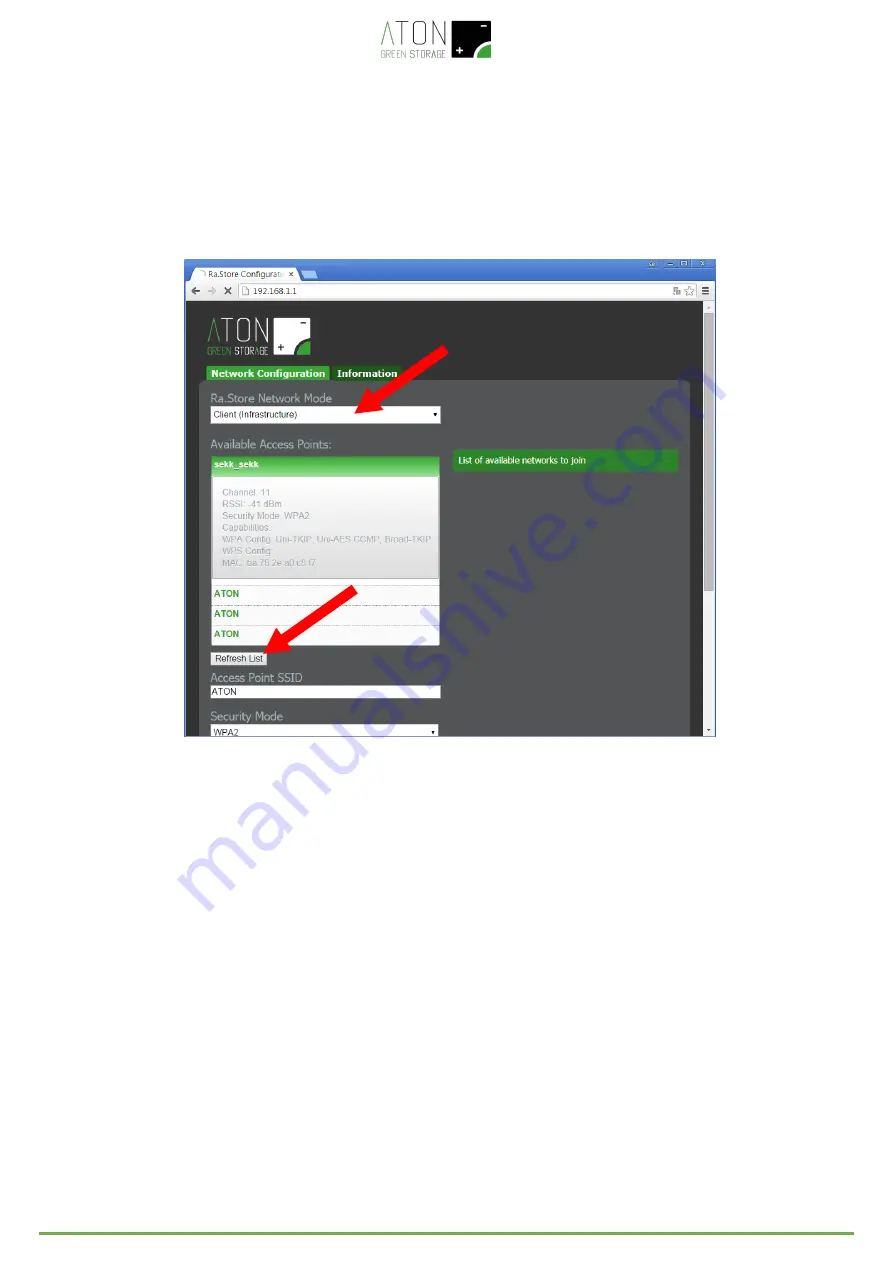
Select in the field Network Mode the item Client (Infrastructure) (Picture 90).
10.
Click on the button Refresh List. The module will scan the available networks and will show in Available
Access Points a list of the ones found (Picture 90).
Picture 90 – Configuration of the WiFi network
11.
Select with a click the network among the ones listed and the fields Access Point SSID and Security Mode
will be filled in automatically (for the WiFi networks without password select the item “Open”). If in the
list the wished WiFi network will not be shown, click on Refresh List in order to execute again the
searching.
12.
Digit the password of the WiFi network in the field Passphrase (put the tick on Show Passphrase to
visualize the written password)
13.
(Optional) The module uses DHCP as default. If you wish to give the module a static IP, remove the tick on
Check to enable DHCP and insert static IP, subnet mask, and gateway.
14.
Click on Save & Reboot in order to save the given settings.
15.
Press OK in the pop-up window in order to confirm the exit (Picture 91), then close the Web Browser.


