RX3041H User’s Manual
Chapter 9. Configuring Firewall/NAT Settings
79
Field
Description
Interface
Select this type of NAT to specify the Dynamic Interface whose IP address should be used for
subjecting traffic to NAT.
9.8.3.2
Add a NAT Pool
To add a NAT Pool, follow the instructions below:
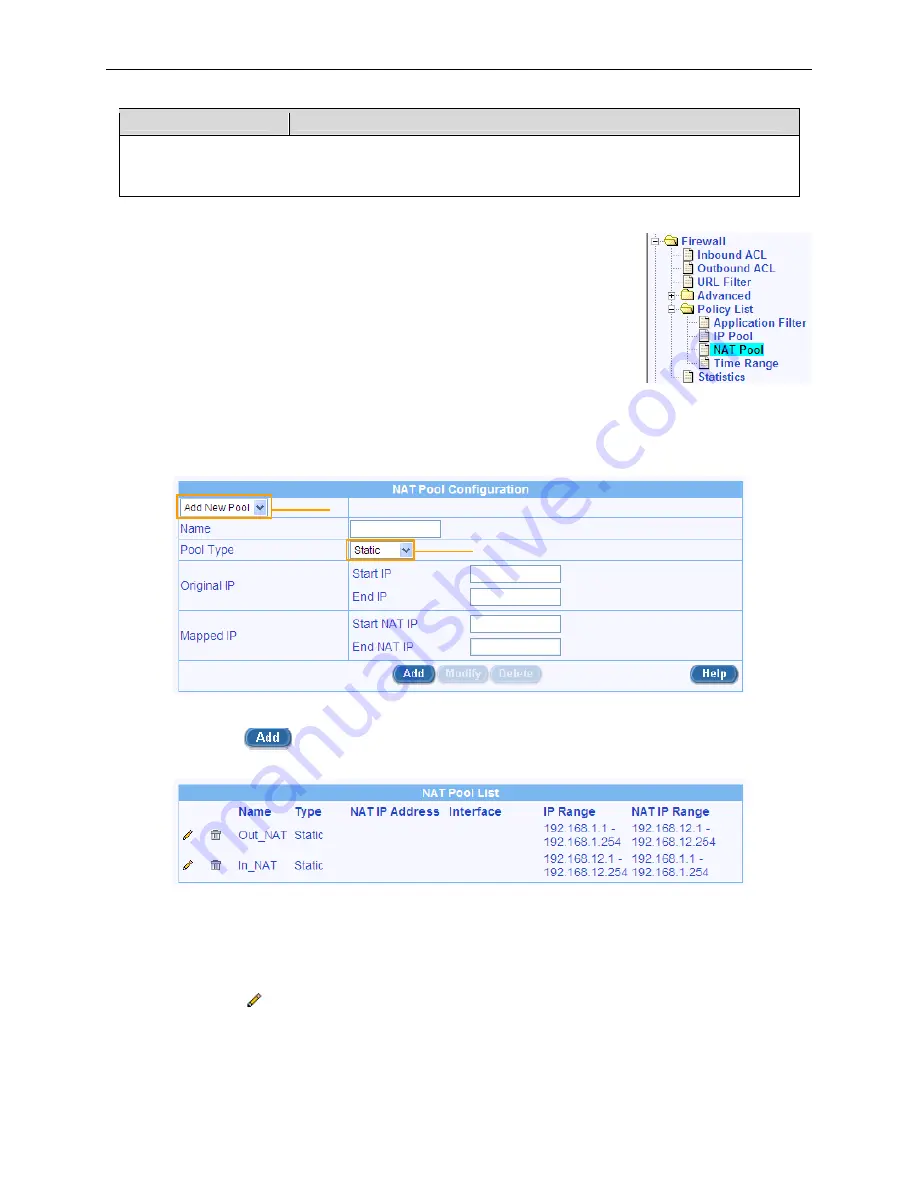
1. Open the NAT Pool configuration page by clicking the
Firewall
Î
Policy List
Î
NAT Pool
menu.
2. Select
“
Add New Pool
” from the NAT Pool drop-down list.
3. Enter a pool name into the Name field.
4. Select a pool type from the Type drop-down list.
5. If “Static” or “Dynamic” pool type is selected, enter the original IP
addresses (start IP Address, and end IP Address), and mapped IP addresses (start NAT IP
Address and end NAT IP Address). If “Overload” pool type is selected, enter the NAT IP address.
If you want to use the IP address assigned for the WAN port as the NAT IP address, select the
Interface pool type.
NAT Pool drop-down list
NAT Pool Type drop-down
Figure 9.30. NAT Pool configuration
6. Click on the
button to create the new NAT pool. The new NAT pool will then be displayed
in the NAT Pool List table.
9.8.3.3
Modify a NAT Pool
To modify a NAT Pool, follow the instructions below:
1. Open the NAT Pool configuration page by clicking the
Firewall
Î
Policy List
Î
NAT Pool
menu.
2. Click on the
icon of the NAT pool to be modified in the NAT Pool List table or select the NAT
pool from the NAT Pool drop-down list.
3. Make desired changes to any or all of the following fields: Pool name, Pool type and IP address.


