


5-14
Chapter 5: BIOS Setup
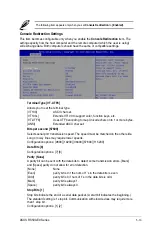
Flow Control [Hardware RTS/CTS]
Flow control can prevent data loss from buffer overflow. When sending data, if the
receiving buffers are full, a “stop” signal can be sent to stop the data flow. Once the
buffers are empty, a “start” signal can be sent to re-start the flow. Hardware flow
control uses two wires to send start/stop signals.
Configuration options: [None] [Hardware RTS/CTS]
VT-UTF8 Combo Key Support [Enabled]
Allows you to enable the VT-UTF8 Combo Key Support for ANSI/VT100 terminals.
Configuration options: [Disabled] [Enabled]
Recorder Mode [Disabled]
With this mode enabled only text will be sent. This is to capture Terminal data.
Configuration options: [Disabled] [Enabled]
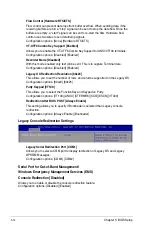
Legacy OS Redirection Resolution [80x24]
This allows you to set the number of rows and columns supported on the Legacy OS.
Configuration options: [80x24] [80x25]
Putty Keypad [VT100]
This allows you to select the FunctionKey and Keypad on Putty.
Configuration options: [VT100] [LINUX] [XTERMR6] [SCO] [ESCN] [VT400]
Redirection After BIOS POST [Always Enable]
This setting allows you to specify if Bootloader is selected than Legacy console
redirection.
Configuration options: [Always Enable] [Bootloader]
Legacy Console Redirection Settings
Legacy Serial Redirection Port [COM1]
Allows you to select a COM port to display redirection of Legacy OS and Legacy
OPROM Messages.
Configuration options: [COM1] [COM2]
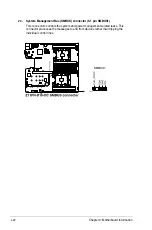
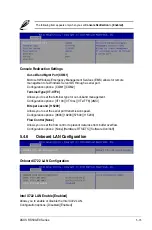
Serial Port for Out-of-Band Management/
Windows Emergency Management Services (EMS)
Console Redirection [Disabled]
Allows you to enable or disable the console redirection feature.
Configuration options: [Disabled] [Enabled]
Summary of Contents for RS500-E9 Series
Page 1: ...1U Rackmount Server User Guide RS500 E9 Series RS500 E9 PS4 RS500 E9 RS4 RS500 E9 RS4 U ...
Page 10: ...x ...
Page 25: ...2 5 ASUS RS500 E9 Series 6 Reinstall the air ducts CPU1 CPU socket 1 CPU2 CPU socket 2 ...
Page 51: ...3 5 ASUS RS500 E9 Series 3 2 Rail kit dimensions 589mm 43 6mm 900mm 43 6mm ...
Page 52: ...Chapter 3 Installation Options 3 6 ...
Page 54: ...Chapter 4 Motherboard Information 4 2 4 1 Motherboard layout ...
Page 148: ...6 22 Chapter 6 RAID Configuration ...
Page 155: ...7 7 ASUS RS500 E9 Series 5 Follow the onscreen instructions to complete the installation ...
Page 156: ...7 8 Chapter 7 Driver Installation ...
Page 157: ...Appendix Appendix ...
Page 158: ...Z11PR D16 DC block diagram ...