


Chapter 3: Installation Options
3-2
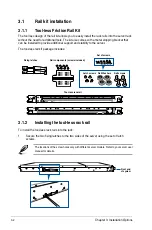
3.1
Rail kit installation
3.1.1
Tool-less Friction Rail Kit
The tool less design of the rail kit allows you to easily install the rack rails into the server rack
without the need for additional tools. The kit also comes with a metal stopping bracket that
can be installed to provide additional support and stability to the server.
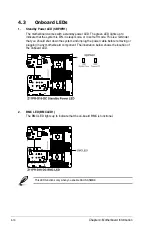
The tool-less rail kit package includes:
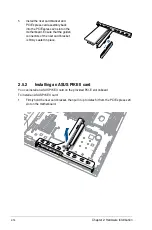
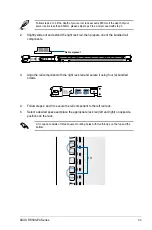
3.1.2
Installing the tool-less rack rail
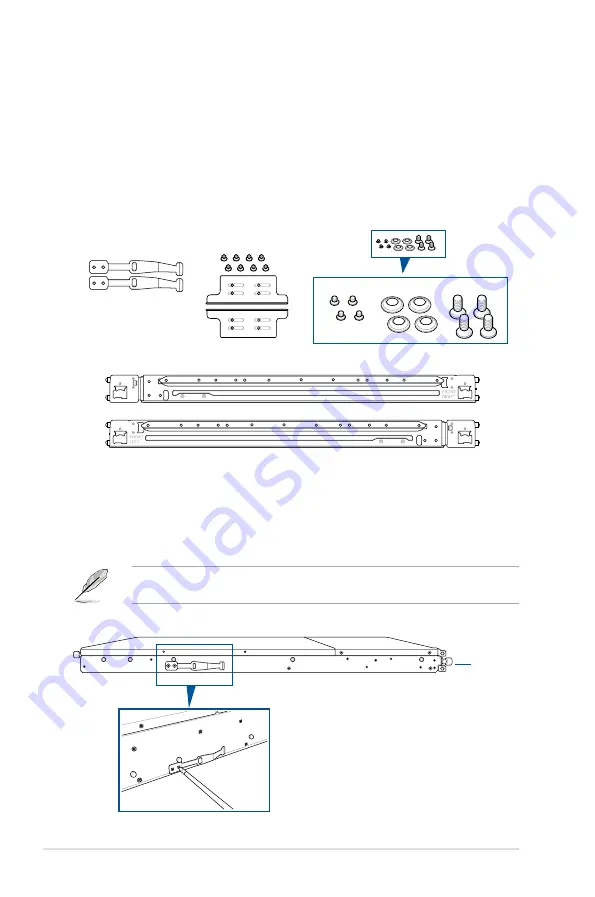
To install the tool-less rack rails into the rack:
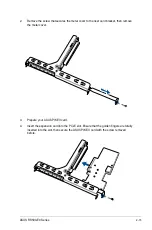
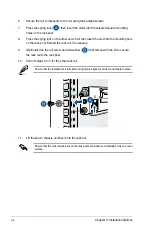
1. Secure the two fixing latches to the two sides of the server using the set of latch
screws.
The locations of the screw holes vary with different server models. Refer to your server user
manual for details.
Fixing latches
Set of screws
Tool-less rack rail
Rail components (screws included)
Latch screws Rail Washers
Rail screws
Front end
of system
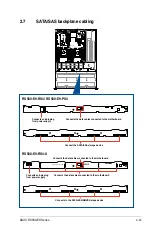
Summary of Contents for RS500-E9 Series
Page 1: ...1U Rackmount Server User Guide RS500 E9 Series RS500 E9 PS4 RS500 E9 RS4 RS500 E9 RS4 U ...
Page 10: ...x ...
Page 25: ...2 5 ASUS RS500 E9 Series 6 Reinstall the air ducts CPU1 CPU socket 1 CPU2 CPU socket 2 ...
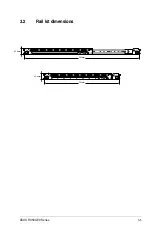
Page 51: ...3 5 ASUS RS500 E9 Series 3 2 Rail kit dimensions 589mm 43 6mm 900mm 43 6mm ...
Page 52: ...Chapter 3 Installation Options 3 6 ...
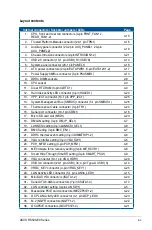
Page 54: ...Chapter 4 Motherboard Information 4 2 4 1 Motherboard layout ...
Page 148: ...6 22 Chapter 6 RAID Configuration ...
Page 155: ...7 7 ASUS RS500 E9 Series 5 Follow the onscreen instructions to complete the installation ...
Page 156: ...7 8 Chapter 7 Driver Installation ...
Page 157: ...Appendix Appendix ...
Page 158: ...Z11PR D16 DC block diagram ...