


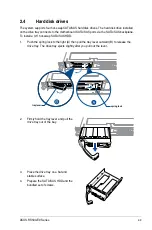
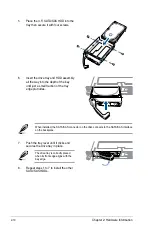
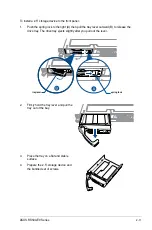
Chapter 2: Hardware Information
2-4
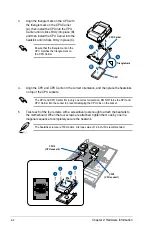
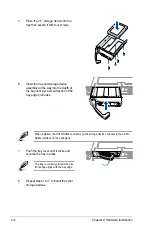
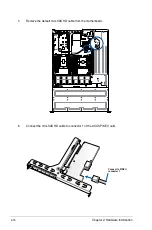
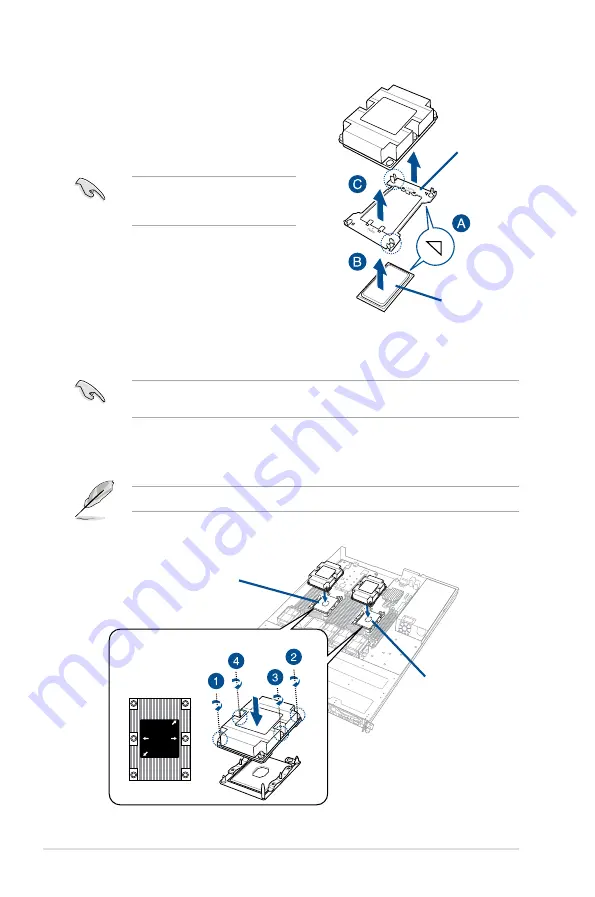
4.
Align the CPU and CPU Carrier in the correct orientation, and then place the heatsinks
on top of the CPU sockets.
The CPU and CPU Carrier fits in only one correct orientation. DO NOT force the CPU and
CPU Carrier into the socket to prevent damaging the CPU pins on the socket.
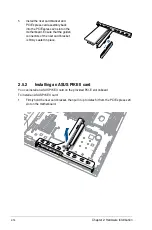
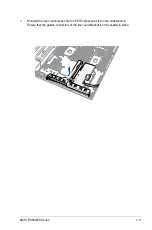
5.
Twist each of the four screws with a screwdriver just enough to attach the heatsink to
the motherboard. When the four screws are attached, tighten them one by one in a
diagonal sequence to completely secure the heatsink.
The heatsink screws are T30 models. A torque value of 12 inch-lbf is recommended.
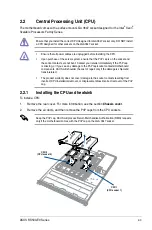
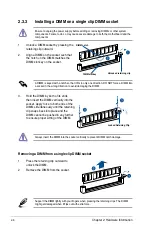
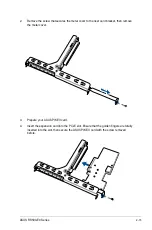
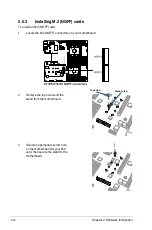
3.
Align the triangle mark on the CPU with
the triangle mark on the CPU Carrier
(A), then install the CPU into the CPU
Carrier until it clicks firmly into place (B),
and then install the CPU Carrier into the
heatsink until it clicks firmly in place (C).
Ensure that the triangle mark on the
CPU matches the triangle mark on
the CPU Carrier.
CPU Carrier
2
1
2
3
4
1
2
3
4
1
2
3
4
1
2
3
4
2
CPU
Triangle mark
CPU1
(CPU socket 1)
CPU2
(CPU socket 2)
Summary of Contents for RS500-E9 Series
Page 1: ...1U Rackmount Server User Guide RS500 E9 Series RS500 E9 PS4 RS500 E9 RS4 RS500 E9 RS4 U ...
Page 10: ...x ...
Page 25: ...2 5 ASUS RS500 E9 Series 6 Reinstall the air ducts CPU1 CPU socket 1 CPU2 CPU socket 2 ...
Page 51: ...3 5 ASUS RS500 E9 Series 3 2 Rail kit dimensions 589mm 43 6mm 900mm 43 6mm ...
Page 52: ...Chapter 3 Installation Options 3 6 ...
Page 54: ...Chapter 4 Motherboard Information 4 2 4 1 Motherboard layout ...
Page 148: ...6 22 Chapter 6 RAID Configuration ...
Page 155: ...7 7 ASUS RS500 E9 Series 5 Follow the onscreen instructions to complete the installation ...
Page 156: ...7 8 Chapter 7 Driver Installation ...
Page 157: ...Appendix Appendix ...
Page 158: ...Z11PR D16 DC block diagram ...