USER’S MANUAL
58
MENU
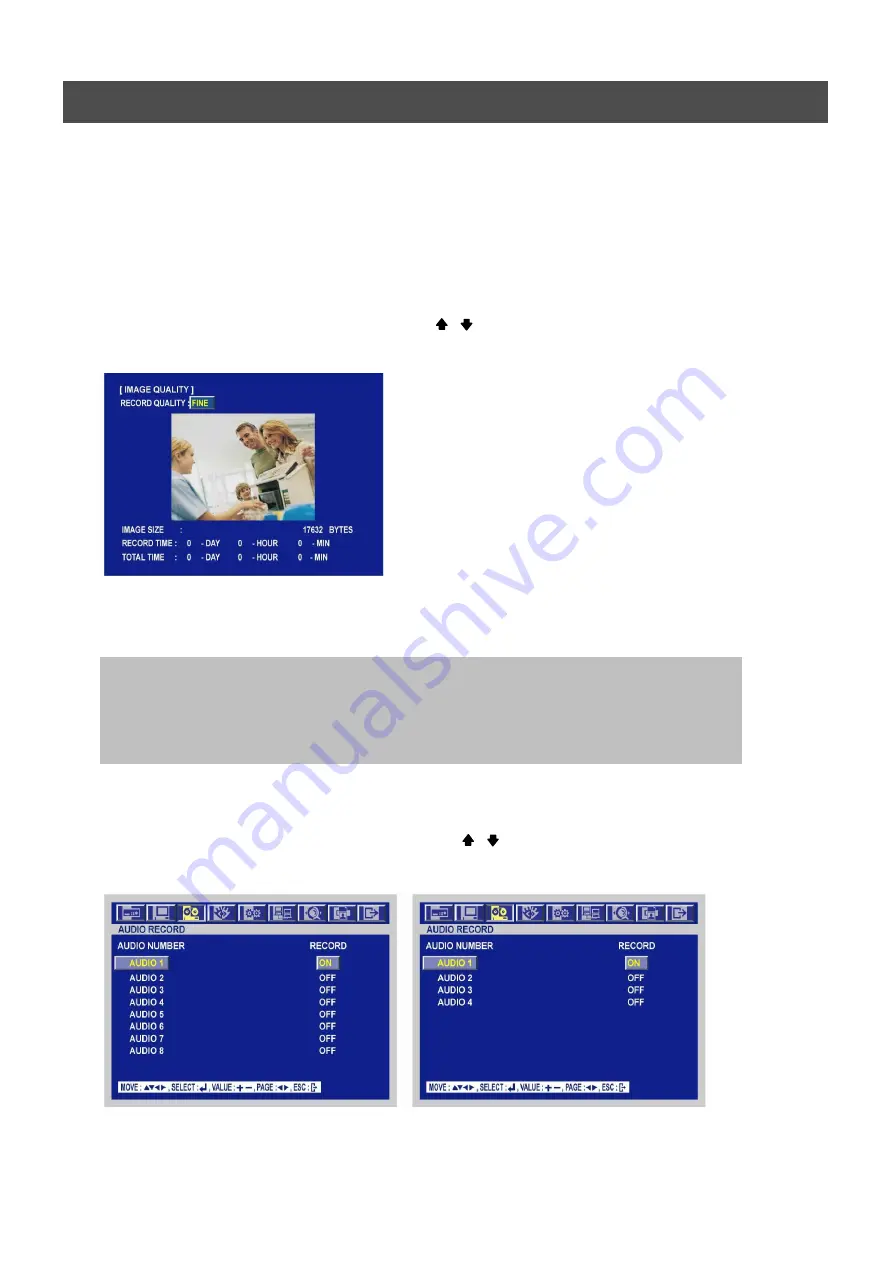
6.3.3 IMAGE QUALITY
At the RECORD menu,
Move the cursor to the IMAGE QUALITY using , buttons.
Press the ENTER button when the cursor is on the IMAGE QUALITY and the following screen
appears.
Select the desired RECORD QUALITY using the (-), (+) buttons or jog dial.
And you can see the size of each image quality and how long you can record in the installed
HDDs by the image quality.
To exit this IMAGE QUALITY menu, press the ESC button.
6.3.4 AUDIO RECORD
At the RECORD menu,
Move the cursor to the AUDIO RECORD using the , buttons.
Press the ENTER button when the cursor is on the AUDIO RECORD and the following screen
appears.
[MPEG4 16480, 16240, 8240]
[The others]
You have to record off to see IMAGE QUALITY screen.
RECORD TIME: A period how long you can record in free space of installed HDD(s) by setting of
Max. frame rate.
TOTAL TIME: A period how long you can record in total installed HDD(s) by setting of Max. frame rate.
** The better the image quality is, the bigger the file size is and the worse the image quality,
the smaller the file size is.
Summary of Contents for ANX-16480
Page 9: ...9 LOCATION AND CONTROL Chapter 3 Location and Control 3 1 FRONT PANEL CONTROLS 3 8...
Page 12: ...USER S MANUAL 12 INSTALLATION Chapter 4 Installation 4 1 TOTAL CONNECTION LAY OUT...
Page 41: ...USER S MANUAL 41 OPERATION You can click the below keys on the MENU screen with a mouse...
Page 91: ...91 HDD INSTALLATION PROCESS Chapter 9 256 Camera Integration system Block Diagram...


