USER’S MANUAL
34
OPERATION
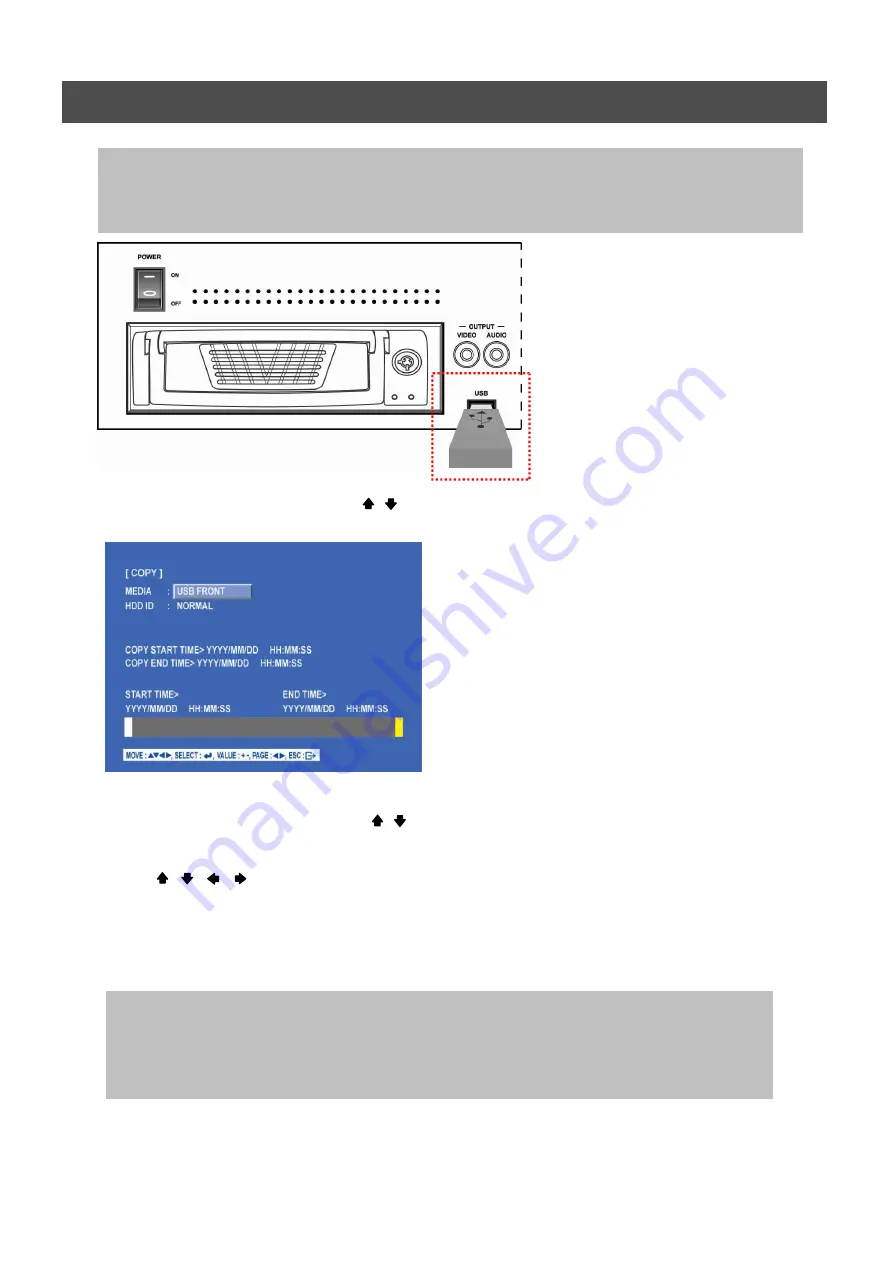
5.2.10.1-2 COPY TO USB memory stick
At the COPY menu,
Move the cursor to COPY using the , buttons.
Press the ENTER button and the following screen appears.
Select the desired MEDIA(USB) (-), (+) buttons or jog dial.
Move the cursor to HDD ID using the , buttons and select the desired HDD to copy among
HDD IDs using the (-), (+) buttons or jog dial.
Move the cursor to the desired position of COPY START TIME/ COPY END TIME using
the , , , buttons and press the (-) or (+) button to set up the time or turn the JOG DIAL
to set up the COPY START TIME and COPY END TIME.
** Scroll bar: - Turn the shuttle ring to the right to move the cursor of COPY END TIME or to the
left to move the cursor of COPY START TIME and the cursor will be yellow. And
then turn the Jog dial to move the cursor to the desired time.
- It can operate with just Mouse click.
Press the ENTER button to copy.
NOTE
When the copy is in process, the copying status(ex. “COPY 30%”) will be displayed on the right side of the monitor.
You can search and playback the copied images in HDD with DVR itself (Please refer to 5.1.4.4 FILE SEARCH)
** You have to format in case of the media to be used in DVR for the first time.
When the copy is in process, the copying status(ex. “COPY 30%”) will be displayed on the right side
of the monitor.
You can search and playback the copied images in USB stick memory with DVR itself as well as PC.
(Please refer to 5.2.4.6 FILE SEARCH.)
** You have to format in case of the media to be used in DVR for the first time.
Summary of Contents for ANX-16480
Page 9: ...9 LOCATION AND CONTROL Chapter 3 Location and Control 3 1 FRONT PANEL CONTROLS 3 8...
Page 12: ...USER S MANUAL 12 INSTALLATION Chapter 4 Installation 4 1 TOTAL CONNECTION LAY OUT...
Page 41: ...USER S MANUAL 41 OPERATION You can click the below keys on the MENU screen with a mouse...
Page 91: ...91 HDD INSTALLATION PROCESS Chapter 9 256 Camera Integration system Block Diagram...


