Installation
5
10.4" Touch Panels
2.
Carefully insert a flat-blade screwdriver into the release slot on the touch panel’s bezel and
remove the engraved overlay.
3.
Lay the touch panel facedown on a soft cloth and remove the screws from the low-profile
Backbox; remove the Backbox and discard.
4.
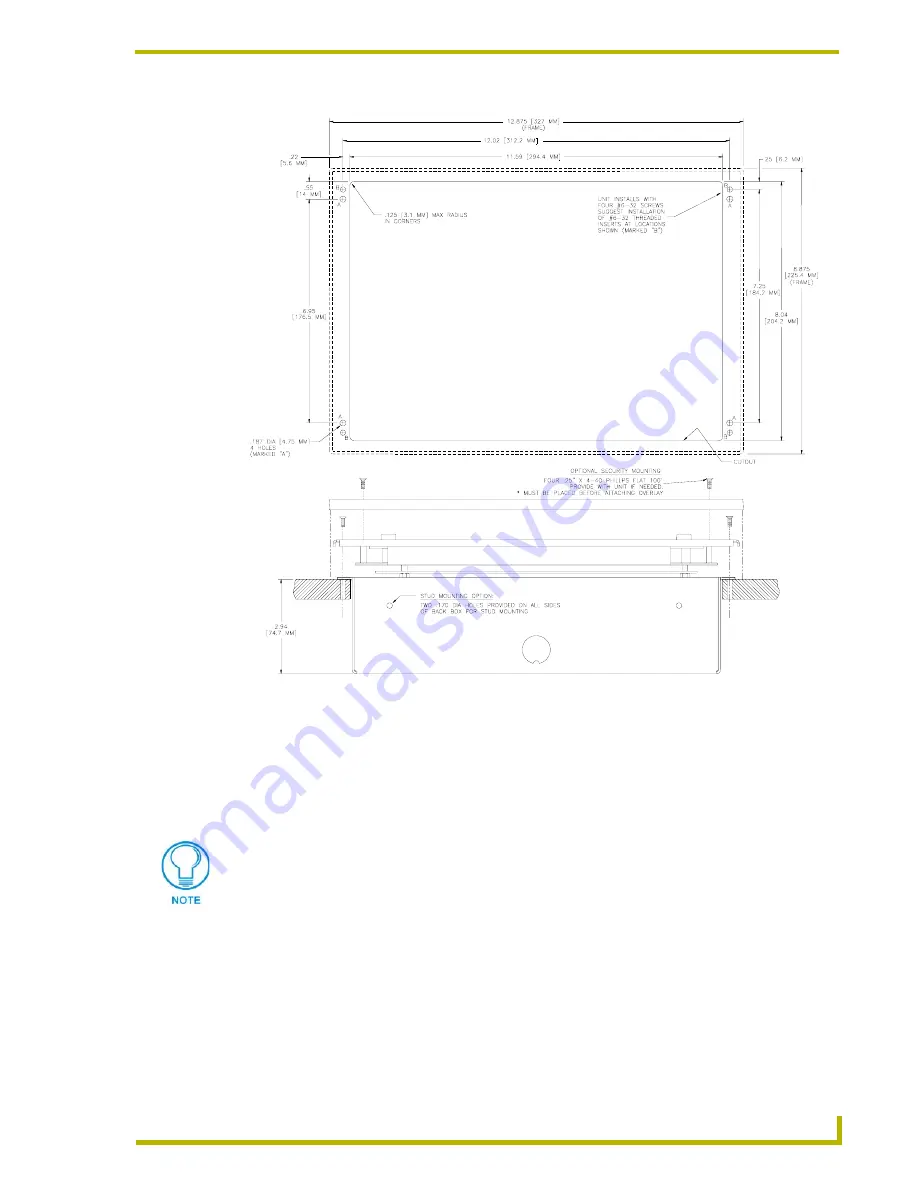
Place the CB-TP3 into the cutout and mark the threaded insert positions, as shown in FIG. 3.
5.
Remove the CB-TP3 and drill eight holes (A and B) for the panel (FIG. 3). Then, place #6-32
threaded inserts (or screw anchors) into the four holes marked ‘B’ (FIG. 3).
6.
Disconnect the AXlink connector from the Central Controller, RS-232 connector, and the
optional graphic/video wiring from the source equipment.
7.
Remove one or more knockouts to accommodate the wiring.
8.
Thread the incoming AXlink, RS-232, and optional graphic/video wiring through the CB-TP3
knockouts. Refer to the
Wiring the Touch Panel
section on page 8 for pinout descriptions.
FIG. 3
Decor style (AXD) and CB-TP3 cutout dimensions (solid surfaces)
The CB-TP3 can also be mounted to wood or metal studs using the pre-drilled stud
mounting holes.
Summary of Contents for AXD-CA10
Page 1: ...instruction manual Touch Panels and Accessories 10 4 Touch Panels Firmware version G3 ...
Page 17: ...Installation 13 10 4 Touch Panels ...
Page 18: ...Installation 14 10 4 Touch Panels ...
Page 28: ...Designing Touch Panel Pages 24 10 4 Touch Panels ...


