Installation
4
10.4" Touch Panels
5.
Disconnect the AXlink connector from the Central Controller, RS-232 connector, and the
optional graphic/video wiring from the external RS-232 device connected to the source
equipment.
6.
Thread the incoming AXlink, RS-232, and optional graphic/video wiring through the low-
profile Backbox.
7.
Fasten the low-profile Backbox using the #6-32 machine screws supplied with the enclosure.
8.
Attach the data and power wiring to the touch panel.
9.
Test the connection by reconnecting the AXlink connector to the Central Controller, RS-232
connector, and optional graphic/video wiring to the source equipment. Before continuing,
disconnect all connections until panel installation is complete.
10.
Fasten the touch panel and low-profile Backbox using the #6-32 machine screws supplied with
the enclosure panel.
11.
Place the faceplate onto the bezel. You can also secure the faceplate to the bezel using the four
Phillips flathead security screws. Once attached to the faceplate, the security screws cannot be
replaced without removing the overlay.
12.
Remove the backing from the adhesive tape strips located on the front of the panel; press the
engraved overlay onto the faceplate.
13.
Reconnect the AXlink wiring to the Central Controller, RS-232 wiring to the mouse (if used),
and optional graphic/video wiring to the source equipment. The touch panel beeps on power-
up. Refer to the
Wiring the Touch Panel
section on page 8 for complete information.
Installing touch panels and a CB-TP3 Backbox (solid surface)
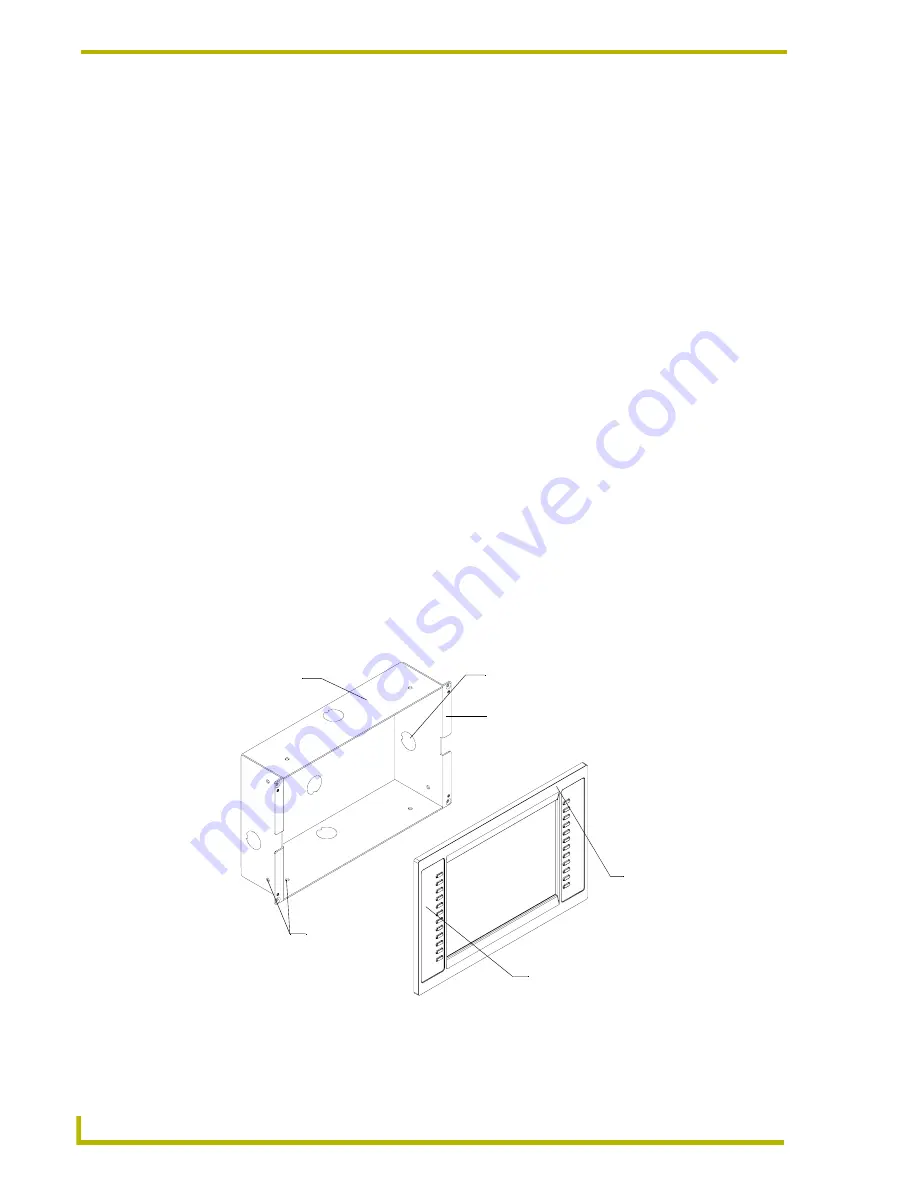
FIG. 2 shows an AXD-CA10/PB and CB-TP3 UniMount Backbox for solid surfaces.
1.
Cut out the surface using the dimensions shown in FIG. 3.
FIG. 2
AXD-CA10/PB and CB-TP3 for solid surfaces
CB-TP3 Unimount
Backbox enclosure
Knockout
Solid surface mounting flanges
Stud mounting
holes
Engraved overlay
AXD-CA10/PB
faceplate
Summary of Contents for AXD-CA10
Page 1: ...instruction manual Touch Panels and Accessories 10 4 Touch Panels Firmware version G3 ...
Page 17: ...Installation 13 10 4 Touch Panels ...
Page 18: ...Installation 14 10 4 Touch Panels ...
Page 28: ...Designing Touch Panel Pages 24 10 4 Touch Panels ...


