EN
19
Advanced Mode
In SIMPLE MODE press
to enter ADVANCED MODE
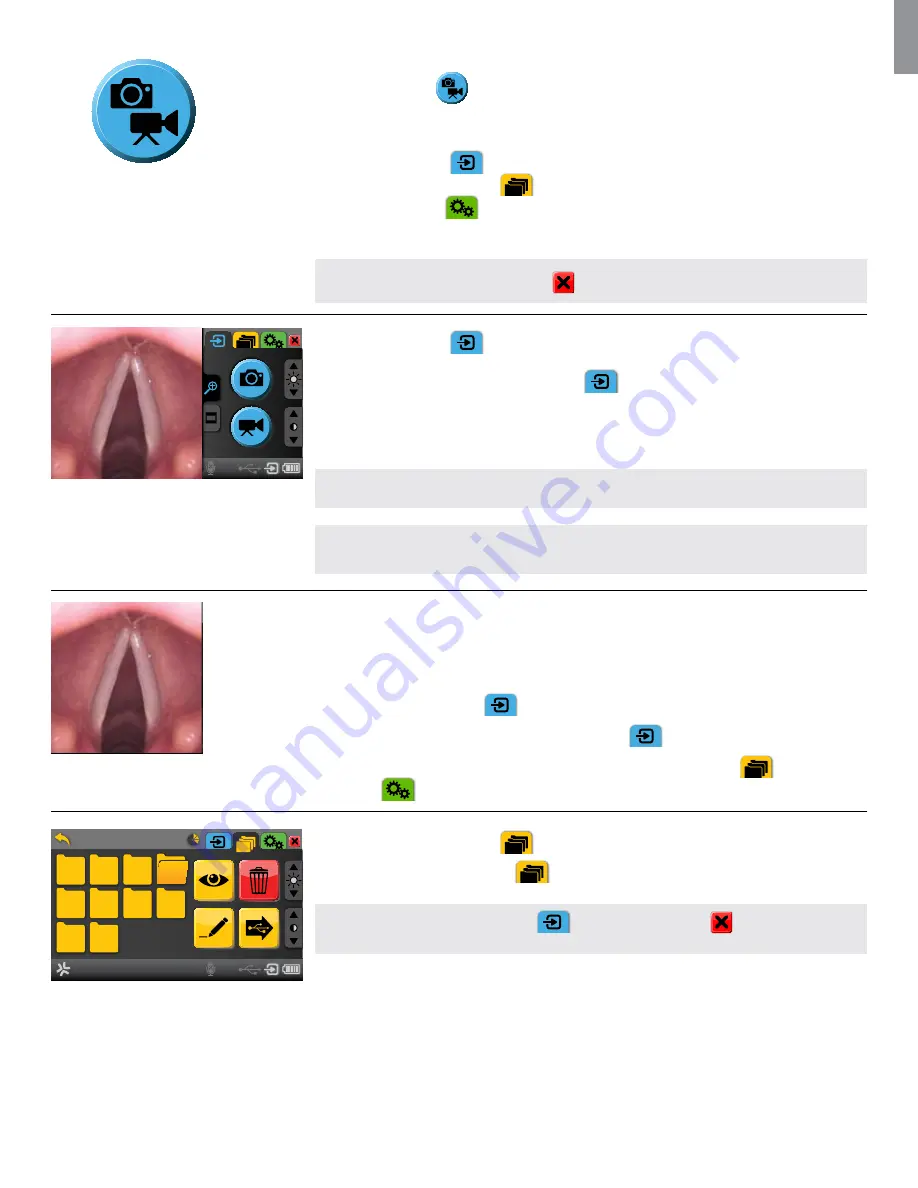
ADVANCED MODE has 3 tabs with different functions
Blue tab for Live Image
- Viewing and recording live image
Yellow tab for File Management
- Managing saved files
Green tab for Settings
- System settings and User Accounts
- To change between the tabs press the tab.
NOTE:
Press the RETURN SIMPLE MODE
to enter SIMPLE MODE.
Blue tab for Live Image
:
ADVANCED MODE starts in the blue
Live Image
tab
.
- Live image from a plugged in Ambu Visualization Devices is available. Further functions available
are recording, zooming in live image, battery status, status of microphone, brightness/contrast con-
trol and possibility of displaying device usage time for the connected device.
CAUTION:
Be careful to check whether the image on the screen is a live image or a recorded image.
NOTE:
When de-selecting a live image by leaving the blue
Live Image
tab to go to an other tab in
ADVANCED MODE, aView asks for confirmation.
Live image vs. recorded image in ADVANCED MODE
When de-selecting a live image by leaving the blue
Live Image
tab to go to another tab in ADVANCED
MODE, aView asks for confirmation before removing the live image.
To distinguish between a live image and a recorded image the button´s shape and colour changes when
leaving the blue Live Image tab
.
Round BLUE buttons
are shown in the blue
Live Image tab
and indicates a live image.
Square YELLOW or GREEN buttons
are shown the yellow
File Management tab
and the green
Settings tab
and indicates a recorded image.
ROOT/ALL_USERS
#3
#4
#5
#1
#6
#2
#7
#8
#9
#10
Yellow tab for File Management
:
Press the yellow
File Management
tab
to view, delete, rename or transfer recorded files:
NOTE:
Press the blue
Live Image
tab
or RETURN SIMPLE MODE
to view a live image
from a connected Ambu Visualization Device with just one click.


