S220/S221/S230/S231/Z200
8-5
Maintenance
8
2
1
4
1
2
3
Figure 8-4
Figure 8-6
Figure 8-5
8.2.3.2 Planetary gear
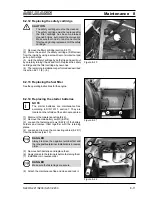
(1) Move the loader so that the plug (8-4/2) is positioned
at 3 o’clock.
(2) Unscrew the plug.
NOTE
-
Collect any oil that escapes.
-
The oil level must reach the plug bore.
-
If necessary, fill oil into the plug bore (8-4/1)
until the oil reaches the required level.
(3) Fit a new gasket and screw the plug back in.
8.2.3.3 Front axle
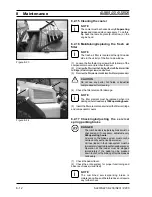
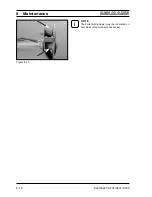
(1) Unscrew the plug from the axle arch (8-5/arrow).
NOTE
-
Collect any oil that escapes.
-
The oil level must reach the plug bore.
-
If necessary, fill oil into the plug bore until the
oil reaches the required level.
(2) Fit a new gasket and screw the plug back in.
8.2.4
Oil level check (distribution gear)
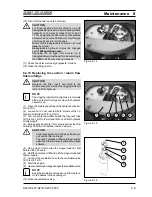
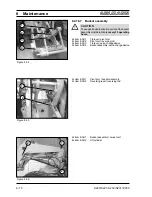
(1) Remove the foot mat in the footwell of the operator’s
cabin.
(2) Dismantle the floor plate under the foot mat.
(3) Check the oil level using the check marking of the oil
dipstick (8-6/1) for the upper oil compartment (coupling
space).
(4) Unscrew the plug (8-6/4) from the lower oil compart-
ment (spur gear space).
NOTE
-
Collect any oil that escapes.
-
The oil level must reach the plug bore (8-6/4).
-
If necessary, fill oil into oil filling screw 8-6/2
(upper oil compartment) or 8-6/3 (lower oil
compartment) until the oil reaches the required
level.
(5) Fit a new gasket and screw the plug back in.
Plan view
View from front
Maintenance
8
i
i
i
Summary of Contents for AS 210
Page 7: ...Safety Regulations ...
Page 19: ...Signs ...
Page 22: ...ProtectionAgainstTheft ...
Page 25: ...Description ...
Page 33: ...Operation ...
Page 44: ...Attachments ...
Page 53: ...Rescue Towing Lashing Lifting by Crane ...
Page 60: ...Maintenance ...
Page 78: ...Faults Causes and Remedies ...
Page 81: ...Diagrams ...
Page 98: ...Technical Data Loader ...
Page 102: ...Technical Data Attachments ...
Page 115: ...AdditionalOptions Modifications Notes on Inspection for Loaders ...

