Chapter 5
5-15
Power Supply Troubleshooting
If the Green LEDs of the A8 Are Not All ON
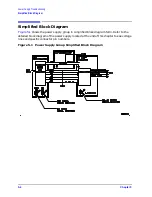
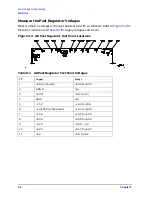
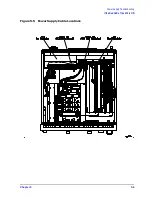
4. Refer to the block diagram at the end of this chapter and do the following:
• Note the mnemonics of any additional signals that may connect to any A8 test point
that showed a fault in the previous step.
• Cross-reference all assemblies that use the power supplies whose A8 LEDs went out
when A8TP4 (SDIS) was connected to chassis ground.
• Make a list of these assemblies.
• Delete the following assemblies from your list as they have already been verified
earlier in this section.
A10 digital IF
A11 phase lock
A12 reference
A13 fractional-N analog
A14 fractional-N digital
A19 graphics processor
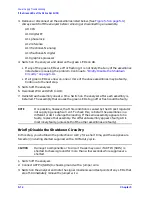
5. Switch off the analyzer.
6. Of those assemblies that are left on the list, remove or disconnect them from the
analyzer one at a time.
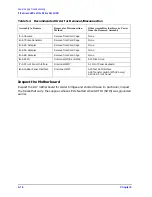
shows the best order in which to remove them, sorting
them from most to least accessible.
also lists any associated assemblies that
are supplied by the assembly that is being removed. After each assembly is removed or
disconnected, switch on the analyzer and observe the LEDs.
CAUTION
• Always switch off the analyzer before removing or disconnecting
assemblies.
• When extensive disassembly is required, refer to
Replacement and Post-Repair Procedures.”
• Refer to
Chapter 13 , “Replaceable Parts,”
to identify specific cables and
assemblies that are not shown in this chapter.
• If all the LEDs light, the assembly (or one receiving power from it) that allows them to
light is faulty.
• If the LEDs are still not on steadily, continue to
Summary of Contents for 8753ES
Page 14: ...Contents xiv Contents ...
Page 15: ...1 1 1 Service Equipment and Analyzer Options ...
Page 26: ...1 12 Chapter1 Service Equipment and Analyzer Options Service and Support Options ...
Page 27: ...2 1 2 System Verification and Performance Tests ...
Page 203: ...3 1 3 Adjustments and Correction Constants ...
Page 262: ...3 60 Chapter3 Adjustments and Correction Constants Sequences for Mechanical Adjustments ...
Page 263: ...4 1 4 Start Troubleshooting Here ...
Page 297: ...5 1 5 Power Supply Troubleshooting ...
Page 317: ......
Page 318: ...6 1 6 Digital Control Troubleshooting ...
Page 337: ...6 20 Chapter6 Digital Control Troubleshooting GPIB Failures ...
Page 338: ...7 1 7 Source Troubleshooting ...
Page 369: ...7 32 Chapter7 Source Troubleshooting Source Group Troubleshooting Appendix ...
Page 370: ...8 1 8 Receiver Troubleshooting ...
Page 381: ...8 12 Chapter8 Receiver Troubleshooting Troubleshooting When One or More Inputs Look Good ...
Page 382: ...9 1 9 Accessories Troubleshooting ...
Page 389: ...9 8 Chapter9 Accessories Troubleshooting Inspect the Error Terms ...
Page 390: ...10 1 10 Service Key Menus and Error Messages ...
Page 439: ...10 50 Chapter10 Service Key Menus and Error Messages Error Messages ...
Page 440: ...11 1 11 Error Terms ...
Page 451: ...11 12 Chapter11 Error Terms Error Correction ...
Page 452: ...12 1 12 Theory of Operation ...
Page 482: ...13 1 13 Replaceable Parts ...
Page 487: ...13 6 Chapter13 Replaceable Parts Ordering Information Figure 13 1 Module Exchange Procedure ...
Page 500: ...Chapter 13 13 19 Replaceable Parts Replaceable Part Listings Figure 13 7 8753ET Cables Top ...
Page 502: ...Chapter 13 13 21 Replaceable Parts Replaceable Part Listings Figure 13 8 8753ES Cables Top ...
Page 512: ...Chapter 13 13 31 Replaceable Parts Replaceable Part Listings Figure 13 13 8753ES Cables Front ...
Page 544: ...14 1 14 Assembly Replacement and Post Repair Procedures ...
Page 550: ...Chapter 14 14 7 Assembly Replacement and Post Repair Procedures Covers Figure 14 2 Covers ...
Page 597: ...14 54 Chapter14 Assembly Replacement and Post Repair Procedures Post Repair Procedures ...


