actiLib Library 4U
– User and Service Guide
Page 88 of 103
INFORMATION
If you are adding an additional tape drive to your Library,
or if you are upgrading an existing drive, be sure to use
supported cabling configurations.
4.
Push the Product ID Foil back underneath the drive sled. When inserted properly, only the
handle of the Foil will be visible.
5.
Tighten the captive thumbscrews until the drive is secure.
6.
Connecting the power cable, SCSI cable and terminator.
7.
Power on the Library(or power on the drive refer to
“Changing the drive configuration” using
the power button on the front panel.
8.
Run the Library Verify test.
9.4
Removing and replacing the Library controller
To remove a Library controller:
Library controller is installed at the back of the Library. Before you remove the Library controller:
1.
Turn off power to the Library (power button on the front panel).
2.
Remove the power cord cable.
3.
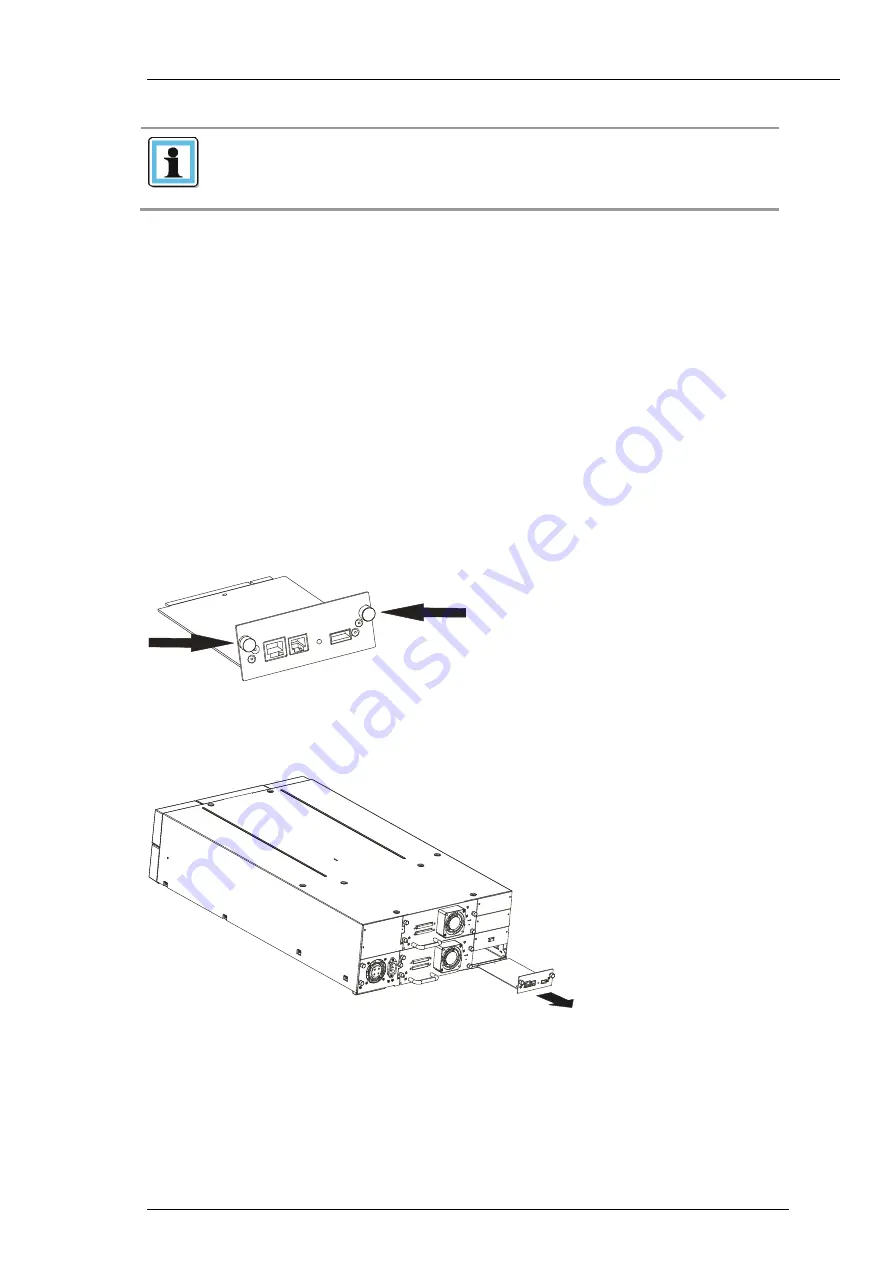
Loosen the two captive thumbscrews on the Library controller (see
Figure 62 Position of the thumbscrews
4.
Pull straight back on the Library controller to remove it from the Library (see
Figure 63 Library controller removal
Summary of Contents for actiLib Autoloader 4U
Page 40: ...actiLib Library 4U User and Service Guide Page 40 of 103 Figure 24 Interaction Mode Commands ...
Page 43: ...actiLib Library 4U User and Service Guide Page 43 of 103 Figure 27 Interaction Mode Service ...
Page 60: ...actiLib Library 4U User and Service Guide Page 60 of 103 Figure 40 Configuration license key ...


