©2018 ACP, Inc.
Cedar Rapids, IA 52404
Page 35 of 80
Part No. 16400033
Original Instructions
1 Ensure the oven is powered ON
2 If the Standby (OFF) Screen is showing, press the Green Power
Icon
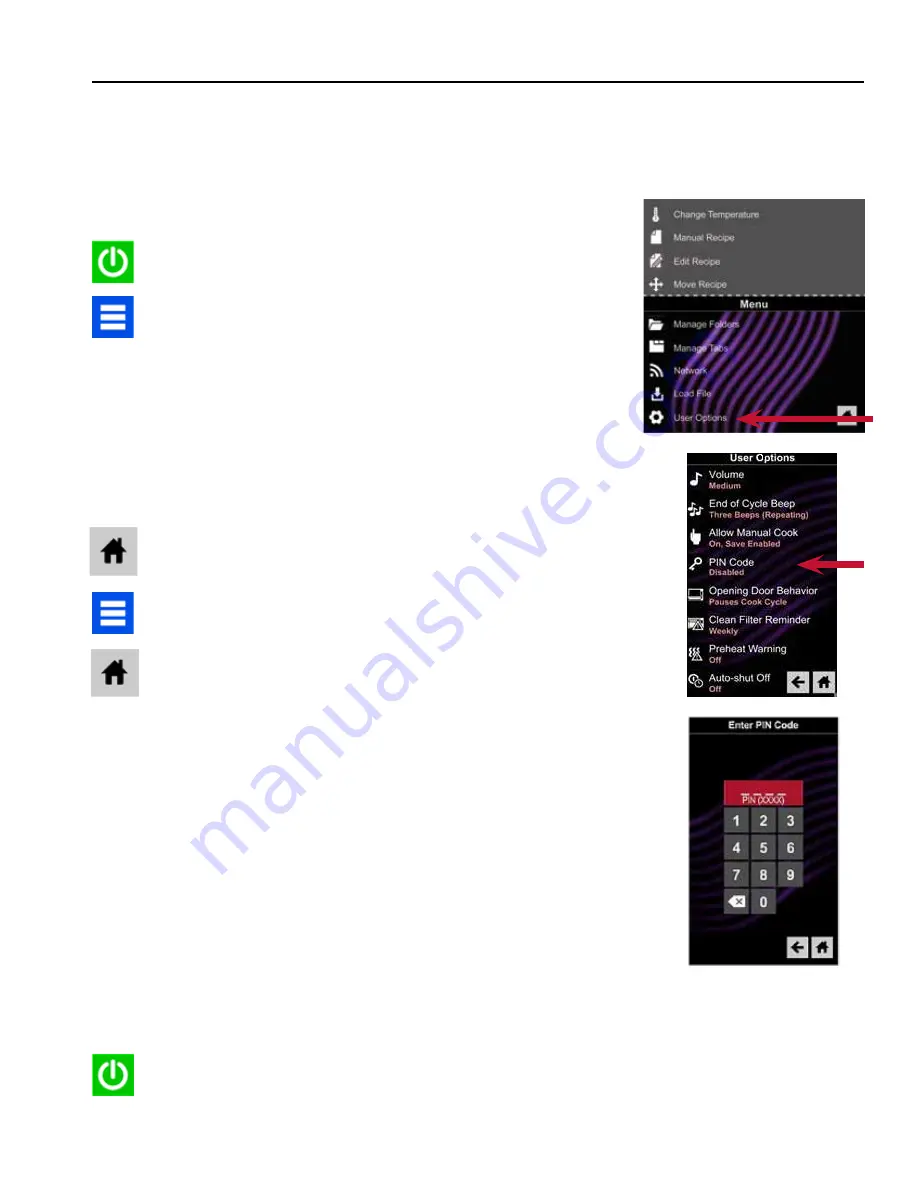
3 Press the Blue Menu Icon
4 If the PIN is enabled, enter 1-3-5-7-9 to access Service Mode
If the PIN is not enabled the Menu will appear
A Press and drag up to scroll to the bottom of the Menu and select “User
Options”
B Press and drag up to scroll down through the user options and select
“PIN Code”
C Select ON, enter and remember a 4-digit Pin Code and then select the
Home Icon
D Now press the Blue Menu Icon and enter 1-3-5-7-9 to access Service
Mode
5 Ensure the Software Version displayed is less than the version being
installed Press the Home Icon and proceed to program loading
6 Select “Software Version”
7
Insert the USB/Flash Drive with the new firmware into the USB port.
8 A box will appear in the lower portion of the screen “Rev “xxxx”
Available Begin Update”
9
Press this box to begin firmware update. The screen will now
display “Entering Standby Mode” for a few seconds and then the
screen will go blank Continue to wait
10 The screen will blink, then a few seconds later the Startup logo will
appear Underneath will appear the word “Updating” along with a
progress bar Continue to wait
Note
:
DO NOT
remove the USB/
Flash Drive until
AFTER
the reboot is completed
11 After about two minutes the words “Update Complete” will appear
and a Green “Reboot” Icon will appear
DO NOT
remove the USB/
Flash Drive Press the Green Icon
Firmware Update Procedure
The Touch Control is designed to be updated as future technology and programming requirements change
Should new Firmware be required follow the steps below
Firmware Updates are available at:
http://acpsolutions.com/oven-programming/
A
B
C


