47
2
Do not apply any thermal grease to the heatsink or the CPU die;
the required amount has already been applied.
3
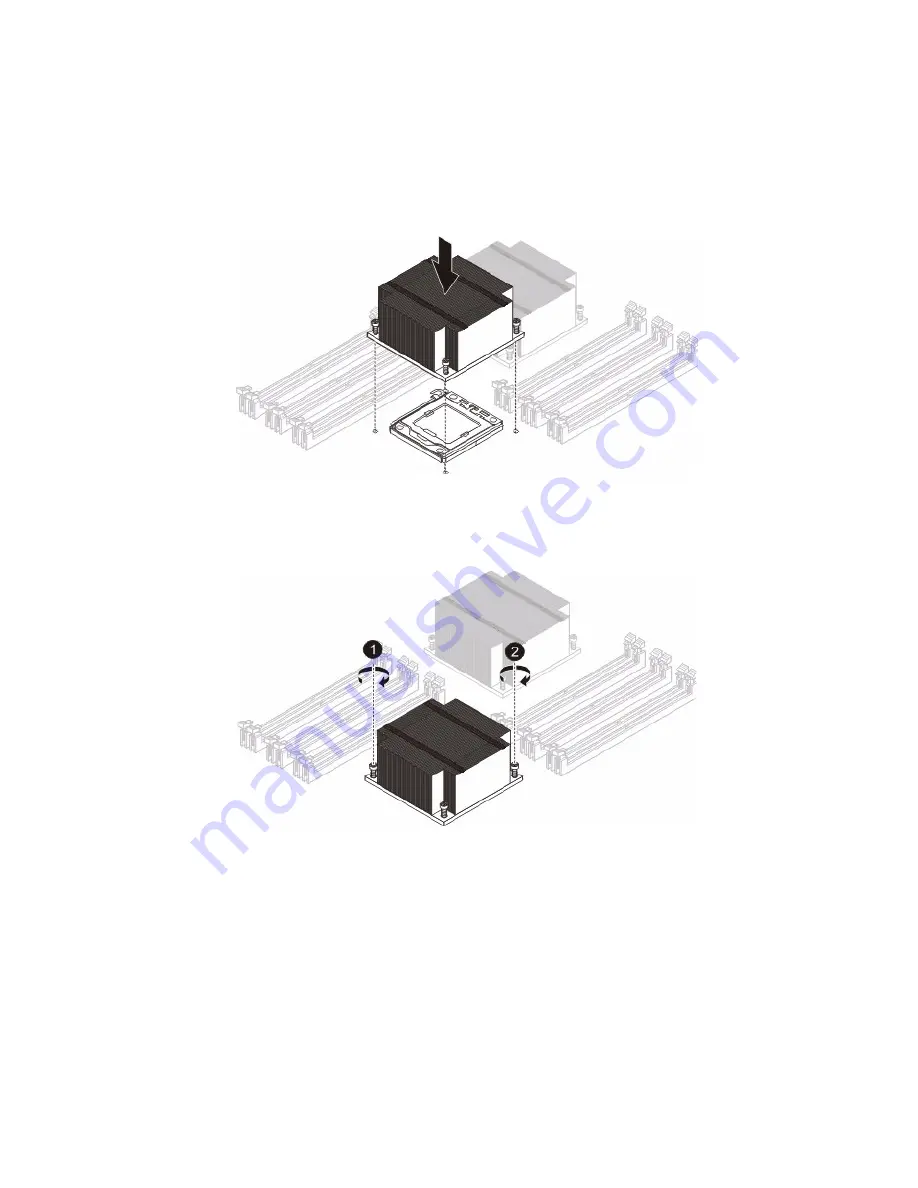
Place the heatsink on top of the CPU so that the four mounting
holes are aligned with those on the (preinstalled) heatsink
retention mechanism.
4
Screw in two diagonal screws (i.e. the #1 and the #2 screws) until
just snug. Do not fully tighten the screws or you may damage the
CPU.)
5
Add the two remaining screws then finish the installation by fully
tightening all four screws.
6
Observe the post-installation instructions on pagepage 28.
Summary of Contents for AR360 F1 Series
Page 1: ...AR360 F1 Series User Guide ...
Page 16: ...xvi ...
Page 17: ...1 System tour ...
Page 32: ...1 System tour 16 ...
Page 33: ...2 System setup ...
Page 40: ...2 System setup 24 ...
Page 41: ...3 System upgrades ...
Page 42: ...3 System upgrades 26 ...
Page 80: ...3 System upgrades 64 2 Insert the riser into the mainboard 1 and fasten the two 2 screws 2 ...
Page 84: ...3 System upgrades 68 The figure below shows the server in a rack mount position ...
Page 92: ...3 System upgrades 76 ...
Page 93: ...4 System BIOS ...
Page 130: ...4 System BIOS 114 ...
Page 131: ...5 System troubleshooting ...
Page 141: ...Appendix A Server management tools ...
Page 146: ...Appendix A Server management tools 130 ...
Page 147: ...Appendix B Rack mount configuration ...
Page 157: ...Appendix C Acer Smart Console ...
Page 186: ...Appendix C Acer Smart Console 170 ...


