3 System upgrade
72
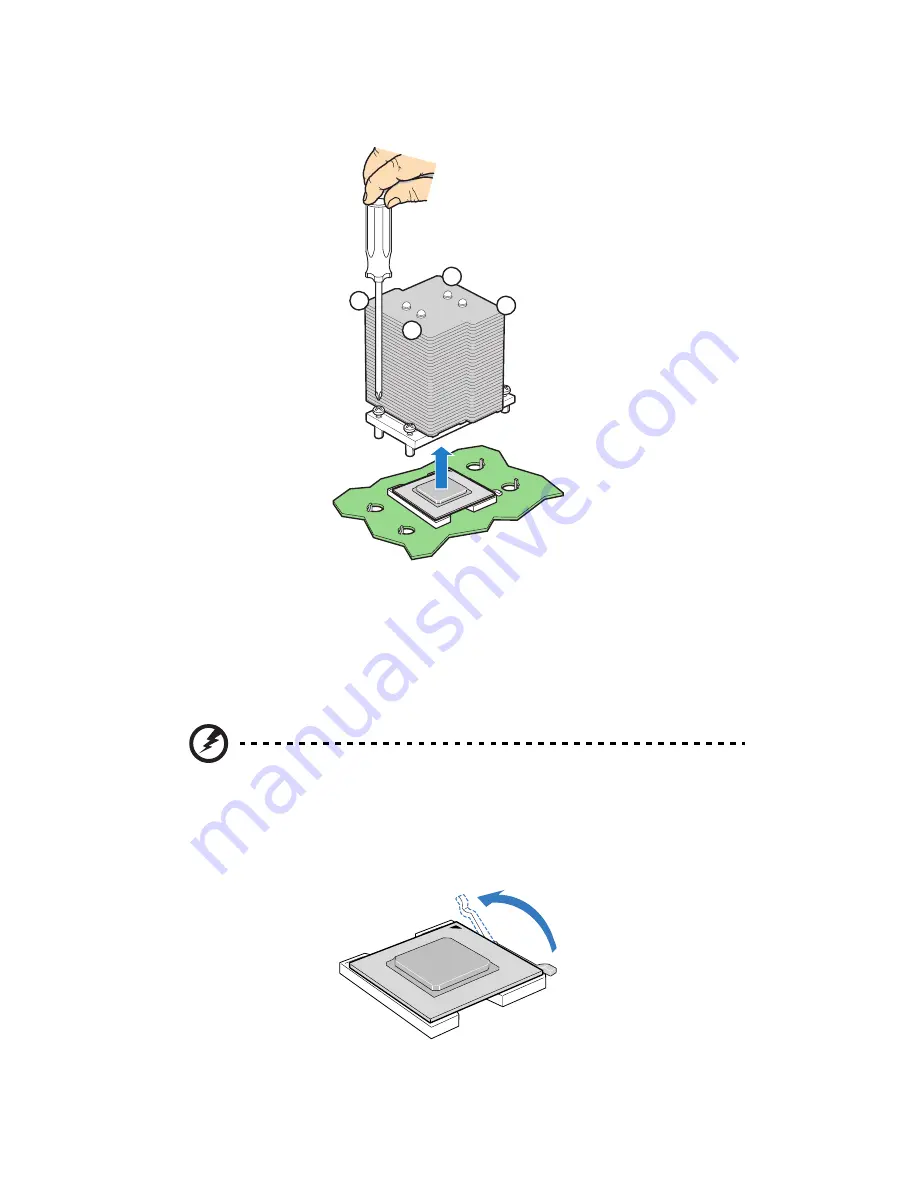
(2) Pull the heat sink away from the CPU socket.
(3) Lay down the heat sink in an upright position—with the
thermal patch facing upward. Do not let the thermal patch
touch the work surface.
(4) Use an alcohol pad to wipe off the thermal grease from both
the heat sink and processor.
4
Remove the processor.
Warning! The processor becomes very hot when the system
is on. Allow it to cool off first before handling.
(1) Pull the CPU socket retainer lever to the fully open, upright
position.
3
1
4
2
Summary of Contents for Altos R920 Series
Page 1: ...Acer Altos R920 Series User s Guide ...
Page 18: ...xviii SAS configuration utility 180 SAS RAID configuration utility 182 Index 185 ...
Page 19: ...1 System tour ...
Page 47: ...2 System setup ...
Page 55: ...3 System upgrade ...
Page 60: ...3 System upgrade 42 To install the front bezel Slide the front bezel onto the chassis ...
Page 115: ...4 System BIOS ...
Page 153: ...5 System troubleshooting ...
Page 166: ...5 System troubleshooting 148 ...
Page 167: ...Appendix A Rack mount configuration ...
Page 168: ...This appendix shows you how to set up the Altos R920 system in a rack mount configuration ...
Page 176: ...Appendix A Rack mount configuration 158 6 Fully extend the mounting rails on the rack ...
Page 180: ...Appendix A Rack mount configuration 162 ...
Page 181: ...Appendix B Memory configuration ...
Page 195: ...Appendix C SAS and SAS RAID configuration utilities ...
Page 196: ...This appendix gives an overview of the RAID configuration utilities supported by your server ...
Page 202: ...Appendix C SAS and SAS RAID configuration utilities 184 ...
Page 206: ...188 ...


