17
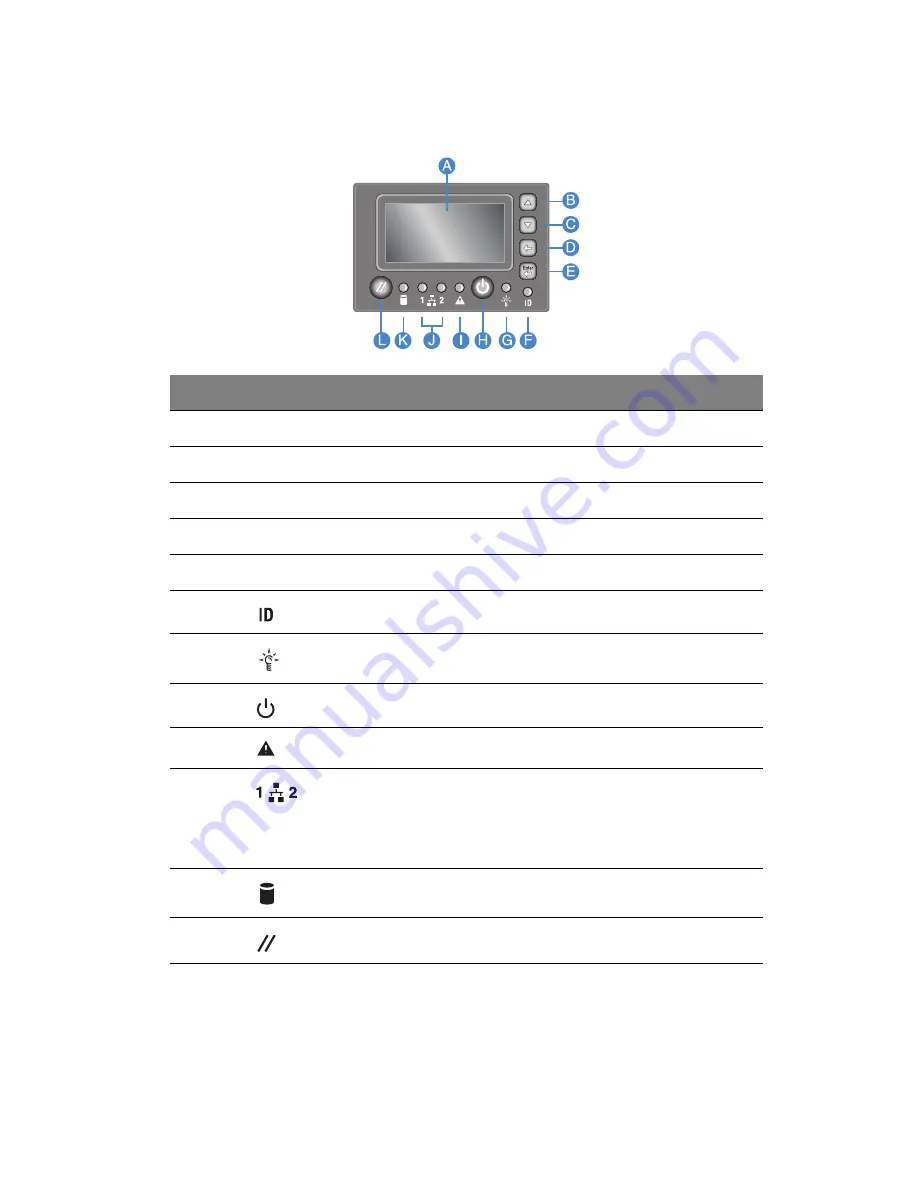
LCD control panel (optional)
Item
Icon
Component
A
LCD display
B
Scroll up button
C
Scroll down button
D
Back button
E
Select button
F
System ID indicator
G
Power indicator
H
Power button
I
Status/fault indicator
J
LAN1 status indicator displays network activity in either
LAN ports on the mainboard.
LAN2 status indicator displays network activity in either
LAN ports on the optional I/O expansion module.
K
HDD (hard disk drive) activity indicator
L
Reset button
Summary of Contents for Altos R920 Series
Page 1: ...Acer Altos R920 Series User s Guide ...
Page 18: ...xviii SAS configuration utility 180 SAS RAID configuration utility 182 Index 185 ...
Page 19: ...1 System tour ...
Page 47: ...2 System setup ...
Page 55: ...3 System upgrade ...
Page 60: ...3 System upgrade 42 To install the front bezel Slide the front bezel onto the chassis ...
Page 115: ...4 System BIOS ...
Page 153: ...5 System troubleshooting ...
Page 166: ...5 System troubleshooting 148 ...
Page 167: ...Appendix A Rack mount configuration ...
Page 168: ...This appendix shows you how to set up the Altos R920 system in a rack mount configuration ...
Page 176: ...Appendix A Rack mount configuration 158 6 Fully extend the mounting rails on the rack ...
Page 180: ...Appendix A Rack mount configuration 162 ...
Page 181: ...Appendix B Memory configuration ...
Page 195: ...Appendix C SAS and SAS RAID configuration utilities ...
Page 196: ...This appendix gives an overview of the RAID configuration utilities supported by your server ...
Page 202: ...Appendix C SAS and SAS RAID configuration utilities 184 ...
Page 206: ...188 ...


