


158
C
HAPTER
3: D
EVICE
C
ONFIGURATION
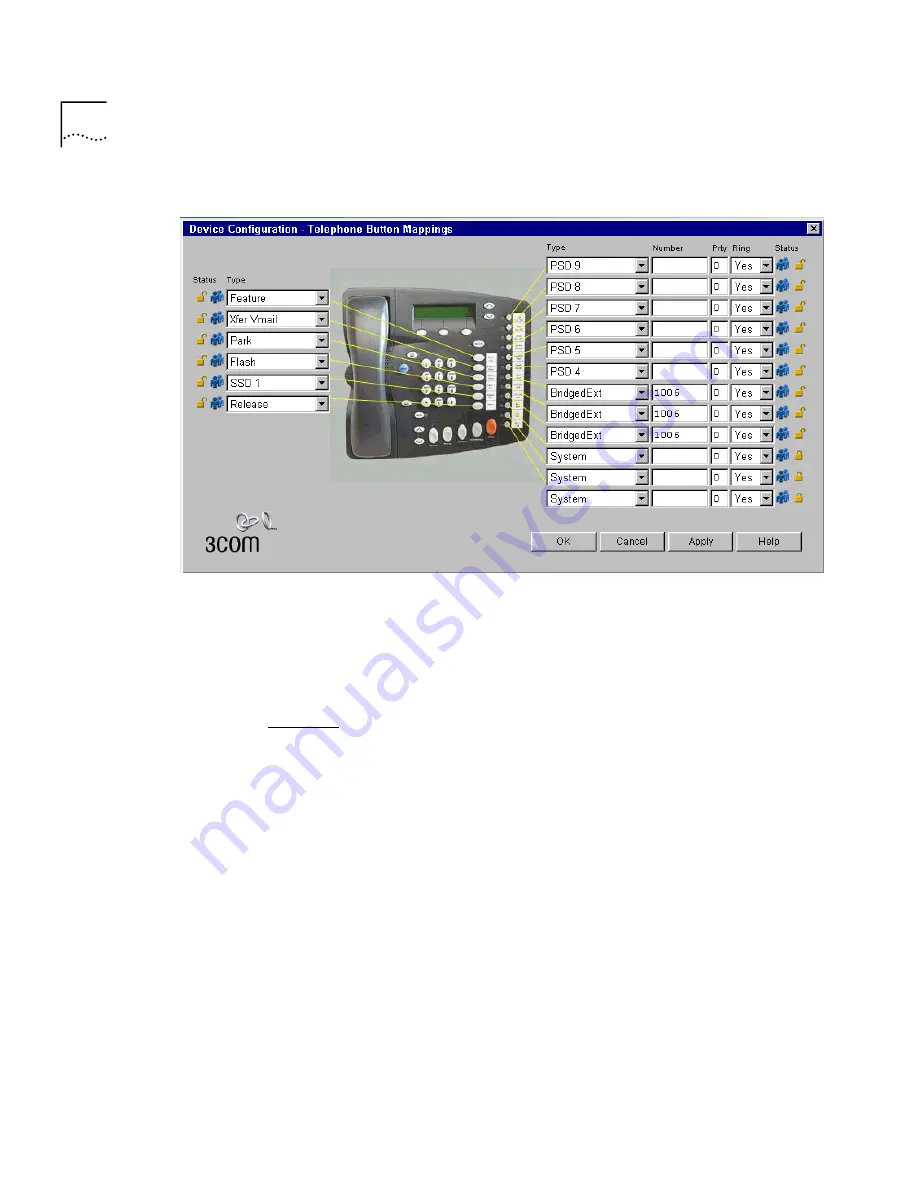
Figure 53
Telephone Button Mappings Dialog Box
6
For each button that you want to include in the group of bridged
extension buttons:
a
Select
Bridged Extension
from the pull-down list in the
Type
column.
b
Type the extension number of the primary telephone in the
Number
column.
Figure 53 shows a group of three buttons (4, 5, and 6) that have been
configured as bridged extension appearances for the extension (1006) on
the primary telephone.
7
Click
OK
.
Defining Bridged
Extensions on a
Secondary Telephone
After you have defined the bridged extension buttons on the primary
telephone, you can define the corresponding bridged extension buttons
on the secondary telephone. You can do this for as many secondary
telephones as you want.
To define the bridged extensions for a secondary telephone:
1
Log in to the NBX NetSet utility using the administrator login ID and
password.
2
In the
NBX NetSet - Main Menu
window, click
Device Configuration
.
3
Click the
Telephones
tab.
Summary of Contents for SuperStack 3 NBX
Page 14: ......
Page 18: ...18 ABOUT THIS GUIDE...
Page 26: ...26 CHAPTER 1 INTRODUCTION...
Page 138: ...138 CHAPTER 2 DIAL PLAN...
Page 322: ...322 CHAPTER 3 DEVICE CONFIGURATION...
Page 328: ...328 CHAPTER 4 USER CONFIGURATION...
Page 412: ...412 CHAPTER 10 TROUBLESHOOTING...
Page 458: ...458 APPENDIX B ISDN COMPLETION CAUSE CODES...
Page 480: ...480 GLOSSARY...
Page 492: ...492 INDEX...


