


Page 48
User manual 5448X000 Version 1 June-06
5. FUNCTIONS
Photometric Measurement
In photometric mode you can make readings of Absorbance and Transmittance of a cer-
tain wavelength. K-Factor calculation and printing are also possible.
Display Information and Function keys
On the instrument's main menu, press
(1)
key to select photometric measurement mode.
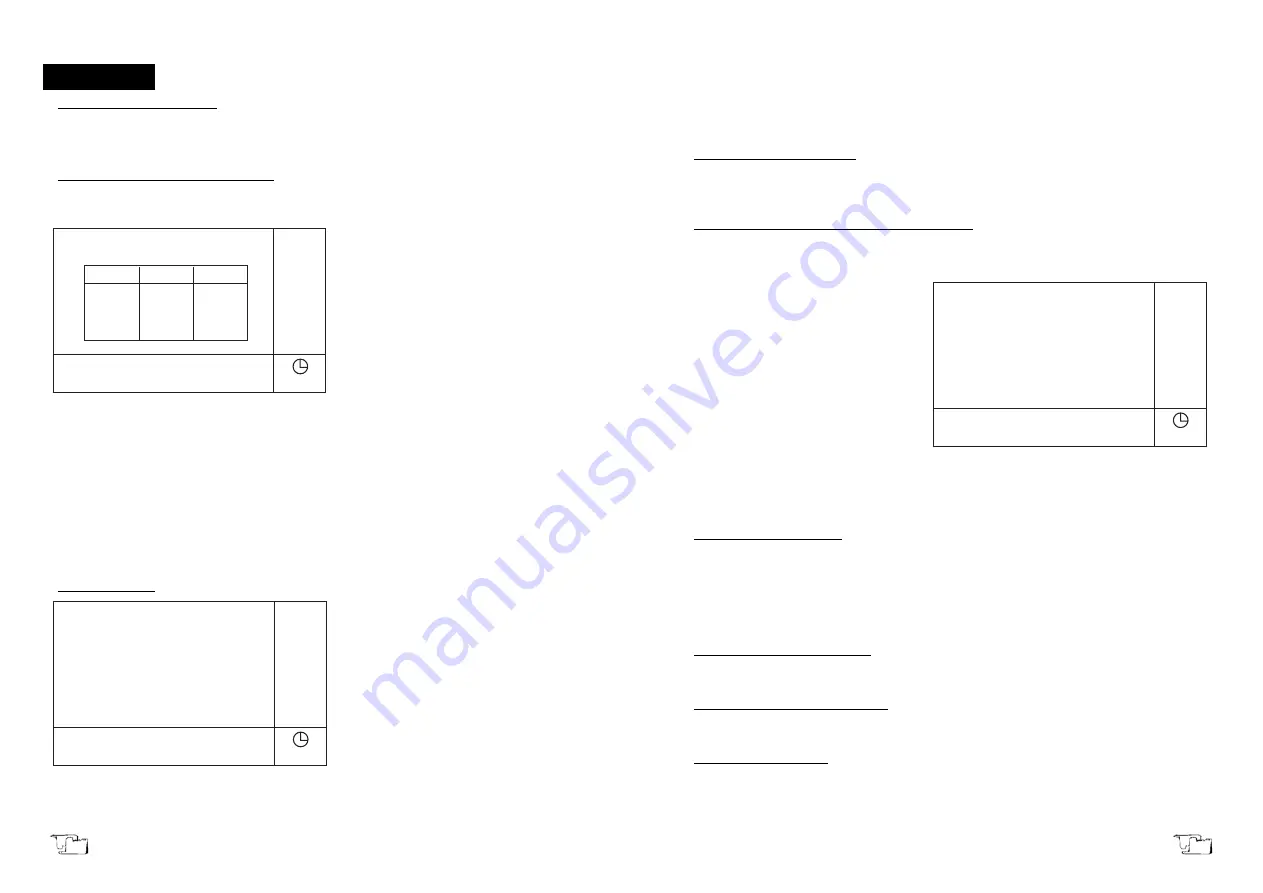
The screen of photometric mode is displayed on LCD, as shown in picture 7.
The first line on the menu shows that
the current working mode is photome-
tric mode.
In the operating area displays the
current measuring wavelength
(660.0nm) and the measured value
(0.001Abs). On the right, the functions of
F1-F4
keys are displayed.
(F1):
Parameter setting
(F2):
Deleting the measurement data and refresh the screen
(F3):
Setting cell holder
(F4):
Printing the measurement results
On this page, you can also set the wavelength and execute auto-zero by pressing
GoTo
WL
(4.4b) key and
Autozero
(4.4a) key respectively.
Parameter setting
On the working page of photometric
measurement, press
(F1)
key to display
the parameter setting page, as shown in
picture 8.
On this page, users can set the photo-
metric mode, wavelength and the value
of K-factor by pressing the correspon-
ding key number. After finishing para-
meter setting, press
Return
(4.3e) key to
return to the previous page.
14:57
System Ready
PARM
(F1)
CLS
(F2)
SAMP
(F3)
PRIN
(F4)
Photo
660.0
0.000
No.
Abs
K*Abs
Picture 7
14:57
Photometric:
Parameter
1. Mode:
Abs
2. WL:
660.0
3. Factor K:
1.000
Select Item No.:
Picture 8
Version 1 June-06
User manual 5448X000 Page 65
Users can select sample cell-holder type (fixed cell-holder and 8-cell holder) in the sam-
ple control page. If the 8-cell holder is selected, you can set the working parameters of the
8-cell holder by pressing the corresponding numeric keys. After finishing the parameter
setting, press
Return
key (4.3e) to return to the previous page.
Selecting sample module type
Press
(1)
key to select sample module type. There are two types available, fixed cell-hol-
der and 8-cell holder, which can be alternatively selected each time
(1)
key is pressed.
Setting sample cell number in use (Drive Cell No.)
This parameter is only available for 8-cell holder. Press (2) key to enter the setting page,
as shown in picture 40. The system will ask users to enter the number of sample cell in use
(Drive Cell No.).
At the bottom of this page, enter the
sample cell number by pressing the
numeric keys
(0~9)
(4.2).
Ce
key (4.3c) is
used to clear previous data. Press
Enter
key (4.3d) to confirm the numeric entry
and quit by pressing
Return
key (4.3e).
The program permits setting a 1-digits
number in a range from 1 to 8. In case the
number you set exceeds the range, the
system will delete what has been entered
and you should start a new entry.
While measuring the system will mea-
sure the samples in the set sample cells
one by one. The series of sample cells numbers is expressed by n-1, n-2, etc.
No. 1 Cell white correction
This parameter sets calibration of
white sample
regarding cell No.1. This means that rea-
dings of samples on cells 2 to 8 are calibrated and compared to the
white
value of cell No.
1. Thus, the system deducts the measured
white value
obtained from samples on cells 2 to
8 regarding the calibration of cell No. 1. There are two options available: YES and NO,
which are alternatively selected by pressing
(3)
.
Sample cell shifting (Move Cell)
Press
(4)
key to shift the cell holder to the next sample cell.
Resetting to cell No.1(Move Home)
Press (5) key to reset the cell holder to sample cell No.1.
Single-cell measurement
If the single-cell type is selected, you can choose any of the cells of the multi-cell as the
measuring cell by shifting the cell holder to the desired position according to the method
described in
Setting sample cell number in use (Drive Cell No.,
page 51). Measurement will
only be done to the chosen cell.
14:57
Sample Control
1. Sample Module: 8 Sample
2. Drive Cell No.: 1
3. Cell 1 Blank Corr: No.
4. Move Cell: 1
5. Cell Restoration
Input Cell No.:
Picture 40
ENGLISH
ENGLISH


