


20
ZoomAir Wireless LAN Owner’s Manual
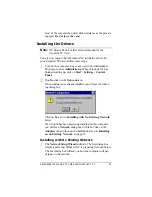
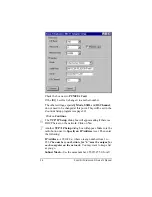
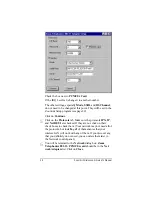
Ignore these screens; they will appear and disappear on their
own. Wait for the Setup Complete message, which will
prompt you to restart the computer. Click on Yes. Then re-
move any diskette in the floppy drive and click on Finish.
After the computer has restarted, you should see an icon
for the ZoomAir Card in the system tray (at the right-hand end of
the taskbar). The icon may take several seconds to appear; it looks
like a small computer monitor. If this is the first ZoomAir Card
you have installed, the icon will be red.
Repeat this installation for the second ZoomAir Card. If you have
accepted the default settings, the two cards should begin to com-
municate. You can verify this because the icon in the system tray
will turn green. (The change in color may take several seconds.)
As you add each new ZoomAir Card to a computer, it should join
the wireless LAN and display a green icon in its system tray.
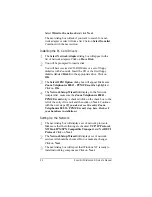
Removing the ZoomAir Card
If you ever need to remove your ZoomAir Card, do not simply
pull it from the PC Card slot. It is not “hot-swappable.”
Follow this procedure: In your system tray (the area at the right
end of the taskbar), click on the icon for PCMCIA devices. Follow
the prompts to stop your PCMCIA device. You may then remove
the ZoomAir Card. If there is no PCMCIA icon in the taskbar,
shut down the computer and turn off the power before removing
the ZoomAir Card.
Interpreting the LEDs
The ZoomAir Card has three lights that indicate its operating char-
acteristics:
Red indicates that power is being provided to the PC Card. If the
LED is not lit, the card may not be plugged in securely or the card
slot may have been powered down by the computer’s operating
system.


