


4-9
IM WT5000-02EN
Integration Information
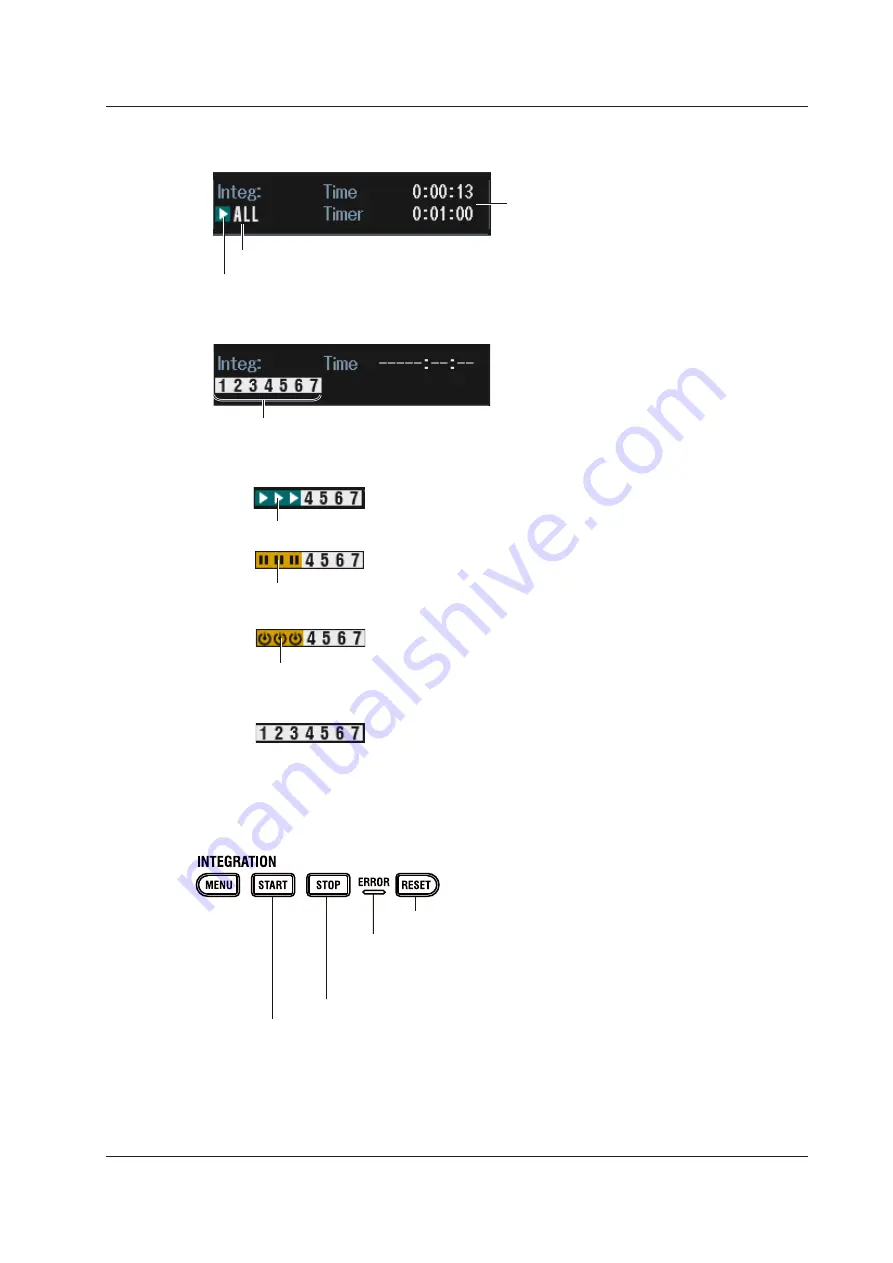
When Independent Integration Is Disabled
All elements are controlled simultaneously, and shared information (e.g., elapsed time, timer)
are shown.
When independent integration is enabled
Selected elements are controlled independently (e.g., elapsed time, start time), and integration
information (e.g., elapsed time, timer) is shown for each element. Press ELEMENTS (appropriate
number) in the ELEMENTS/RANGE area to switch the displayed integration information of each
element.
When integration starts, the elements selected for integration execution show START icons.
When integration stops, the elements selected for integration execution show STOP icons.
If you start it again, the icons change to START, and integration resumes.
Elapsed time, timer ,etc.
Example: Integration running on elements 1 to 3
Example: Integration paused on elements 1 to 3
When you execute reset, the integration information is cleared, and the STOP icons return
to displaying numbers.
When integration ends after the specified timer value elapses or when the scheduled real-time
integration time is reached, the elements selected for integration execution show STOP icons.
Unlike pausing, you need to reset the integration after it ends to start the integration again.
Example: Integration ended on elements 1 to 3
Integration status display (running, paused, ended)
This is the same display as when independent integration is off (see below).
Procedure Using Keys
You can also use the front panel keys to start, end, and reset integration.
Starts integration.
Stops integration.
Resets the integration status
ERROR indicator
Lights when an integration error occurs. In this situation, an error message
appears at the top of the screen. For more information about how to handle
error messages, see appendix 1.
4.2 Displaying Integrated Values (numeric display)


