Setup
Reference Manual
213
• UNKNOWN (black)
This indicates that the clock status cannot be detected because no external device is
connected or because there is no valid clock input. You will be able to select this
connector/slot, but successful synchronization cannot occur until a valid connection is
established.
NOTE
• If the indicator for the selected clock does not turn light blue, make sure that the external device
is correctly connected, and that the external device is set to transmit clock data.
• Noise may occur at the output jacks when the word clock setting is changed. To protect your
speaker system, be sure to turn down the power amp volume before changing the word clock
setting.
• If you attempt to select a channel (for which SRC is on) as the word clock source, a message will
appear, warning you that the sampling rate converter will be disabled.
SLOT field
This field enables you to make various settings related to the MY slots on the rear panel of the
console.
5
Card name
Indicates the type of card installed in the slot. If nothing is installed, “----” will appear.
6
SRC buttons
The SRC (Sampling Rate Converter) function can be switched on or off for a slot in which
an MY card (MY8-AE96S) that features the SRC function is installed. If another type of
card is installed, or if no card is installed, no SRC button will appear.
7
FREQUENCY display
Indicates the sampling frequency of input signals if the installed card can detect the
substatus of input signals, such as an AES/EBU card. If another type of card is installed,
or if no card is installed, “----” will appear.
8
EMPHASIS STATUS display
Indicates the emphasis information of input signals if the installed card can detect the
substatus of input signals, such as an AES/EBU card. If another type of card is installed,
or if no card is installed, “----” will appear.
Using cascade connections
Using multiple QL series consoles, or a QL console and an external mixing console (such as
a Yamaha PM5D) in a cascade connection enables buses to be shared among the devices.
This can be convenient if you want to use an external mixer to increase the number of inputs.
This section explains cascade connections and operation, using an example in which two QL
units are connected in a cascade configuration.
About cascade connections
To cascade two QL series consoles, you must first install digital I/O cards in the appropriate
slots, and connect the output ports of the sending unit (the cascade slave) to the input ports
of the receiving unit (the cascade master).
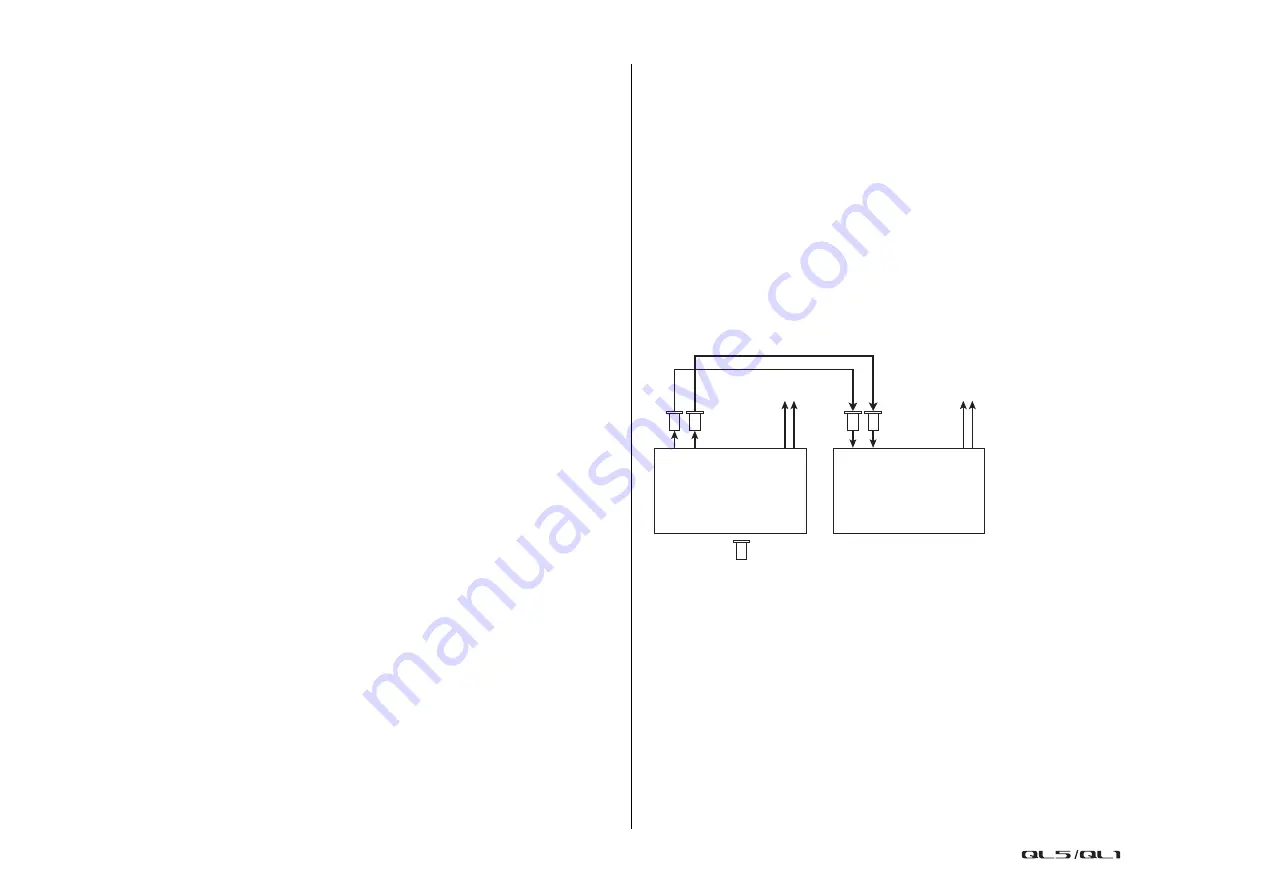
The following illustration shows an example in which two eight-channel digital I/O cards for
each unit are installed in the cascade slave QL unit and in the cascade master QL unit. The
DIGITAL OUT jacks of the sending unit are connected to the DIGITAL IN jacks of the receiving
unit.
In this example, up to twenty four buses chosen from MIX bus 1–16, MATRIX bus 1–8,
STEREO bus (L/R), MONO (C) bus, and CUE bus (L/R) can be shared, and the mixed signals
transmitted from the cascade master QL unit. (If you use two 16-channel digital I/O cards, all
buses can be shared among the devices.) When the required settings are made for the
cascade slave and for the cascade master, the bus signals of the cascade slave will be sent
via the slot to the buses of the cascade master, and the combined signals of both buses will
be output from the cascade master. If the Cascade Link function is enabled, the specified
operations or parameter changes performed on either QL series console will be followed by
the other QL console.
You must specify bus assignments for each slot or channel on each QL unit. Separate
procedures are outlined for the cascade slave and the cascade master.
QL B
QL A
DIGITAL
OUT
DIGITAL
IN
Audio signals of
A + B
Audio signals of
unit A
Digital I/O card
(Cascade slave)
(Cascade master)


