


01
9
Before You Start
40
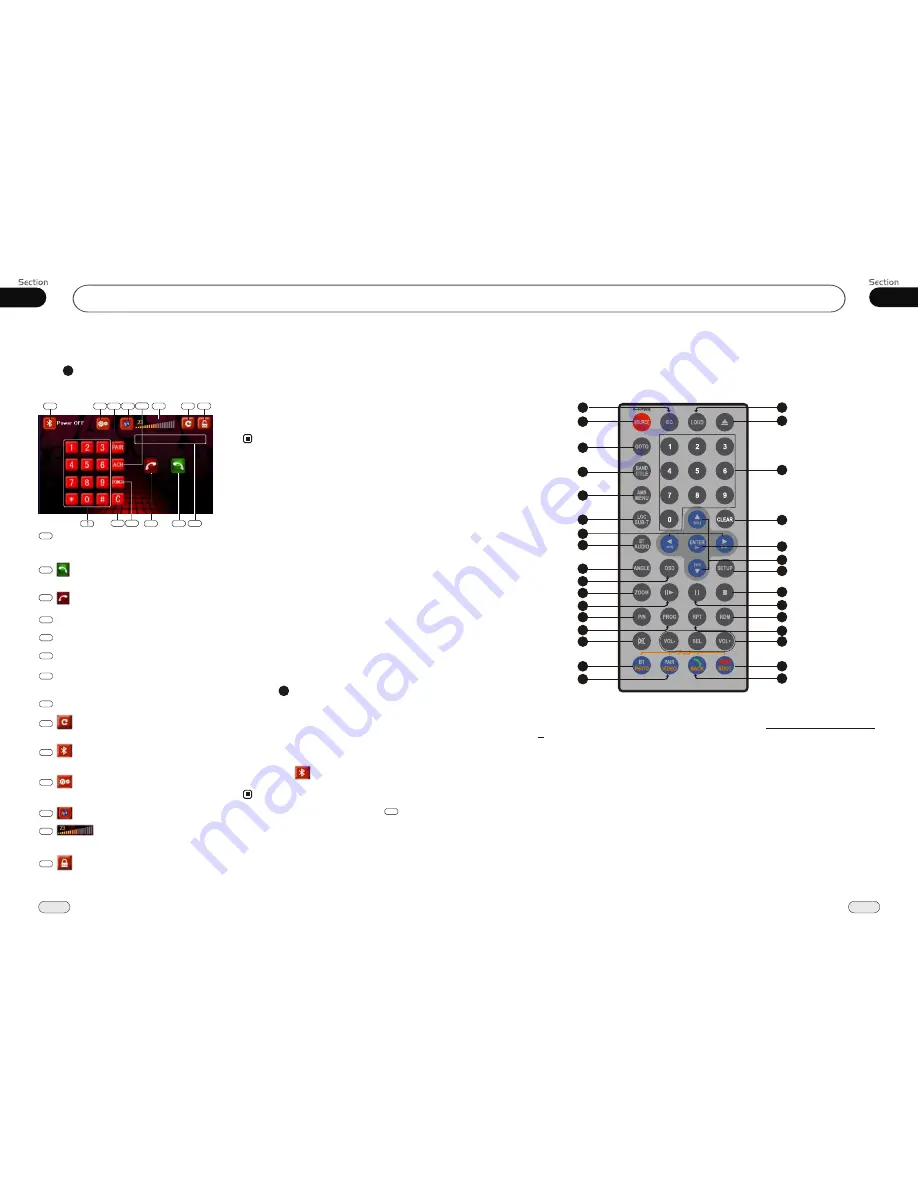
Remote Control
Tips:
For more information as to replacing battery, please refer to
Replacing the Battery
on page 6.
09
1
2
3
4
5
7
20
6
8
9
10
11
12
13
14
15
16
17
18
19
21
22
23
24
25
26
27
28
31
29
30
Bluetooth
Bluetooth Operational Interface
Press BT on the remote control or BT in
the monitor to open the bluetooth operational
interface:
28
4
Number Show
PAIR
5
6
ACH (audio change)
C (clear)
8
POWER
7
Press it to turn on or turn off the bluetooth function.
1
To input the phone number.
Number Buttons
Using a Bluetooth Wireless
Connection
The device can be dialed wirelessly in bluetoo-
th status. Before using the bluetooth function,
please turn on your cellphone's bluetooth func-
tion.
Pairing Your Unit and Bluetooth
Phone
The device supports handsfree profile,head-
set profile, A2DP( Audio Advanced Distri-
bution Profile)and AVRCP(Audio Video
Remote Control profile). Follow the pairing
instructions for the first time use, after that
the unit will connect automatically.
Note:
* To provide the best sound with minimal
distorted sound(the cellphone or network
brings).
* Full duplex conversation.
* Bluetooth ver2.0 compliant.
Pairing in Handsfree Mode
1. Press PAIR, and
Pairing...
shows on
the screen.
2. To get into
CELLPHONE CONNECTION
to search fixtures;
3. If the cellphone has connected,
Pair
Success
appear and then
SLC Connect
in order, will change from green to red.
29
Note:
* Pressing
on the main unit or in the
monitor also performs the same function.
PAIR
5
2
Dial, last call, answer a call.
3
Hang up, refuse a call.
9
Press this button to go back to the select
menu.
10
Pairing success this button is in red,
or it is in green.
AUDIO setup menu
To adjust AUDIO please refer to pages 19.
11
12
Press this button to mute.
You can adjust the volume by
gliding this strip horizontally.
13
Press this button to lock or unlock
the touch screen
During unlock status, glide up and down or
left and right on the blank space of screen
to switch to the previous or next mode.
14
44
88
77
66
10
11
12
13
14
9
5
2
3


