


04
21
Main Menu
28
05
DVD/VCD/MP4
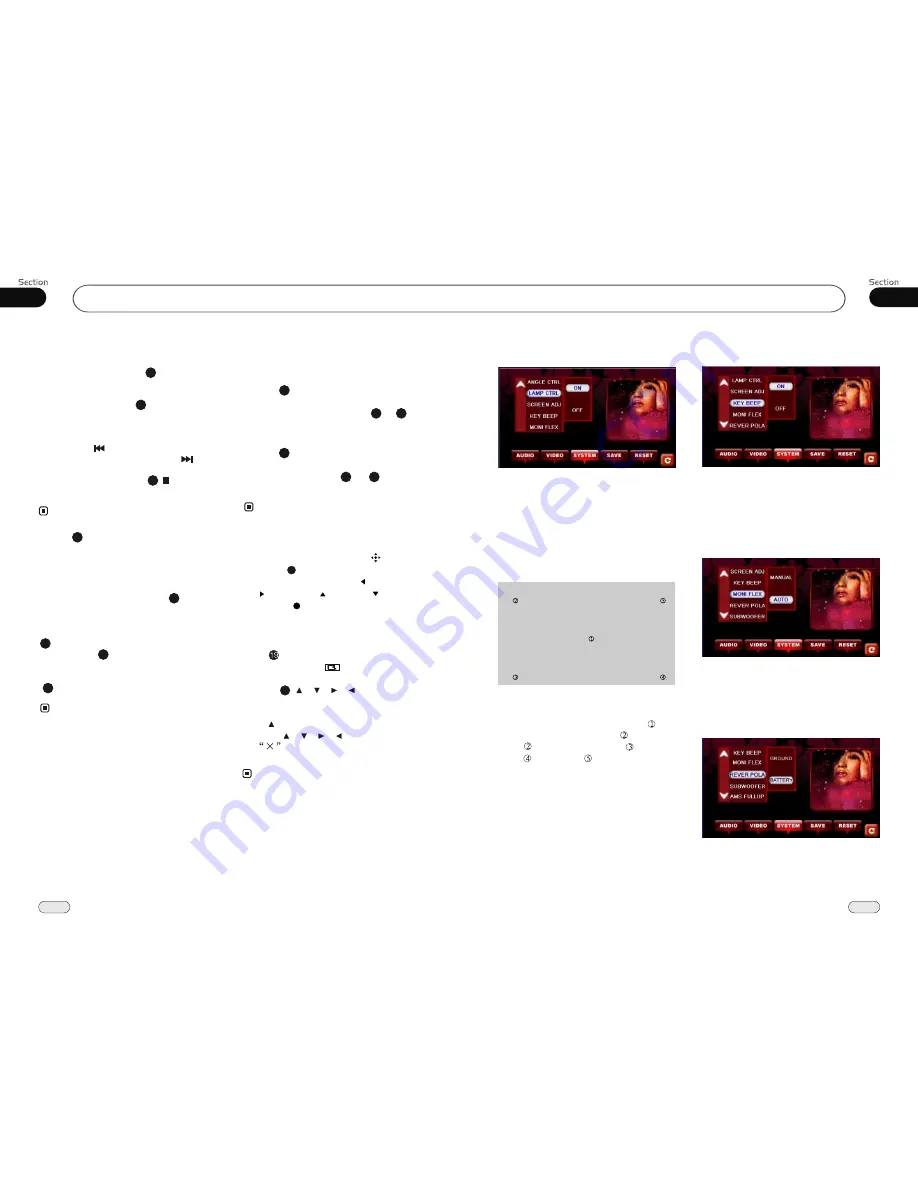
Lamp Control
In this menu you can control the button lights.
If you set it ON, the button lights of the front
panel are illuminated when the unit is on.
If you set it OFF, the lamp is light when the
headlight of the car is on.
Adjust Screen
Press SCREEN ADJ to display the above
menu, there is a + button in the middle of
the screen. Press the button at place ,then
the button will move to place , press it at
place , it will move to place , then
place , then press , and press SAVE
at last.
+
+
+
+
Carefully press and briefly hold stylus
on the center of the target.
Repeat as the target moves around the screen.
+
Key Beep
In this menu you can adjust KEY BEEP,
press it in the monitor and select ON or OFF,
the default setting is ON, it means when you
press the keys,
.
they will make a sound
.
Monitor Flex
In this menu you can adjust MONI FLEX,
press it in the monitor and select MANUAL
or AUTO, the default setting is AUTO, it
means the monitor will flex automatically.
Setting REVERSE POLA in this menu.
The signal is +12V when you back a car,
please press BATTERY in the monitor; if
the signal is 0V, please press GROUND.
Reverse Pola
Program Playing
During VCD mode, press
PROG
, the
TFT displays the program menu. Press
NUMBER BUTTONS
to select the track
Number and then press to move the cursor
to
START
, press
ENTER
to start program
playing; move the cursor to EXIT and press
ENTER to exit the program playing. Move
the cursor to and press ENTER to go to the
previous page; move the cursor to and
press ENTER to go to the next page.
During this process, press to cancel
the program playing.
13
18
The function is only valid on the remote control.
Note:
*
27
* Press CLEAR to clear the input mistake.
22
*
Playing PBC (Menu)
During
VCD status, first press
TITLE
,
PBC playback starts and
the menu of the
entire disc
appears on the monitor, and then
you can select your favorite track by using
Number Buttons
. When a track is playing,
you can
to return to
if you would like to end the track and
select others. To cancel PBC playing, press
button again.
press
MENU
the
menu
TITLE
4
23
3
This function is operated by using the remote
control.
Note:
*
PBC
playing confirms to version 2.0 of VCD/
SVCD disc only.
3
Selecting MENU
Selecting Menu:
During DVD status,
press
MENU
to return to the root
menu, all of the chapters will appear
on the monitor. You can press or
button to select your desired chapter.
4
27
23
Selecting Title:
During DVD status,
press
TITLE
to return the title menu,
all of the titles will appear on the monitor.
You also can press or button to
select your desired chapter.
3
1
2
Under DVD menu, touch the screen to select
items.
Note:
*
27
23
If the touch menu option is invalid or the disc
does not support touch-TITLE, that is the
same as buttons on the remote control will
display on the screen. Press to left, press
to right, press to up, press to down
and press to ENTER.
*
27
27
Press SETUP on remote control or MENU
on the main unit or in the monitor, main
menu and sub-menu will appear on TFT,
pressing [ ][ ][ ][ ] on the remote
control to select your desired items, then
press ENTER.
* The selections are the preferred options that
will be chosen if they are available on a disc.
If the disc that is inserted does not have the
preferred option then the discs own prefer-
ence will be used.
* Regarding
SETUP MENU
, please refer to
the following pages for more details.
* Some functions varies depending on the types
of models or formats of the disc.
DVD SETUP MENU
Notes:
Press to the previous one, press SETUP
or press [ ][ ][ ][ ] to move the cursor
on
, then press ENTER to exit the
menu setup.
* To touch the screen to select menu, touch it
again to select the item.


