x-Lab Dot Matrix Printer XDP-321 User's Manual
- 23 -
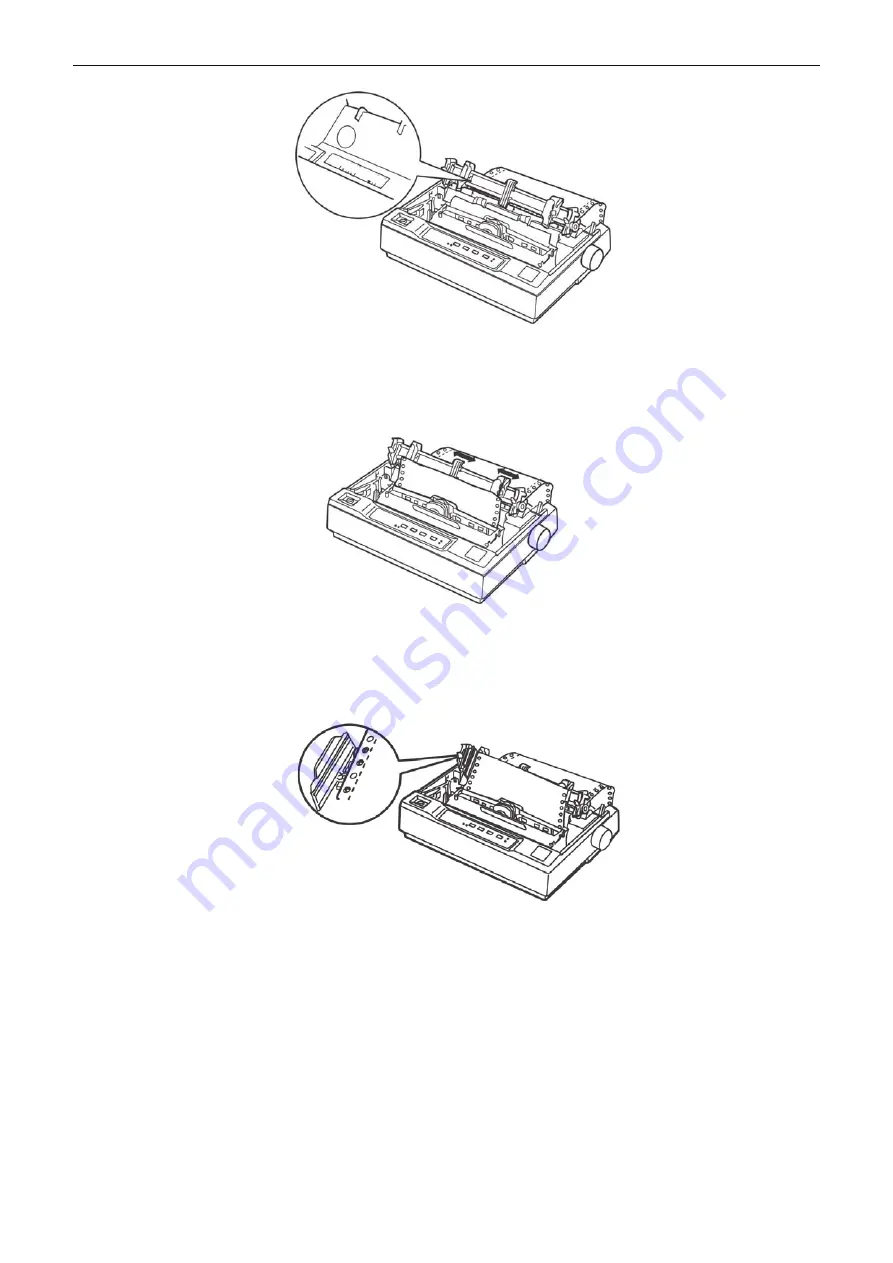
5. Slide the left sprocket until it matches the position of the holes in the paper and lock it in place.
Then slide the right sprocket to match the width of the paper, but do not lock it. Move the paper
support to the midway which is between the two sprockets. (As shown below)
6. Make sure the paper edge is clean and straight. Open the sprocket covers. Fit the first hole of the
paper to the sprocket pins and then close the sprocket covers. Slide the right sprocket to remove
any slack from the paper and lock it in place.
7. To separate the paper from loading and ejecting, it is necessary to install the paper guide. Hold it
horizontally and aim it at the printer’s mounting slots. Then slide the paper guide toward the rear
side of the printer until it locks in place.
8. Slide the left and right guide tracks to the center until it stops at the triangular mark on the paper
guide.
9. Make sure the window is closed and then turn on the printer. When the printer receives data, it
begins printing automatically.
Figure 3.1.2-2:4 Insert the tractor paper into the paper slot
Figure 3.1.2-2:5 Adjust the position of the sprocket
Figure 3.1.2-2:6 Load paper in the draught tractor


