WorkCentre Pro 423/428
3-10
CHAPTER 3 IMAGE QUALITY TROUBLESHOOTING
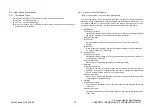
3.3 Image Quality Troubleshooting
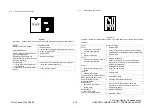
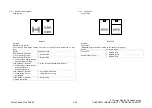
2) Light copies
l
Check
1. Check that the values are correctly set up in the Diag Code [21-5] to [21-37]. (See
NVM table)
2. Check that the ROS window is not contaminated.
3. Print out the built-in Test Pattern of continuous gradation in the Diag Code [23-21].
Check that the darkest two black bands in the Test Pattern copy has almost the
same density as 1.3 solid.
•
When the density is lower, the problem can be Xero related.
•
When the density is almost the same, the IIT may have the problem.
l
When the density of built-in Test Pattern is normal
A. Check the IIT.
•
When the auto controlled density is too light
Check that the setup data in the Diag Codes below are appropriate. (See NVM
table) Change the data as needed. [21-25,26,31to37]
•
When the manually controlled density is too light
Check that the setup data in the Diag Codes below are appropriate. (See NVM
table) Change the data as needed. [21-5 to 24]
B. Check the control board.
Problem of control board rarely causes light copies, but when the problem persists
after conducting the above checks, use a built-in Test Pattern and check each
board for problems.
3) When the image is too light at one half side of copy
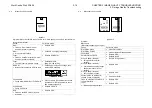
Print out the built-in Test Pattern with continuous gradation in the Diag Code [23-23].
Check for a light image at one half side of the copy.
l
When the outboard side (front side of the machine) is light,
The CRU has not been properly installed.
l
When the built-in Test Patterns does not show light images, check the IIT white
reference board for contamination. (Particularly for the DADF white reference
board)
4) High background for the entire image or density is too dark
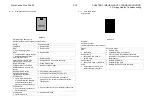
Print out the built-in Test Pattern of the entire white copy in the Diag Code [23-10] and
of continuous gradation in the Diag Code [23-23]. Check for high-background in the
entire image.
When the entire image has background, poor toner charging can be the cause.
(Replace the CRU.)
When the built-in Test Pattern has background, check XERO related components
(CRU, BTR, or DST) for problems.
•
Replace the CRU, then HVPS.
l
When the built-in Test Pattern has no background
A. Check the IIT.
•
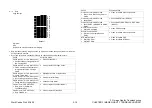
When background is observed in the auto adjusted density
Check the data setup in the Diag Codes [21-25] to [21-57] are appropriate.
(See NVM table) Change the data as needed.
•
When background is observed in the manually adjusted density
•
Check the white reference board for pieces of paper, dust or foreign
matter.
•
Check that the data setup in the Diag Codes [21-5 to 24] are appropriate.
(See NVM table) Change the data as needed.
B. Check the control board.
If the problem persists, use the built-in Test Pattern to check each board for
problems.
Содержание WorkCentre Pro 423
Страница 1: ...Transmittal Page 3URGXFW RUN HQWUH 3UR 7LWOH 6HUYLFH 0DQXDO 3DUW 1XPEHU 3 6WDWXV QWLDO VVXH DWH 0DUFK...
Страница 2: ......
Страница 3: ...WorkCentre Pro 423 428 6HUYLFH 0DQXDO...
Страница 6: ......
Страница 8: ......
Страница 9: ...INTRODUCTION...
Страница 10: ......
Страница 24: ...WorkCentre 423 428 03 02 INTRODUCTION 14 7 Translation of Warnings...
Страница 25: ...CHAPTER 1 SERVICE CALL PROCEDURE...
Страница 26: ......
Страница 28: ...WorkCentre Pro 423 428 1 2 CHAPTER 1 SERVICE CALL PROCEDURE 03 02 1 1 Trimming...
Страница 31: ...CHAPTER 2 TROUBLESHOOTING...
Страница 32: ......
Страница 76: ...WorkCentre Pro 423 428 2 44 CHAPTER 2 TROUBLESHOOTING 03 02 2 3 Level 2 Troubleshooting...
Страница 242: ...WorkCentre Pro 423 428 2 210 CHAPTER 2 TROUBLESHOOTING 03 02 How to use the Diagnostic C E Mode...
Страница 243: ...CHAPTER 3 IMAGE QUALITY TROUBLESHOOTING...
Страница 244: ......
Страница 273: ...CHAPTER 4 DISASSEMBLY ASSEMBLY AND ADJUSTMENT...
Страница 274: ......
Страница 329: ...CHAPTER 5 PARTS LIST...
Страница 330: ......
Страница 415: ...03 02 5 2 Parts List WorkCentre Pro 423 428 5 85 CHAPTER 5 PARTS LIST...
Страница 416: ...CHAPTER 6 GENERAL...
Страница 417: ......
Страница 456: ...CHAPTER 7 ELECTRICAL WIRING DIAGRAMS...
Страница 457: ......
Страница 476: ...CHAPTER 8 ACCESSORIES...
Страница 477: ......
Страница 535: ...WorkCentre Pro 423 428 8 58 CHAPTER 8 ACCESSORIES 03 02 8 22 Stamp Kit Red...
Страница 536: ...CHAPTER 9 BSD Block Schematic Diagram...
Страница 537: ......
Страница 541: ......
Страница 542: ......
Страница 543: ......
Страница 544: ......
Страница 545: ......
Страница 546: ......
Страница 547: ......
Страница 548: ......
Страница 549: ......
Страница 550: ......
Страница 551: ......
Страница 552: ......
Страница 553: ......
Страница 554: ......
Страница 555: ......
Страница 556: ......
Страница 557: ......
Страница 558: ......
Страница 559: ......
Страница 560: ......
Страница 561: ......
Страница 562: ......
Страница 563: ......
Страница 564: ......
Страница 565: ......
Страница 566: ......
Страница 567: ......
Страница 568: ......
Страница 569: ......
Страница 570: ......
Страница 571: ......
Страница 572: ......
Страница 573: ......
Страница 574: ......
Страница 575: ......
Страница 576: ......
Страница 577: ......
Страница 578: ......
Страница 579: ......
Страница 580: ......
Страница 581: ......
Страница 582: ......
Страница 583: ......
Страница 584: ......
Страница 585: ......
Страница 586: ......
Страница 587: ......
Страница 588: ......
Страница 589: ......
Страница 590: ......
Страница 591: ......
Страница 592: ......
Страница 593: ......
Страница 594: ......
Страница 595: ......
Страница 596: ......
Страница 597: ......
Страница 598: ......
Страница 599: ......
Страница 600: ......
Страница 601: ......
Страница 602: ......
Страница 603: ......
Страница 604: ......
Страница 605: ......
Страница 606: ......
Страница 607: ......
Страница 608: ......
Страница 609: ......
Страница 610: ......
Страница 611: ......
Страница 612: ......
Страница 613: ......
Страница 614: ......
Страница 615: ......
Страница 616: ......
Страница 617: ......
Страница 618: ......
Страница 619: ......


