Maintenance and Diagnostics
Service Manual 7-11
7.6 How to use Engine Diagnostic Control Mode (EDC)
7.6.1 What is EDC Mode
EDC Mode is a feature that allows the service technician to check the condition of the print engine. It can check the
operating condition of the motors, sensors, solenoids and clutches, measure the high voltage from the HVPS and
check the operation of the fuser and laser units.
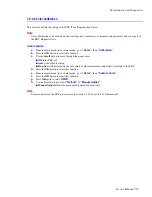
7.6.1.1 Entering EDC Mode
a.
Turn on the printer while pressing the
“
OK
”
button. Hold the button until
“Select Test mode”
appears on
the control panel.
b.
Press the Scroll button until
“<EDC Test>”
is displayed.
c.
Press the OK button to select the desired test.
d.
When
“Press access key”
is displayed, press the Cancel key twice.
e.
You are now in EDC mode.
NOTE:
There are a number of other test modes. Only EDC Test and Panel Tests should be used by service technicians,
all other functions are for factory use only.
7.6.1.2 Functions of the Buttons While in EDC Mode
7.6.1.3 LCD Functions and Directions
Upper line messages mainly show the current test menu or sub-menu item. Lower line messages mainly show the
currrent test and status.
Button
Function
Description
On-line/Continue
Not used
Cancel
Not used
Menu
Menu
Displays top level menu items
Left/Right Arrow Scroll
Find Menu
Scrolls through menus
OK
Run / Select Run
Starts/Runs the function or selects menu item
Back
Stop / Move Stop
Stops the selected function or goes to the
upper menu item.
Status Map
Display : displays the printer
status and job in progress.
Buttons
Содержание Phaser 6100
Страница 1: ...Service Manual X XEROX P h a s e r C o l o r L a s e r P r i n t e r 6100 ...
Страница 2: ......
Страница 10: ...vi ...
Страница 22: ...Reference Information 2 6 ...
Страница 28: ...Specifications 3 6 ...
Страница 38: ...Summary of Product 4 10 RAM DIMM SPGPm Main Control FLASH MEMORY ENGINE CONTROL ...
Страница 44: ...Summary of Product 4 16 ...
Страница 66: ...Disassembly 6 10 3 Remove the toner caps and fit them to the inlets as shown below Toner Cap ...
Страница 84: ...Disassembly 6 28 7 Remove 5 screws 3 6 machine gold and then remove the HVPS Screw Screw Screw Screw Screw ...
Страница 94: ...Disassembly 6 38 6 Disconnect 2 harnesses and remove the laser unit Harness Harness ...
Страница 130: ...Maintenance and Diagnostics 7 20 ...
Страница 188: ...Parts List 9 34 9 16 Base Frame Assembly 16 15 14 23 13 6 12 8 3 3 7 4 5 19 10 9 20 18 22 17 1 2 24 25 26 11 21 ...
Страница 190: ...Parts List 9 36 9 17 MPT Assembly 15 19 20 13 4 17 17 18 24 1 18 11 3 7 23 1 S5 6 2 S9 9 14 22 10 21 8 5 16 12 0 ...
Страница 196: ...Parts List 9 42 9 21 Transfer Belt Cam Assembly S18 9 0 8 S8 7 6 5 10 1 2 14 3 12 13 S8 11 4 ...
Страница 200: ...Parts List 9 46 ...


