50
3 Print
Operations on the Control Panel
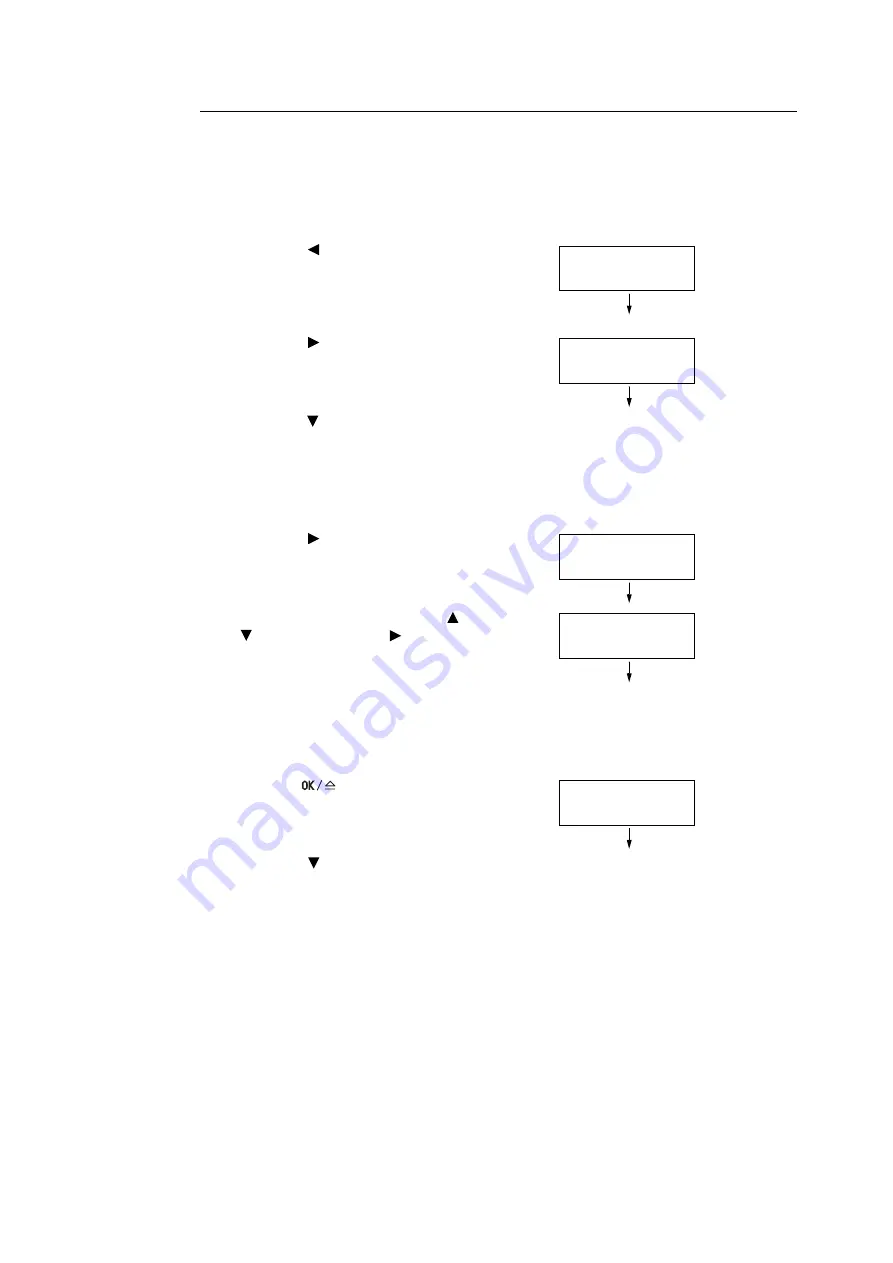
The following explains how to release a Secure Print job stored in the printer.
Note
• When deleting a Secure Print job without printing, select [Delete] after Step 8 in the following procedure.
• If the menu screen is left idle for 3 minutes, the display returns to the print screen. Any incomplete
setting on the menu screen made 3 minutes before becomes invalid.
1. Press the < > button on the control panel.
2. Press the < > button to accept the
selection.
A user ID is displayed.
3. Press the < > button until the desired user
ID is displayed.
Note
• The user ID is the ID set under [User ID] in the [Secure
Print] dialog box on your print driver.
4. Press the < > button to accept the
selection.
A screen that allows you to enter a
password is displayed.
5. Enter your password using the < > and
< > buttons. Use the < > button to move
the curser.
Note
• Enter the password set under [Password] in the
[Secure Print] dialog box on your print driver. When a
password is not set, you will not be asked to enter it on
the control panel.
6. Press the
<OK/Eject> button to
confirm your setting.
The name of a document stored in the
printer is displayed.
7. Press the < > button until the desired
document name is displayed.
Note
• The document name is the name entered in the
[Secure Print] dialog box on your print driver.
• When more than one document is stored in the printer,
you can also select [All documents]. If you selected
[All documents], select also [Use PC settings] (the
printer prints in the print quantity specified on the print
driver) or [xxx sets] (you must enter the print quantity).
Print Menu
Secure Print
Select User ID
User1
PSET key
[_ ]
POK key
[**** ]
Select Document
Report
Содержание Phaser 5335
Страница 1: ...Phaser5335 User Guide Version 1 0 December 2007...
Страница 6: ...vi Contents...
Страница 48: ...30 2 Basic Operation...
Страница 74: ...56 3 Print...
Страница 90: ...72 4 Paper...
Страница 130: ...112 5 Control Panel Menus...
Страница 156: ...138 6 Troubleshooting...
Страница 196: ...178 7 Maintenance 11 Place the roll cover back inside the printer 12 Close Tray 1 Bypass tray and the upper cover...
Страница 216: ...198 A Appendix...
Страница 224: ......
Страница 229: ......
Страница 230: ......


