


44
3 Print
3.5
Printing by Changing the Paper Types of
the Trays
Tray 1 (Bypass tray) and trays 2 - 5 accept plain paper and special media such as
heavyweight paper and transparencies.
This section describes how to print by changing the paper type setting of the trays.
The following procedures use Windows XP WordPad as an example.
Note
• The method of displaying the Properties dialog box varies depending on the application being used.
Consult the documentation for your application.
Printing by Changing the Paper Type Setting
There are two methods of printing by changing the paper type setting of the trays.
• Printing by setting the paper type on the control panel
• Printing by setting the paper type on the print driver
Printing by Setting the Paper Type on the Control Panel
The following example shows how to print using the A4 size transparencies in portrait
orientation loaded in Tray 2.
Before requesting a job from your print driver, set the paper type of the tray on the control
panel.
After changing the paper type setting on the control panel, import the print information to the
print driver. The sizes and types of paper set in each tray can be viewed on the print driver
when printing.
Refer to
• For information on how to set the paper type setting on the control panel, refer to " Paper Sizes / Paper
Types in the Trays" (P. 67) and " [Paper Type]" (P. 104).
• For information on how to import the paper setting to the print driver, refer to "2.6 Importing Printer
Information to a Print Driver" (P. 29).
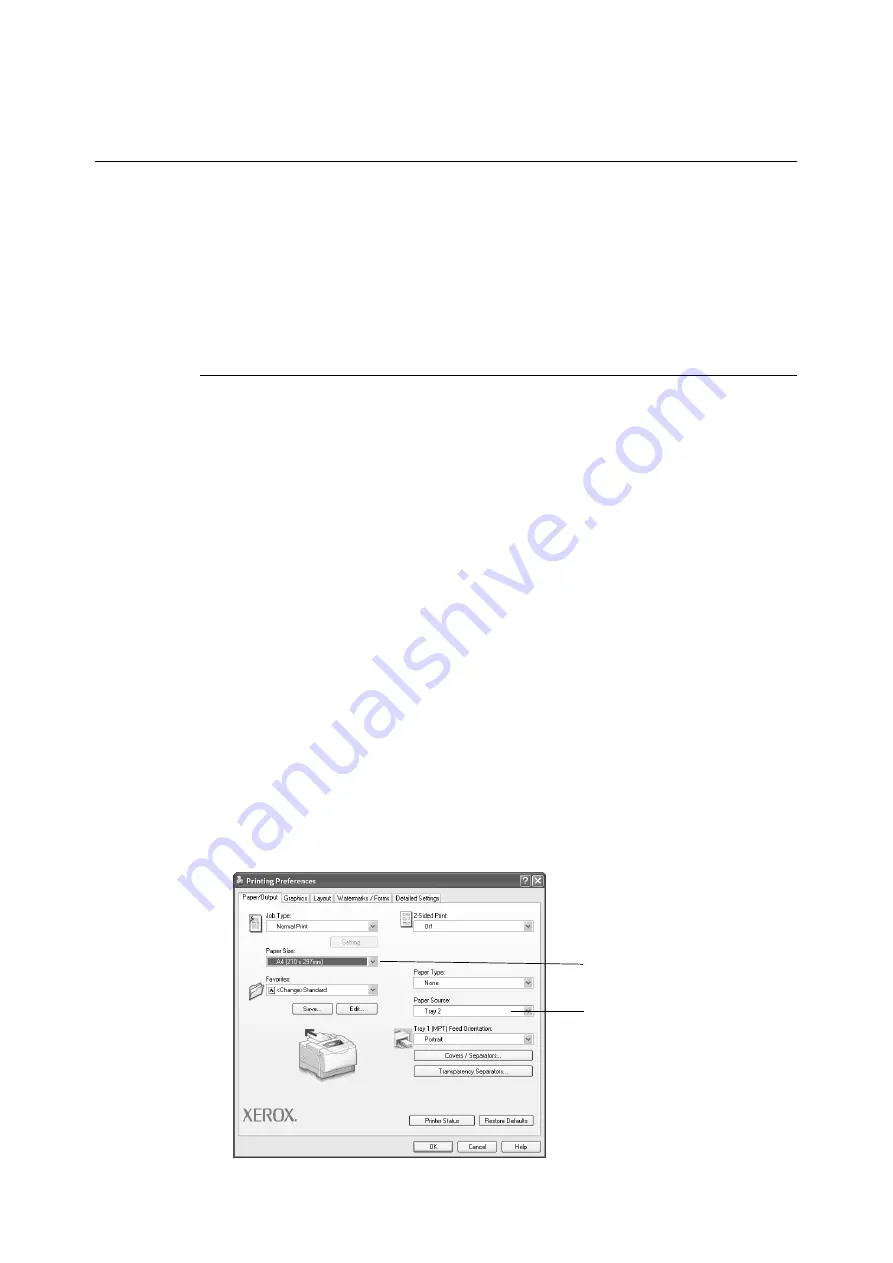
1. On the [File] menu, click [Print].
2. Select the printer from the [Select Printer] list, and click [Preferences].
3. The [Paper/Output] tab appears. From [Paper Source], select [Tray2].
3
4
Содержание Phaser 5335
Страница 1: ...Phaser5335 User Guide Version 1 0 December 2007...
Страница 6: ...vi Contents...
Страница 48: ...30 2 Basic Operation...
Страница 74: ...56 3 Print...
Страница 90: ...72 4 Paper...
Страница 130: ...112 5 Control Panel Menus...
Страница 156: ...138 6 Troubleshooting...
Страница 196: ...178 7 Maintenance 11 Place the roll cover back inside the printer 12 Close Tray 1 Bypass tray and the upper cover...
Страница 216: ...198 A Appendix...
Страница 224: ......
Страница 229: ......
Страница 230: ......


