CS200
Control Systems
40
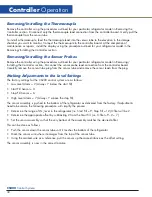
Removing/Installing the Thermocouple
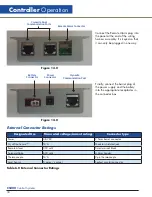
Remove the controller using the procedures outlined for your particular refrigerator model in Removing the
Controller section. Disconnect only the thermocouple lead connection from the controller board. Gently pull the
thermocouple from the sensor tube.
To install a thermocouple, feed the thermocouple lead into the sensor tube to the elevation in the storage
chamber you want to monitor. Connect the thermocouple to the controller board. At the completion of
maintenance or repairs, install the display using the procedure outlined for your refrigerator model in the
Removing/Installing the Controller section.
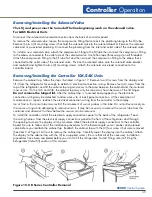
Removing/Installing the Sensor Probes
Remove the controller using the procedures outlined for your particular refrigerator model in Removing/
Installing the Controller section. Disconnect the sensor probe lead connection from the controller board.
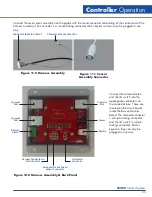
Carefully remove the sensor tube plug from the sensor tube and remove the sensor leads from the plug.
Making Adjustments to the Level Settings
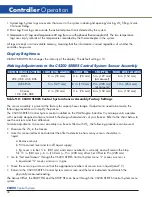
The factory settings for the CS200 control system are as follows:
• Low Level Alarm = 2 (Always 1” below the start fill)
• Start Fill Sensor = 3
• Stop Fill Sensor = 6
• High Level Alarm = 7 (Always 1” above the stop fill)
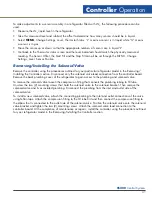
The sensor assembly is pushed to the bottom of the refrigerator as delivered from the factory. If adjustments
need to be made, the following procedure will simplify the process.
• Determine the range of LN
2
level in the refrigerator (i.e. Start Fill = 9; Stop Fill = 12) Offset will be 2.
• Determine the appropriate offset by subtracting 2 from the Start Fill. (i.e. Offset =9 –2 = 7)
• Set the sensor assembly so that the very bottom of the assembly matches the desired offset.
This can be done as follows:
• Push the sensor down the sensor tube until it touches the bottom of the refrigerator.
• Mark the sensor wire where it emerges from the top of the sensor tube.
• Using the marked wire as a reference, pull the sensor up the same distance as the offset setting.
The sensor assembly is now in the correct location.
Controller
Operation
Содержание CS200
Страница 2: ......

