background image


35


[ Alarm]   

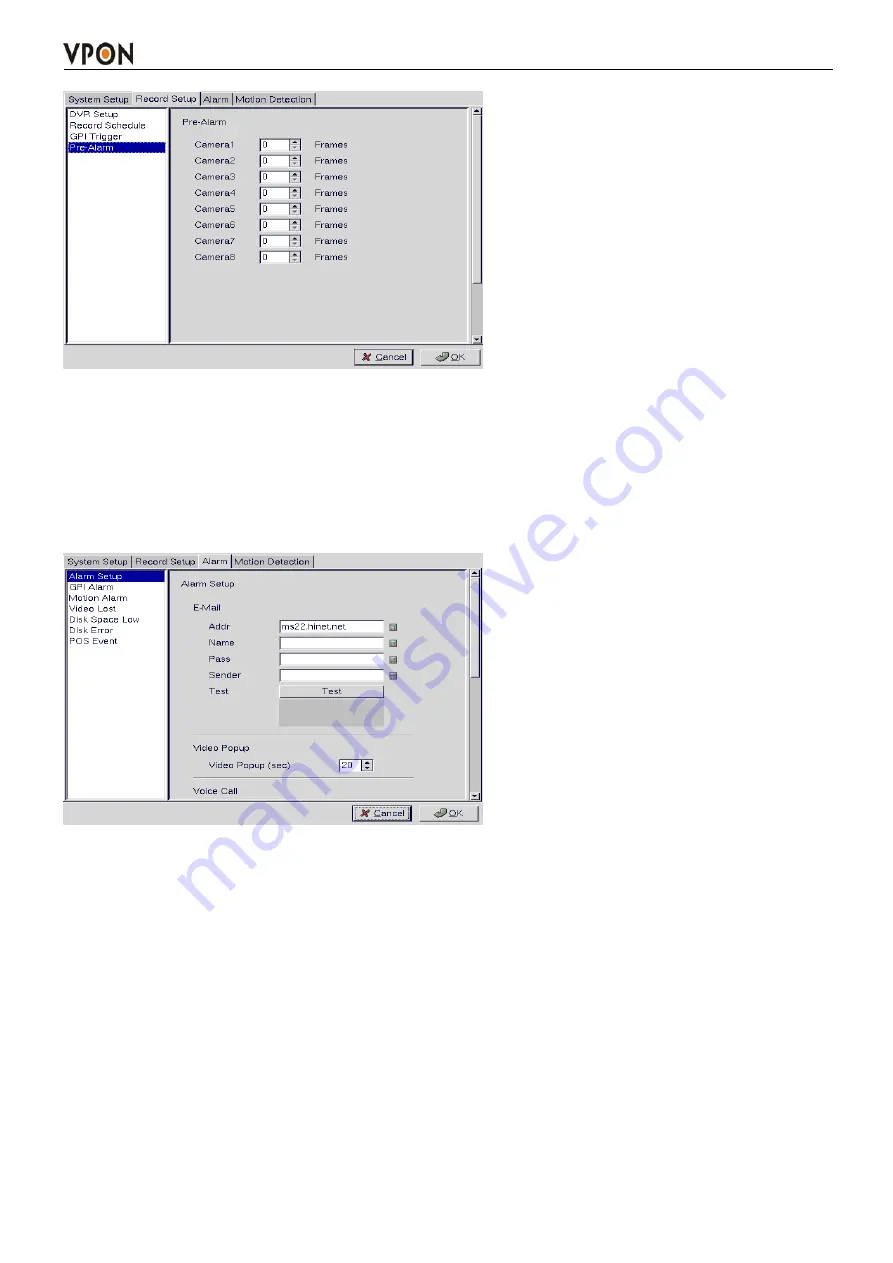
3.17.1  Alarm setup 

Use the Alarm Setup menu under the Alarm tab to define what action is taken when an alarm is triggered. 

Through this menu, you can set up an E-mail address to which an E-mail is sent when the alarm is 

generated, or set up the device to display a video popup message on your monitor, or place a voice call. 


The Voice Call options enable you to set up a voice modem that will make a call when the selected event 

(such as a GPI alarm, or video lost from a camera) occurs. Set the following options: 

Redial -

sets the number of times the voice modem will redial 

Voice Repeat -

sets the number of times the voice message is repeated on the voice call 

Rec. Time -

sets the time for which audio is recorded 

Modem Speaker -

sets the internal or external speaker to be used 

Voice File -

selects the voice file to be sent 

Edit File Name -

enables you to change the file name of the voice file 

Use the keyboard or mouse (recommended) to complete all fields and click OK to save changes. Refer to 

the following sections to see how to select the voice call as the action for specific events such as GPI 

alarm and so on. 

Note: The Voice Call options will be grayed out in the menu system if the voice modem function is 

not selected in the serial port setup menu. Make sure that a voice modem is enabled in device field 

Содержание VP-404

Страница 1: ...Network DVR System Your best choice for digital video recording and remote surveillance VP 404 4048 User Manual Version V2 0 www vpon21 com...

Страница 2: ...nd equilateral triangle alerts the user to the presence of a shock hazard within the product s enclosure CE Warning FCC Warning GUARANTEE Every care has been taken in the preparation of this manual if...

Страница 3: ...3 Set up Video Quality 8 3 4 I O button 9 3 5 POS button 9 3 6 PTZ Control panel 9 3 7 Play button 10 1 play buttons 12 2 Split screen display buttons 12 3 Brightness Contrast Sharpness Digital Zoom i...

Страница 4: ...15 20 Network neighbor 29 3 15 21 System log 30 3 15 22 Alarm log 30 3 15 23 Configuration 30 3 15 24 Default settings 31 3 15 25 Revise firmware 32 3 15 26 Reboot system 32 Record setup 3 16 1 DVR s...

Страница 5: ...13 Alarm 52 Motion Detection 52 E mail 52 Video Popup 53 Voice Call 53 Set Action MD Video lost Disk space low Disk error Pos 54 4 3 14 ISP 54 4 3 15 Registry server 55 4 3 16 Running mode 56 4 3 17...

Страница 6: ...6 4 Set time and date 71 5 6 5 Set NTP server 72 5 6 6 System configuration 72 5 6 7 Set Serial ports 72 5 6 8 Set pos 73 5 6 9 Alarm and remote control 73 5 6 10 Set names and on screen display 74 5...

Страница 7: ...82 6 5 Using xDSL or cable Internet 82 6 6 Using PPPoE 82 6 7 Using dial up Internet 83 6 8 Remote access using dial up 83 Appendix Appendix A Operation via local keyboard I Appendix B IrDA mode IR R...

Страница 8: ...ol unit optional is included to make setup and operation as trouble free as possible 1 2 System requirements Cameras Composite CCD V8 or camcorder NTSC or PAL standard Network equipment RJ 45 Ethernet...

Страница 9: ...rm control Customization HTML file upload support for home page customization FTP server upload support for customization FW1 3 New Features Point of sales DVR Integration USB mouse support SATA HDD s...

Страница 10: ...provide RS 232 serial connection for VP404 4048 unit configuration or modem ISDN connection COM2 Port provides RS 485 serial connection for camera PTZ control E Network connector RJ 45 connector is fo...

Страница 11: ...4 1 5 About the GUI The VP 404 4048 can be configured and operated using either the local GUI or over a network 1 5 1 The local GUI 1 5 2 The network GUI...

Страница 12: ...e power switch on the rear of the unit and the switch on the front panel Note The default startup mode for the VP 404 4048 is mouse control mode This can be changed by setting the Running Mode option...

Страница 13: ...remote control running mode to mouse running mode 1 Press the Menu button on the remote control to display the setup menu on screen 2 Use the up and down arrow buttons to highlight the Running Mode op...

Страница 14: ...al hard disk size and LAN status Camera status R M Color Recording Mode Gray No video signal Blue No recording Red Full recording G Color Status of each DI and DO device Gray DI or DO not detected Red...

Страница 15: ...utton to set all the video parameters for the cameras connected to the VP 404 4048 1 First please change to single screen as following 2 Press the set quality button you can see the Brightness Contras...

Страница 16: ...ted will show the status of the input or output device Colors will change on the GPIO panel when the corresponding GPIO points are activated 3 5 POS button Click the POS button and the screen will sho...

Страница 17: ...D menu to control PTZ The button is ok button is cancel Pan and tilt buttons Adjust the pan and tilt of the selected camera include 45 degree directional PTZ control at upper right upper left button r...

Страница 18: ...g file Step1 Select a date from calendar Step2 Select an hour from time line Step3 Select camera to playback Step4 Click anywhere on recording data score bar to start playback from the required point...

Страница 19: ...h split screen is displayed on screen Selectable 4 9 16 split screen display The arrow buttons to cycle through all connected cameras 3 Brightness Contrast Sharpness Digital Zoom in playback When paus...

Страница 20: ...k from that point 3 8 Bookmark User can have bookmarks at the specific time during playback 3 9 Alarm log Any alarm will be written into alarm log including motion trigger GPIO trigger Disk error Vide...

Страница 21: ...time and camera 2 Using a simple time selector and built in image viewer you can check out the results with the built in viewer Previous Search forward Next Search backward Zoom in The whole Thumbnail...

Страница 22: ...c area of motion or a GPI Trigger that occurred within the specified time interval Search by GPI Trigger 1 Rule Selection choose one of GPI 1 16 2 All Time Range Select All Time Range Today Yesterday...

Страница 23: ...day Yesterday or User Define for quicker searching 2 Click ok to start search motion files in that specific time 3 And then define search area 4 Click ok to start searching motion files in that specif...

Страница 24: ...n of specified text 1 After define POS text select search starting time and camera 2 Search results are as follow Note Click the search result list button to playback the pos data Previous search resu...

Страница 25: ...Password Protect The Password Protect screen helps you to enable password protection set administrator and user passwords set the auto lock period and lock the system immediately Enabling password pro...

Страница 26: ...to enter characters for the required field 3 15 2 Video The Video menu enables you to set video parameters such as the video standard and so on for each of the connected cameras Select the camera from...

Страница 27: ...e VP 404 4048 over the Internet Set to zero to allow the maximum number of connections Max Bandwidth sets the maximum bandwidth in bytes second that can be used by users connecting to the VP 404 4048...

Страница 28: ...sks that the DVR uses to record data If no disk is connected No Device appears in the Disk Device field Use keyboard or mouse to enter the IP address and Volume of any connected network disk Click on...

Страница 29: ...could result in the display becoming unreadable and very difficult to correct 3 15 6 OSD Text Use the OSD Text menu to assign text for each of the connected cameras For instance you may like to have...

Страница 30: ...e GPI and GPO that are connected will show the status of the input or output device GPI devices will show NC normally closed or NO normally open as the status of the switch Depending on the input you...

Страница 31: ...nd playback files Use the More Users field to change the authorities of Internet users 3 15 10 Audio Use the Audio menu to set parameters such as Mic Gain Speaker Mic Timeout and Speaker Timeout You c...

Страница 32: ...meters TCP IP properties firmware information and so on on the screen There are no configurable fields on this page Click OK or Cancel to leave the screen 3 15 13 Date Time Use the Date Time menu to s...

Страница 33: ...t Service Provider 3 15 15 Registry The Registry menu enables you to set up the registry server for your device If you are using a dynamic IP address for the VP 404 4048 you can set up the device to p...

Страница 34: ...ch between Network Mode and ISP Mode and between Mouse Mode and IR Remote Control Mode 3 15 17 Algorithm H 263 frame size is small and suitable for Network surveillance MPEG4 Video quality good and fr...

Страница 35: ...in a key pro you don t need to key in the license number again in the license setup menu 2 There are three POS License to three levels Level 1 Single POS unit Can connect ONLY one cash register Singl...

Страница 36: ...6 Back to the live display Click POS button to display the POS Panel You can try to send out some data from POS machine then POS text should show up with video 3 15 20 Network Neighbor User can copy t...

Страница 37: ...ic time 3 15 23 Export system configuration User can backup or restore system record alarm and motion detection setup data Backup configuration data 1 Connect a USB flash to DVR for backup or restore...

Страница 38: ...enu to ask you to over write data Select ok to start to restore configuration data 4 When restore data action was done system will ask you to reboot DVR Press ok to reboot DVR 5 After restart DVR user...

Страница 39: ...ent settings 3 15 25 Revise firmware Use the Revise Firmware menu to upgrade the VP 404 4048 firmware Click Revise Firmware Yes No to start the firmware upgrade process Click Cancel or No to abort the...

Страница 40: ...s when disk space runs out Cyclic Recording continues to record until disk space runs out and then overwrites the oldest records Click OK to save changes 3 16 2 Record schedule Use the Record Schedule...

Страница 41: ...to record video from a camera installed at your front door when the door lock is opened In this case connected an alarm module not provided to lock and set the front door camera to start recording 3 1...

Страница 42: ...ice modem will redial Voice Repeat sets the number of times the voice message is repeated on the voice call Rec Time sets the time for which audio is recorded Modem Speaker sets the internal or extern...

Страница 43: ...swered The VP 404 4048 does not support non standard ringing tones If the VP 404 4048 calls a phone and an unexpected tone is received an error message will be generated POS event User can specify any...

Страница 44: ...captured from the POS machine you should check what text will be sent from the POS machine then set appropriate text in POS Event 3 17 2 GPI alarm Use the GPI Alarm menu under the Alarm tab to set wha...

Страница 45: ...changes 3 17 4 Video lost Use the Video Lost menu under the Alarm tab to set what actions are taken when video signal from a camera is not available You can set up the alarm through a message a beep a...

Страница 46: ...here is an error while accessing the disk You can set up the alarm through a message a beep a video popup or E mail Use the keyboard or mouse recommended to complete all fields as described in GPI ala...

Страница 47: ...2 Enable Yes No Turn On Off the motion detection 3 Sensitivity Select motion sensitivity level 4 Directly drag the square on the screen to a desired location for Motion Detection Each small square on...

Страница 48: ...reen Use the Up and Down arrow buttons to select one of the four options and press OK button to confirm your choice 4 3 System setup The System Setup menu enables you to change many different paramete...

Страница 49: ...ssword User Pass sets the user password Auto lock After enables password protection after the specified time interval Lock Now enables password protection immediately To set the user or admin password...

Страница 50: ...stem immediately 1 Highlight the Lock Now Function in the Password Protect menu 2 Use the Left or Right arrow buttons to confirm the operation 4 3 2 Video Use the Video menu to set all the video param...

Страница 51: ...maximum connections Dimension sets 320x240 or 640x480 resolution for each camera Water Mark Sets water mark on the video image Local Display enables viewing the selected camera video signal on the lo...

Страница 52: ...iew of the subject FOCUS adjust the focus of the camera Speed Adjust the speed of the selected PTZ camera Pan and tilt Adjust the pan and tilt of the selected camera 4 3 3 Video input This function is...

Страница 53: ...Test option 2 Press the OK button to confirm the choice The test result will appear on the screen To save disk parameters 1 Use the Up and Down arrow buttons on the remote control to highlight the Sav...

Страница 54: ...sing the value of Y moves the text down the screen Increasing the value of X moves the text to the right To alter the text position 1 Use the Up and Down arrow buttons on the remote control to highlig...

Страница 55: ...ough Microsoft Windows network neighbor Then user can copy files in that directory to PC or do remote back up automatically if user has the proper software installed on the PC Note when you setup serv...

Страница 56: ...ntrol to display the on screen keyboard 4 Use the Arrow buttons to select the letters you require and the OK button to confirm 5 When the field is correct press the Key Pad button to turn off the on s...

Страница 57: ...ne and speaker Camera setup which camera mapping to which audio channels Audio1 is the audio input from motherboard The other audio inputs are from video capture card Note Make sure that audio is enab...

Страница 58: ...buttons to cycle through the available options for that field 3 Press the OK button when the field is set correctly Note 1 You can use the Prev Page and Next Page buttons on the remote control to tog...

Страница 59: ...there is a disk error or if pos event Once the alarm is generated you can set the alarm notification through a beep a message a video popup voice call or E mail The Alarm menu has the following subme...

Страница 60: ...ht arrow button to increase the time 3 Press the OK button to save your settings The Voice Call options enable you to set up a voice modem that will make a call when the selected event such as a GPI o...

Страница 61: ...Set Action option to define what action is taken by the VP 404 4048 when an event occurs The following options are available Video Lost generates an alarm when the video from the selected camera is n...

Страница 62: ...ption To enter ISP details 1 Use the Up and Down arrow buttons to select a field to change 2 Press the Right arrow button to confirm 3 Press the Key Pad button on the remote control to display the on...

Страница 63: ...d Down arrow buttons to select a field to change from the Algorithm menu 2 Use the Right and Left arrow buttons to toggle the available options 3 Press the OK button when the fields are set correctly...

Страница 64: ...menu Use the License menu to key in the license number There are three POS License to three levels Level 1 Single POS unit Can connect ONLY one cash register Single POS only one cash register This le...

Страница 65: ...rol 2 Use the Left and Right buttons to select either Cyclic Recording or Auto Stop 3 Press the OK button to save changes 4 4 2 Record schedule You can set up to 16 record schedules that automatically...

Страница 66: ...the Motion Detection option from the Alarm menu and press the OK button 2 When the motion detection menu appears uses the Up and Down Arrow buttons to select one of the following options Enable confi...

Страница 67: ...tails if you want an E mail to be sent when an alarm occurs 4 4 4 GPI Trigger Use the GPI Trigger function to enable recording video from specified cameras when triggered by an external alarm GPI conn...

Страница 68: ...Use the Up and Down arrow buttons to select a recording to play back The alarm condition which caused the file to be recorded is indicated in the list For instance in the screen shot shown here the l...

Страница 69: ...he next motion detection or alarm trigger event press the Right Left arrow buttons Motion Detection The yellow bars represent where motion detection was set off Searching for a file The VP 404 4048 pl...

Страница 70: ...the Up or Down arrows 5 Modify the settings as required using the Left and Right arrow buttons Note If you select the Search by Event option choose an event from GPI 1 16 If you choose the Select by T...

Страница 71: ...e The VP 404 4048 will begin to collect data as soon as the above screens are displayed When the required data has been collected the backup can begin 4 6 System Maintenance Press the Menu button on t...

Страница 72: ...of the searching way user can see the log and press ok button to enter submenu to get more detail information of log 4 6 2 System log Any operation will be written into system log include local operat...

Страница 73: ...ns to select either Backup or Restore Configuration 4 6 5 Revise firmware Use the Revise Firmware option to upgrade the firmware in the VP 404 4048 The firmware can be revised through an external read...

Страница 74: ...ork running mode To access the VP 404 4048 from remote browser 1 Open a browser window on a terminal that has network access to the VP 404 4048 2 Type the IP address of the VP 404 4048 in the browser...

Страница 75: ...he Surveillance Screen Panel is very similar to the one on the local GUI See Surveillance screen panel on page 6 There is no Sequence button on the network GUI This feature is only available on the lo...

Страница 76: ...and date in the From field and clicking Play file on this time Search for files between particular times and dates by entering the dates in the To and From fields and clicking Query 5 5 PTZ panel The...

Страница 77: ...Information page No information on this page is changeable 5 6 2 Camera setting Use the Camera Setting page to change the video settings for each of the connected cameras Refer to Video on page 18 fo...

Страница 78: ...ne which audio mapping to which camera Audio1 is audio input from motherboard Other audio inputs are from video capture cards Audio out is from motherboard 5 6 4 Set time and date Use the Set Time and...

Страница 79: ...iguration page to set the following parameters for the VP 404 4048 Running mode sets the operation and control mode TCP IP setting configures TCP IP Fill in the IP address and subnet mask settings ISP...

Страница 80: ...serial Ports menu to set the following parameters Click the Done button to save the new settings 5 6 9 Alarm and remote control GPI devices will show NC normally closed or NO normally open as the sta...

Страница 81: ...t appears on the display for each camera 5 6 11 Set user s authority Use the Set User s Authority page to set the individual privileges of up to 256 users Enter the user number in the User field Assig...

Страница 82: ...ed Enable Audio if you want to record audio also Weight recording is setting special recording frame rate when an alarm of one of camera was triggered Select a Frame Rate of recording for each camera...

Страница 83: ...e for recording the Trigger Click Done button to save the new setting 5 6 16 Set Pre Alarm The Set Pre Alarm page on the network GUI enables you to set the number of frames that are recorded from each...

Страница 84: ...ick Download Save to save the video recording to your local disk Select Data Motion or GPI to view the status of the recorded file and the instances where the recording was triggered by motion detecti...

Страница 85: ...s subject and content of the E mail Enable a snapshot of the camera video to be attached to the E mail by selecting cameras in the Snapshot option Under the Global Settings fill in the mail server det...

Страница 86: ...video to be uploaded by selecting cameras in the Snapshot option 5 6 21 Alarm log Any alarm will be written into alarm log including motion trigger GPIO trigger Disk error Video loss POS event etc Use...

Страница 87: ...5 6 25 View video without plug ins You can view video even if the machine you are working on does not have the plug ins necessary for video monitoring Click the View Video Without Plug ins link to vie...

Страница 88: ...a applet to display the video 6 2 Configuring Static IP addresses Static IP addresses can be public or private Public IP addresses allow access to the VPON from the Internet Private IP addresses only...

Страница 89: ...6 Using PPPoE If your xDSL or cable router uses PPPoE an IP sharing router is required as the VPON does not support PPPoE Regardless of whether you use a static IP address or a dynamic IP address you...

Страница 90: ...may cause internet drop down 6 8 Remote access using dial up You can access the VPON remotely without the Internet by using a dialup modem The VPON must be working under Network mode 1 Connect a dial...

Страница 91: ...or F5 to play the video 4 F3 Local view live image immediately When pressing F3 users can view the live image immediately 5 F4 Screen Press F4 to switch display setting from Single Quad 8 splits and 1...

Страница 92: ...Besides when playback the video users can press Enter to continue or pause the playing 18 Up Down Left Right Button When pressing these buttons users can control the directions of cameras or adjust t...

Страница 93: ...the next or previous screens K OK button Sets the settings L Keypad button Brings on screen the keypad function M Mode Switch button Remote Playback and Local buttons allow users to switch the display...

Страница 94: ...his http VPON IP revise htm 3 Browse for the saved copy of the updated firmware and click revise program then start to the update process 4 The VPON will reboot automatically after the revision is com...

Страница 95: ...wing Appendix F NET I O optional One VPON DVR can offer to connect sixteen cash registers We provide two devices to connect DVR and cash registers one of device is VP 204 NET I O device for connecting...

Страница 96: ...ta capture 6 VP204 1 Speed Select the same Baud rate as your POS machine 7 VP204 1 Camera Select the camera channel that you wish POS transaction data to integrate with Select Rescan option and select...

Страница 97: ...this IP again If there is a response then you have a duplicated IP address on the network Clear your browser cache and configure the browser to check for newer versions of the web page on every visit...

Отзывы: