


257
Product Manual
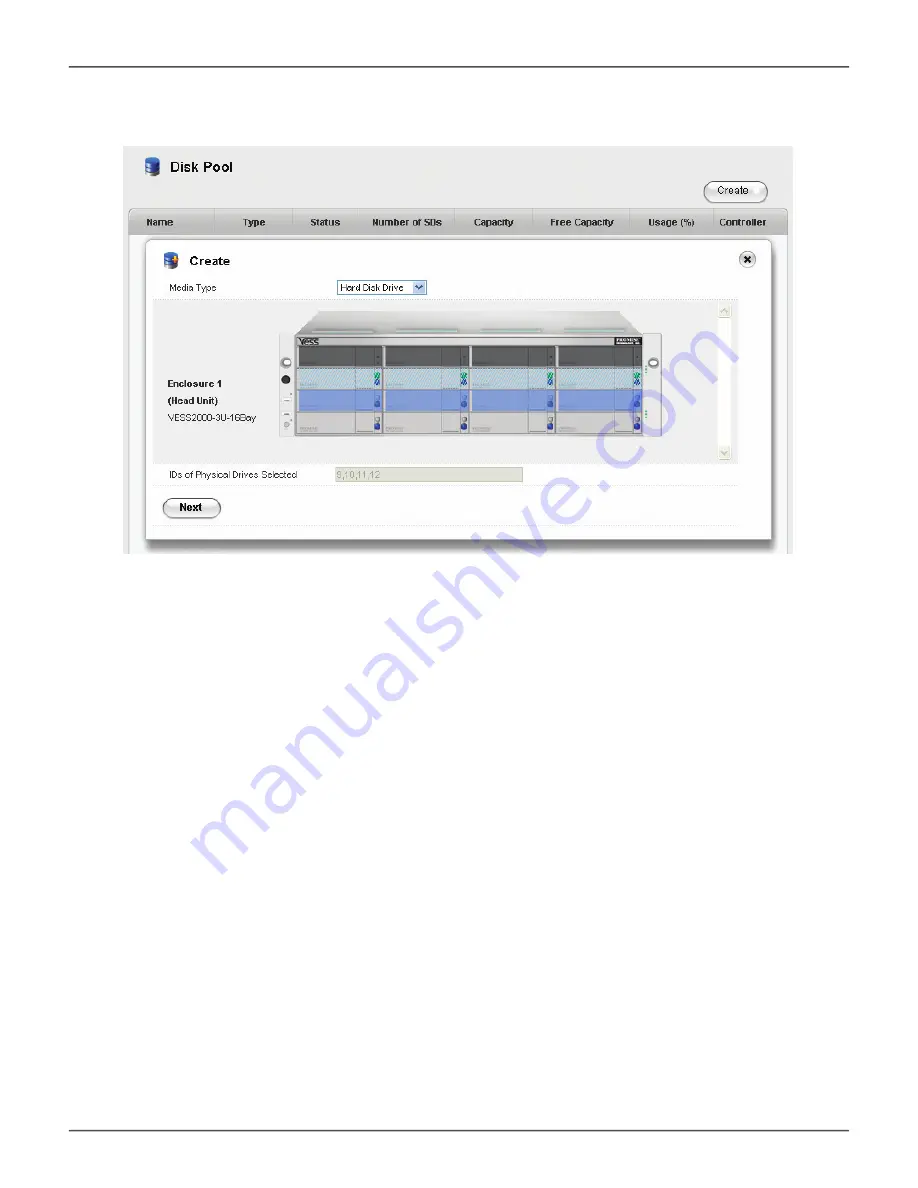
3. Click on the
Create
button, the
Create Disk Pool
menu displays.
4. The Create Disk Pool menu displays a virtual front of the Vess R2000 enclosure. Hard disk drives that are
unavailable for use appear colored in light blue shading (see example above). Hard disk drives that are
available for the Disk Pool appear with the power LED lighted on and without any shading (HDDs 13 - 16
in the above example).
5. Choose the hard drives to use for the Disk Pool being created and click the
Next
button. A new menu
appears. Note that selected hard disk drives appear purple color after selection.
6. In the new menu, enter a name for the
Disk Pool
and select a
RAID Level
from the pull-down menu.
The RAID level options available depend on the number of hard disks in the Disk Pool.
7. Click on the
Apply
button to create the new Disk Pool. The newly created Disk Pool appears listed in
the main Disk Pool menu. The amount of time needed for initialization of the Disk Pool depends on its
capacity.
Create Disk Pool main menu (Choose drives for Disk Pool)
Содержание R2000 SERIES
Страница 1: ...ProductManual ...
Страница 2: ...Vess R2000 Series Product Manual Version 2 0 2014 PROMISE Technology Inc All Rights Reserved ...
Страница 79: ...iSCSI SAN data and management connections 52 Vess R2000 Series Product Manual Promise Technologies ...
Страница 81: ...iSCSI DAS data and management connections 54 Vess R2000 Series Product Manual Promise Technologies ...
Страница 83: ...Vess R2600i with SAS JBOD expansion 56 Vess R2000 Series Product Manual Promise Technologies ...
Страница 151: ...124 Vess R2000 Series Product Manual Promise Technologies Topology display ...
Страница 302: ...275 Product Manual NAS Function and Management Redundancy with port configuration ...
Страница 704: ... 2014 PROMISE Technology Inc All Rights Reserved ...


