


7 Start-up
26
Installation and maintenance instructions auroCOMPACT 0020181589_04
7.12
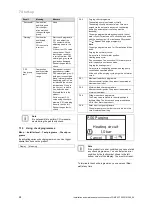
Reading off the filling pressure
The unit comes with a bar chart showing the pressure and a
digital pressure display.
▶
To read off the digital filling pressure value, press the
button twice.
For the heating installation to operate properly, the bar chart
in the display must remain roughly in the centre (between the
dotted limit values). This corresponds to a filling pressure of
between 100 kPa and 150 kPa (1.0 bar and 1.5 bar).
If the heating installation extends over several storeys,
higher filling pressures may be required to avoid air entering
the heating installation.
7.13
Preventing low water pressure
To prevent damage to the heating installation that is caused
by low filling pressure, the product is fitted with a water pres-
sure sensor. If the water pressure falls below 80 kPa (0.8
bar), the unit indicates low pressure by displaying a flashing
pressure value. If the filling pressure falls below a value of 50
kPa (0.5 bar), the unit switches off. The display shows
F.22
.
▶
Top up the heating water to start the product up again.
A flashing pressure value is shown in the display until a pres-
sure of 110 kPa (1.1 bar) or higher has been reached.
▶
If you notice frequent drops in pressure, determine and
eliminate the cause.
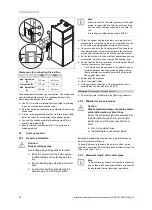
7.14
Filling and purging the heating installation
Preliminary work
▶
Flush the heating installation thoroughly before filling it.
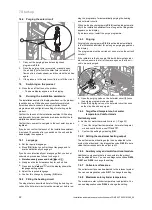
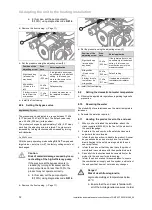
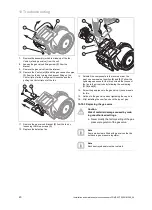
1
1.
Loosen the cap of the automatic air vent
(1)
by one to
two rotations and leave it in this position, as the unit
automatically purges itself in this way during operation.
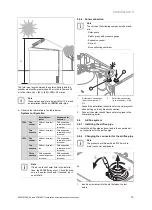
2.
Select the check programme
P.06
.
◁
The 3-way valve moves to the mid-position, the
pumps do not run and the unit does not switch to
heating mode.
3.
Observe the information on the topic of treating
(
→
Page 25) heating water.
4.
Connect the heating installation's filling cock on the con-
nection accessory to a heating water supply in accord-
ance with the relevant standards; fit a cold water valve
where possible.
5.
Supply the heating circuit with water.
6.
Open all thermostatic radiator valves.
7.
Check whether the stop cocks for the heating flow and
return are open.
8.
Slowly open the combined filling and emptying valve to
allow water to flow into the heating circuit.
9.
Purge the highest radiator and wait until water flows out
of the purging valve without bubbles.
10. Purge all other radiators until the entire heating system
has been filled with water.
11. Close all purging valves.
12. Fill with water until the required filling pressure is
reached.
13. Close the combined filling and emptying valve and the
cold water valve.
14. Check all connections and the entire system for leaks.
15. To purge the heating installation, select the check pro-
gramme
P.00
.
◁
The unit does not switch on, the internal pump runs
intermittently and enables the circuit to be purged.
◁
The display shows the filling pressure of the heating
installation.
16. To be able to carry out the purging process properly,
ensure that the heating installation filling pressure is
above the minimum filling pressure.
–
Minimum heating installation filling pressure: 80 kPa
Note
The check programme
P.00
runs for 7.5
minutes in the hot water circuit and for 2.5
minutes in the heating circuit.
At the end of the filling process, the filling
pressure of the heating installation should
be at least 20 kPa (0.2 bar) above the coun-
terpressure of the expansion vessel (Exp)
(P
Installation
≥
P
Exp
+ 20 kPa (0.2 bar)).
17. If there is still too much air in the heating installation at
the end of the check programme
P.00
, restart the check
programme.
18. Check that all connections are leak-tight.
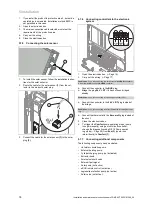
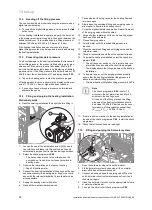
7.15
Filling and purging the hot water system
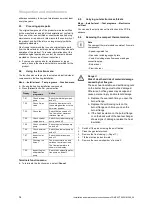
1
1.
Open the cold water stop valve on the product.
2.
Fill the hot water system by opening all the hot water
draw-off valves until water escapes.
3.
Connect a hose and open the purging valve
(1)
on the
unit's hot water circuit until water escapes from it, and
then close it again.
4.
Close the hot water valves once the appropriate volume
of water has flowed out.
5.
To purge the circuit, start check programme
P.00
.


