


7 Start-up
22
Installation and maintenance instructions auroCOMPACT 0020181589_04
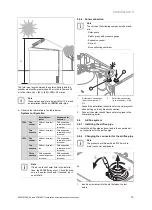
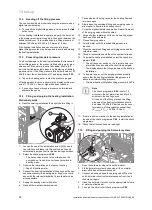
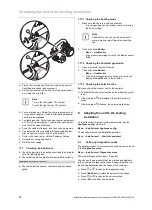
7.4.4
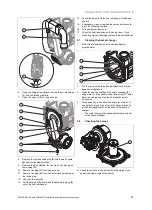
Purging the solar circuit
1
1.
Carry out the purging procedure using check
programme
P.08
.
2.
Once the purging cycle is complete, manually open
the air trap
(1)
, wait until the solar fluid is clear and
flows out in a steady stream, and then close the air trap
again.
3.
If the pressure in the solar circuit is low, refill the circuit.
7.5
Switching on the product
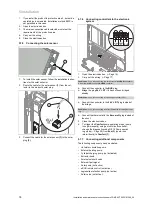
▶
Press the on/off button on the product.
◁
The basic display appears on the display.
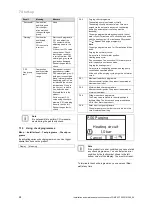
7.6
Running the installation assistants
The installation assistant is displayed whenever the product
is switched on until it has been successfully completed.
It provides direct access to the most important check
programmes and configuration settings for starting up the
product.
Confirm the launch of the installation assistant. All heating
and domestic hot water demands are blocked whilst the in-
stallation assistant is active.
Confirm that you want to navigate to the next point by press-
ing
Next
.
If you do not confirm the launch of the installation assistant,
it is closed 10 seconds after you switch on the unit and the
basic display then appears.
7.6.1
Language
▶
Set the required language.
▶
Press (
OK
) twice to confirm the set language and to
avoid unintentionally changing it.
If you have unintentionally set a language that you do not
understand, proceed as follows to change it:
▶
Simultaneously press and hold
and
.
▶
Also press the fault clearance key for a short time.
▶
Press and hold
and
until the display shows the
language setting option.
▶
Select the required language.
▶
Confirm this change by pressing (
OK
) twice.
7.6.2
Filling the heating circuit
The steps that are described here for filling the heating cir-
cuit and the hot water circuit must be carried out before run-
ning the programme for automatically purging the heating
and hot water circuits.
Filling mode (check programme
P.06
) is activated automatic-
ally in the installation assistant for as long as the filling mode
appears on the display.
If problems occur, restart the purge programme .
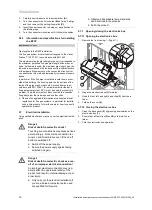
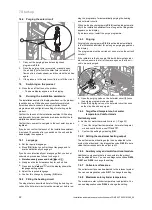
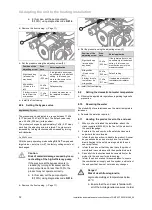
7.6.3
Purging
Purging (check programme
P.00
) is activated automatically
in the installation assistant for as long as purging appears on
the display.
The programme must be carried out once or else the unit will
not start.
If the radiators in the house are fitted with thermostatic radi-
ator valves, ensure that all of them are open so that the cir-
cuit is properly purged.
1
▶
Open the purging valve on the hot water circuit
(1)
once
the purging programme has ended.
▶
Close the purging valve on the hot water circuit as soon
as the circuit has been purged.
7.6.4
Target feed temperature, hot water
temperature, Comfort mode
Preliminary work
▶
Set the hot water thermostatic mixer. (
→
Page 33)
1.
To set the target flow temperature, hot water temperat-
ure and comfort mode, use
and
.
2.
Confirm the setting by pressing (
OK
).
7.6.5
Setting the maximum heating output
The unit's maximum heating output can be adjusted to the
system's heat demand. Use diagnostics code
D.000
to set a
value that corresponds to the output in kW.
7.6.6
Auxiliary relay and multi-functional module
Additional components that are connected to the product
can be adjusted here. You can use diagnostics codes
D.026
,
D.027
and
D.028
to change the setting.
7.6.7
Collector surface area
The collector surface can be adjusted to the relevant system.
You can use diagnostics code
D.217
to change the setting.
7.6.8
Maximum solar cylinder temperature
The maximum solar cylinder temperature is adjustable. You
can use diagnostics code
D.206
to change the setting.


