


Prima IP KVM Switch User Guide R1.4
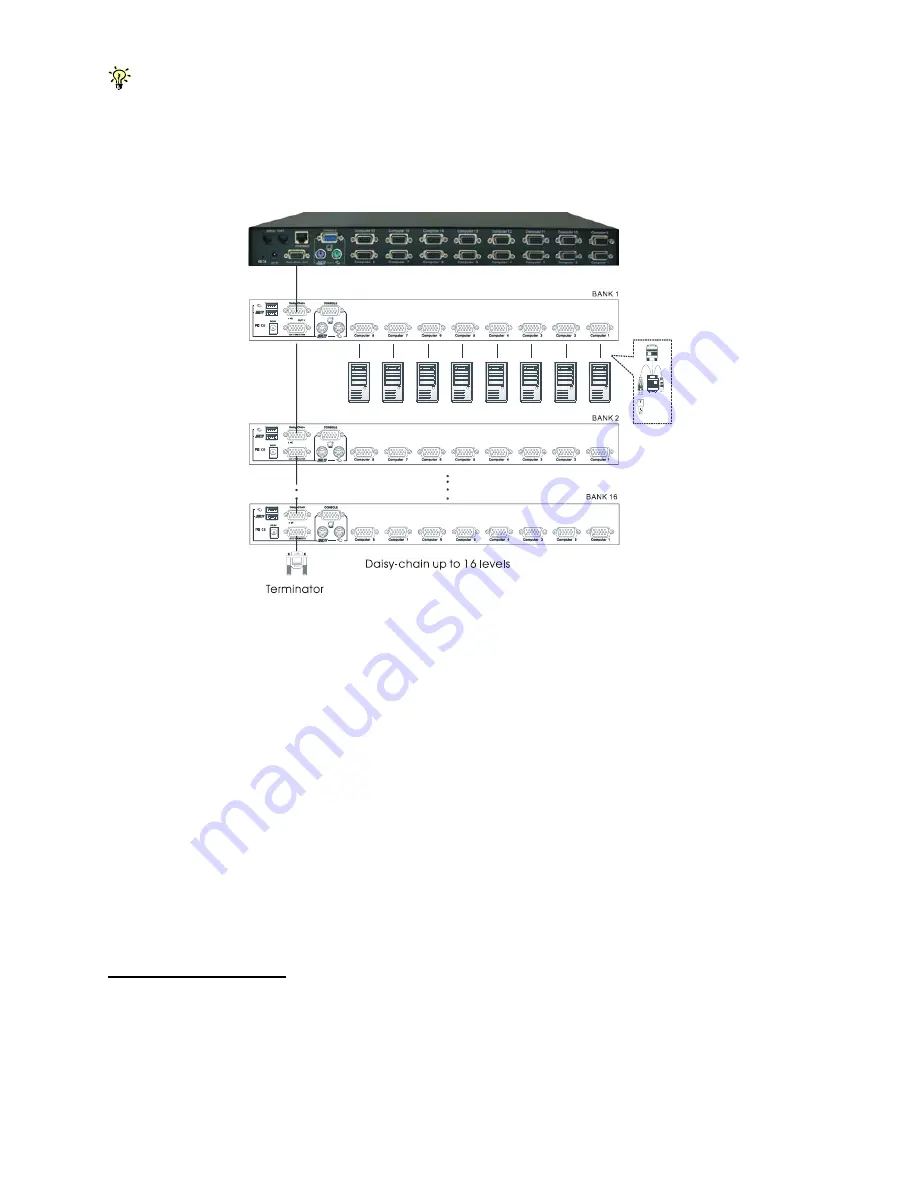
The special Combo-free KVM cable provides a PS/2 keyboard connector, a USB connector and
a HDB video connector for the computer connection. When connecting with a USB computer, just
plug the USB connector to it and leave the PS/2 connector free. When connecting with a PS/2
computer, just add one USB-to-PS/2 adapter to the USB connector and you’ll have a PS/2
connector for mouse. DO NOT try to connect both USB connector and PS/2 keyboard
connector to a computer at the same time.
Step 4. Boot up connected computers (if they are not powered-on yet): After the
computers has booted. Then, you can go forth to verify the connections with each of the
connected computers. On the Prima local console you should switch to every computer and verify
that the keyboard, mouse and monitor are all working on each of the connected server(s).
Now that you have set up your local console on
Prima IP
, you can now configure your
connected servers just by using the ready access provided by
Prima IP
’s local console.
2.3
Configure Your Servers for Connections to
Prima IP
Mouse acceleration is not supported in Prima IP. Therefore, you must turn off mouse
acceleration on all your connected servers.
Turn off mouse acceleration & “Snap to” option
Windows XP Platform
Access
Control Panel Mouse
. On the
Mouse Properties
tab, select the
Pointer Options
page :
/
1.
Adjust the pointer speed slide bar to the exact middle.
2.
Uncheck the
Enhance pointer precision
option.
3.
Uncheck the
Automatically move pointer to the default button in a dialog box
- -
14


