OPERATOR’S MANUAL
120 / SENSOR SETUP
ISO
6
Version 4 UL 2_3 Manual
6011258 Rev C
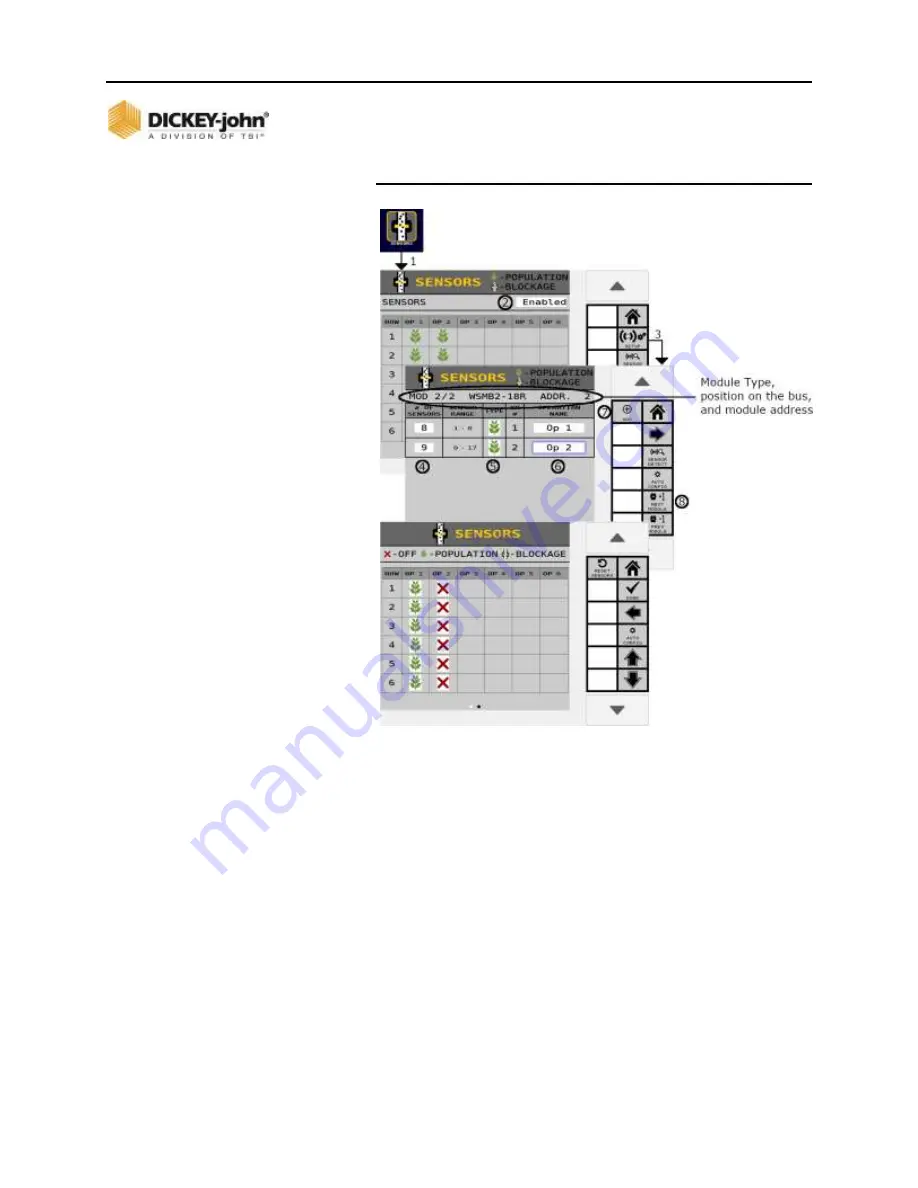
Figure 86
Assigning Sensors to ISO
6
Module
8. After all sensors are entered, press the Arrow button to
navigate to the next screen.
9. Press the
AUTO CONFIG
button to auto-assign sensors to
the operations.
-
A sensor’s position is indicated in the operation column it
is assigned to with an “X” indicating the sensor is off.
-
Sensors may be assigned manually by pressing the icon
in the table corresponding to the row and operation.
10. Press the Checkmark button to begin auto configuration.
-
Operation/sensor assignment does not become active
until the sensor is configured to a sensor type.
11. After configuration is complete, sensors and assignments
now display on the Sensors Summary screen as population
or blockage.
Содержание DICKEY-john INTELLIAG ISO6
Страница 111: ...OPERATOR S MANUAL 106 SECTION CONTROL ISO6 Version 4 UL 2_3 Manual 6011258 Rev C Figure 71 Assigning Clutch Sections ...
Страница 115: ...OPERATOR S MANUAL 110 SECTION LINKING ISO6 Version 4 UL 2_3 Manual 6011258 Rev C Figure 74 Linking Sections ...
Страница 197: ...OPERATOR S MANUAL 192 VERSION INFORMATION ISO6 Version 4 UL 2_3 Manual 6012487 Rev A ...
Страница 205: ...OPERATOR S MANUAL 200 DIAGNOSTICS ISO6 Version 4 UL 2_3 Manual 6011258 Rev C Figure 154 Manual Open of a Channel ...


