


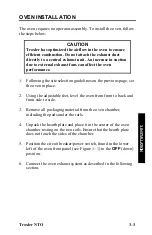


3–2
SITE SELECTION
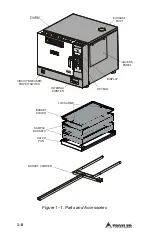
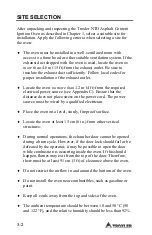
After unpacking and inspecting the Troxler NTO Asphalt Content
Ignition Oven as described in Chapter 1, select a suitable site for
installation. Apply the following criteria when selecting a site for
the oven:
♦
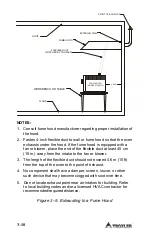
The oven must be installed in a well-ventilated room with
access to a fume hood or other suitable ventilation system. If the
exhaust duct shipped with the oven is used, locate the oven
no
more
than
4.6 m (15 ft) from the exhaust outlet. Be sure to
insulate the exhaust duct sufficiently. Follow local codes for
proper installation of the exhaust outlet.
♦
Locate the oven
no more than
1.2 m (4 ft) from the required
electrical power source (see Appendix C). Ensure that the
distance does not place stress on the power cord. The power
source must be wired by a qualified electrician.
♦
Place the oven on a level, sturdy, fireproof surface.
♦
Locate the oven at least 15 cm (6 in.) from other vertical
structures.
♦
During normal operations, the chamber door cannot be opened
during a burn cycle. However, if the door lock should fail or be
defeated by the operator, it may be possible to open the door
while combustion is occurring inside the oven. If this should
happen, flames may exit from the top of the door. Therefore,
there must be at least 91 cm (3 ft) of clearance above the oven.
♦
Do not restrict the airflow in and around the bottom of the oven.
♦
Do not install the oven near combustibles, such as gasoline or
paint.
♦
Keep all cords away from the top and sides of the oven.
♦
The ambient temperature should be between 10 and 50
°
C (50
and 122
°
F), and the relative humidity should be less than 92%.
Содержание NTO 4730
Страница 10: ...x LIST OF TABLES Table Title Page 4 1 Oven Keys 4 3 5 1 Recommended Minimum Burn Times 5 6...
Страница 30: ...2 10 NOTES...
Страница 90: ...5 36 NOTES...
Страница 110: ...6 20 NOTES...
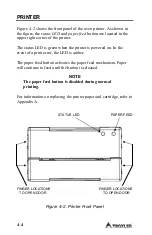
Страница 130: ...Appendix A 10 Figure A 1 Printer with Doors Open Figure A 2 Inserting the Paper Roll SPRING CLIPS...
Страница 136: ...Appendix A 16 NOTES...
Страница 148: ...Appendix C 6 NOTES...
Страница 156: ...Index 8 NOTES...
Страница 157: ...Troxler NTO Warranty 1 WARRANTY NOTES...


