


Introduction
3
Procedure
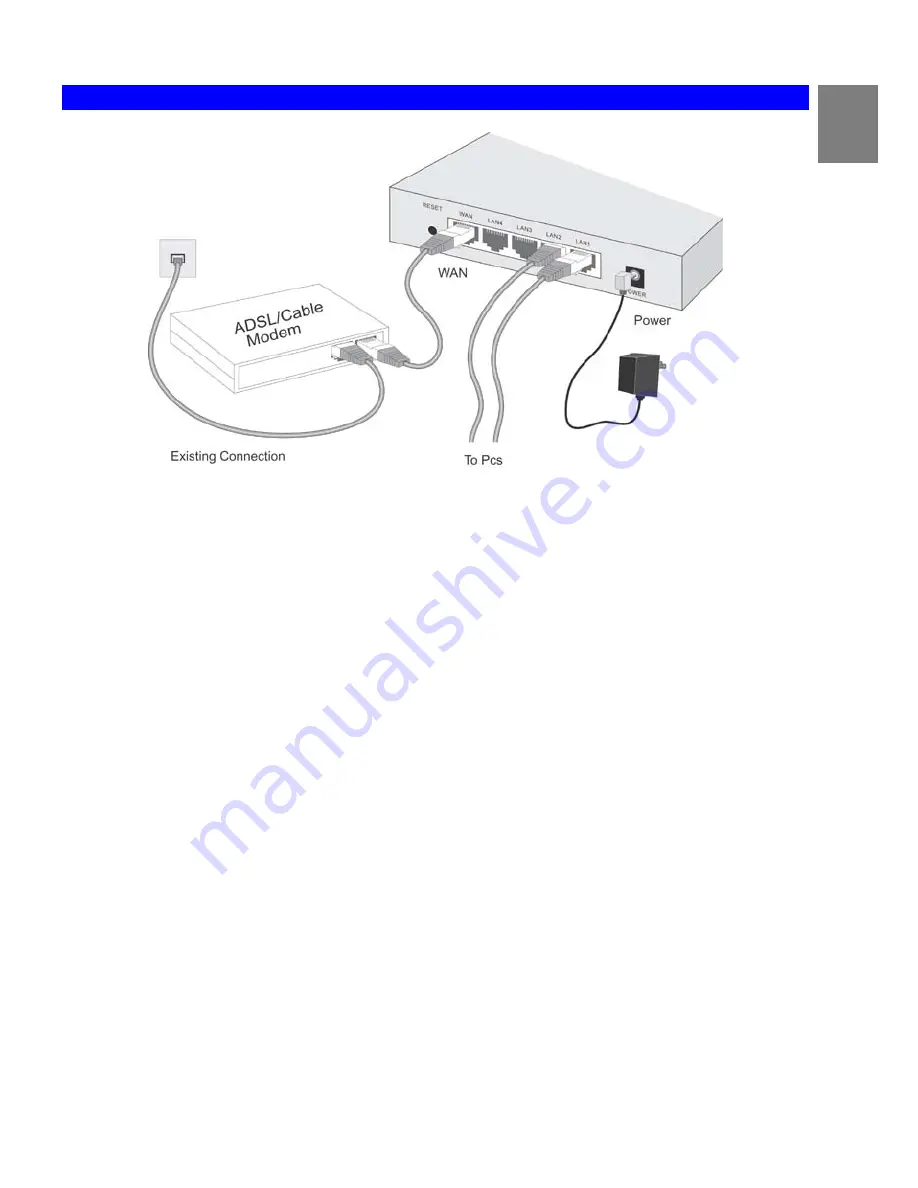
Figure 4: Installation Diagram
1. Choose an Installation Site
Select a suitable place on the network to install the Broadband Router.
Ensure the Broadband Router and the DSL/Cable modem are powered OFF.
2. Connect LAN Cables
Use standard LAN cables to connect PCs to the Switching Hub ports on the Broadband Router. Both 10BaseT and 100BaseT
connections can be used simultaneously.
If required, connect any port to a normal port on another Hub, using a standard LAN cable. Any LAN port on the Broadband
Router will automatically function as an "Uplink" port when required.
3. Connect WAN Cable
Connect the DSL or Cable modem to the WAN port on the Broadband Router. Use the cable supplied with your DSL/Cable mod-
em. If no cable was supplied, use a standard cable.
4. Power Up
•
Power on the Cable or DSL modem.
•
Connect the supplied power adapter to the Broadband Router and power up.
Use only the power adapter provided. Using a different one may cause hardware damage
5. Check the LEDs
•
The
Power
LED should be ON.
•
The
Status
LED should flash, then turn Off. If it stays on, there is a hardware error.
•
For each LAN (PC) connection, the LAN
Link/Act
LED should be ON (provided the PC is also ON.)
•
The
WAN
LED should be ON.
For more information, refer to Front-mounted LEDs in Chapter 1.
7
Содержание TWG-BRF114
Страница 1: ...i...
Страница 25: ...PC Configuration Figure 16 Windows NT4 0 DNS 23...
Страница 31: ...PC Configuration 29...
Страница 33: ...PC Configuration Before clicking Sign On always ensure that you are using the Broadband Router location 31...
Страница 43: ...Operation and Status Refresh Update the data on screen 41...
Страница 88: ...Broadband Router User Guide 86...