background image

– 113 –

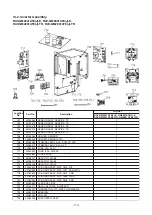
14-2. Inverter Assembly

RAV-GM2241AT8(J)-E, RAV-GM2801AT8(J)-E,

RAV-GM2241AT8(J)-TR, RAV-GM2801AT8(J)-TR

Location

No.

Part No.

Q’ty/Set

701

702

703

704

705

706

707

708

709

710

711

712

713

714

715

716

717

718

719

720

721

722

723

724

725

726

43150360

43150373

43150376

43150374

43150375

43163055

43F63325

43160565

43160579

43F60639

43160590

43160667

43158207

43158237

43158238

4316V620

4316V625

4316V693

4316V624

4316V550

43160660

43154177

43153007

43282001

43183020

43F63248

SENSOR ASSY, SERVICE, TS

SENSOR ASSY, SERVICE, TO

SENSOR ASSY, SERVICE, TE

SENSOR ASSY, SERVICE, TD

SENSOR ASSY, SERVICE, TL

HOLDER, SENSOR

HOLDER, SENSOR (TE)

TERMINAL BLOCK, 3P, AC250V, 20A

TERMINAL BLOCK, 30A, 4P

FUSE, 25A, 250V

FUSE, 6.3A, 250VAC

FUSE BLOCK

REACTOR, CH-68

REACTOR, CH-85

REACTOR, CH-90

PC BOARD ASSY, MCC-1600, N/F

PC BOARD ASSY, MCC-1597, FAN-IPDU

PC BOARD ASSY, MCC-1675, CDB

PC BOARD ASSY, MCC-1698, IPDU

PC BOARD ASSY, MCC-1646, DSP

LEAD ASSY, DSP

RELAY, 480V,20A (CONTACT)

THERMISTOR, PTC, MZ32-101RMAD01E

BUSHING

COLLAR

SUPPORTER, ASSY

 RAV-GM2241AT8(J)-E, GM2801AT8(J)-E
 RAV-GM2241AT8(J)-TR, GM2801AT8(J)-TR

1

1

1

1

1

1

1

1

1

1

3

1

1

1

1

1

1

1

1

1

1

1

1

1

1

3

Description

Содержание RAV-GM2241AT8-E

Страница 1: ...OMO FILE No A10 1901 SERVICE MANUAL AIR CONDITIONER SPLIT TYPE OUTDOOR UNIT DIGITAL INVERTER RAV GM2241AT8 E RAV GM2241AT8 TR RAV GM2801AT8 E RAV GM2801AT8 TR RAV GM2241AT8J E RAV GM2241AT8J TR RAV GM2801AT8J E RAV GM2801AT8J TR ...

Страница 2: ...407C 36 6 6 1 Basic Conditions Needed to Reuse the Existing Pipe 36 6 6 2 Restricted Items to Use the Existing Pipes 36 6 6 3 Branching Pipe for Simultaneous Operation System 36 6 6 4 Curing of Pipes 36 6 6 5 Final Installation Checks 37 6 6 6 Handling of Existing Pipe 38 6 6 7 Recovering Refrigerant 38 6 7 Charging additional refrigerant 38 6 7 1 Assumed gas leak 38 6 7 2 Limiting the additional ...

Страница 3: ... Automatic Address Example from Unset Address No miss wiring 93 10 3 Remote Controller Wiring 94 10 4 Address Setup Manual setting from remote controller 95 10 5 Confirmation of Indoor Unit No Position 96 11 REPLACEMENT OF THE SERVICE P C BOARD 98 11 1 Interface CDB P C BOARD MCC 1675 4316V693 98 11 2 Compressor IPDU P C BOARD MCC 1698 4316V624 98 12 HOW TO EXCHANGE COMPRESSOR 99 12 1 Exchanging P...

Страница 4: ...as been instructed in such matters by an individual or individuals who have been trained and is thus thoroughly acquainted with the knowledge related to this work The qualified installer that is allowed to work at heights has been trained in matters relating to working at heights with the air conditioners made by Toshiba Carrier Corporation or alternatively he or she has been instructed in such ma...

Страница 5: ... provide protection for electricians Insulating shoes Clothing to provide protection from electric shock Helmets for use in industry Shoes with additional protective toecap Gloves to provide protection for electricians Indication DANGER WARNING CAUTION Explanation Indicates contents assumed that an imminent danger causing a death or serious injury of the repair engineers and the third parties when...

Страница 6: ...get burned when removing this panel CAUTION Do not touch the aluminum fins of the unit Doing so may result in injury CAUTION BURST HAZARD Open the service valves before the operation otherwise there might be the burst Description WARNING ELECTRICAL SHOCK HAZARD Disconnect all remote electric power supplies before servicing WARNING Moving parts Do not operate unit with grille removed Stop the unit ...

Страница 7: ...eaker to the OFF position may result in electric shocks through contact with the interior parts Only a qualified installer 1 or qualified service person 1 is allowed to remove the intake grille of the indoor unit or service panel of the outdoor unit and do the work required Bef Do not turn ON the circuit breaker under the condition of removing a cabinet a panel etc Otherwise it leads to an electri...

Страница 8: ...on first put on protective gloves and safety work clothing and then proceed Do not climb onto or place objects on top of the outdoor unit You may fall or the objects may fall off the outdoor unit and result in injury When transporting the air conditioner wear shoes with additional protective toecap When transporting the air conditioner do not hold the bands around the packing carton You may injure...

Страница 9: ...omes absolutely necessary to check out the electrical parts with the electrical parts box cover of one or more of the indoor units and the service panel of the outdoor unit removed in order to find out exactly where the trouble lies place Keep out signs around the work site before proceeding Third party individuals may enter the work site and receive electric shocks if this warning is not heeded C...

Страница 10: ...d with the refrigerant abnormal high pressure generates in the refrigerating cycle resulted in cause of injury due to breakage After the installation work confirm that refrigerant gas does not leak If refrigerant gas leaks into the room and flows near a fire source such as a cooking range noxious gas may be generated Never recover the refrigerant into the outdoor unit When the equipment is moved o...

Страница 11: ...hut down set the circuit breaker to the OFF position and then wait at least 10 minutes before opening the service panel If you fail to heed this warning you will run the risk of burning yourself because the compressor pipes and other parts will be very hot to the touch In addition before proceeding with the repair work wear the kind of insulated heat resistant gloves designed to protect electricia...

Страница 12: ...ot vent gases to the atmosphere Venting gases to the atmosphere is prohibited by the law in the local regulations and laws Install the circuit breaker where it can be easily accessed by the agent Do not place any combustion appliance in a place where it is directly exposed to the wind of air conditioner otherwise it may cause imperfect combustion Prohibition Wearing of gloves Ensure wearing of glo...

Страница 13: ...V GM2241AT8J TR RAV GM2801AT8J TR Commercial name Digital Inverter Series Air Conditioner Complies with the provisions of the Machinery Directive Directive 2006 42 EC and the regulations transposing into national law Note This declaration becomes invalid if technical or operational modifications are introduced without the manufacturer s consent Specifications Model Under 70 dB A Sound presser leve...

Страница 14: ...re to check for leakage refrigerant or residual refrigerant If the leakage refrigerant comes into contact with fire a poisonous gas may occur or it may cause a fire Keep adequate ventilation during the work 4 When refrigerant gas leaks during work execute ventilation If the leakage refrigerant comes into contact with a fire a poisonous gas may occur or it may cause a fire 5 In places where install...

Страница 15: ...ng composition of the refrigerant changes and then characteristics of the air conditioner change 3 Pipe Materials For the refrigerant pipes copper pipe and joints are mainly used It is necessary to select the most appropriate pipes to conform to the standard Use clean pipes or joints to which little impurities adhere 1 Copper pipe Be sure to select the pipes with copper thickness in the table belo...

Страница 16: ...refrigerant type may cause not only damage of the equipment but also a fire etc R410A tools available Partly unavailable R410A tools unavailable No Installation service tools Tools Equipment specification 1 Flare tool Clutch type Pipe flaring Use Applicability to R32 air conditioner or not Applicability to R22 air conditioner or not 5 Charge hose High voltage 3 Torque wrench Tightening of flare nu...

Страница 17: ... RAV RM561CTP E 4 RAV RM561KRT E 4 RAV GM280 series Single Concealed Duct High Static Pressure Type RAV RM2801DTP E Simultaneous twin Concealed duct type RAV RM1401UTP E 2 RAV RM1401BTP E 2 RAV RM1401CTP E 2 Simultaneous triple Concealed duct type RAV RM801UTP E 3 RAV RM801BTP E 3 RAV RM801CTP E 3 Simultaneous double twin RAV RM801UTP E 4 Concealed duct type RAV RM801BTP E 4 RAV RM801CTP E 4 RAV R...

Страница 18: ... series RM110 RM110 RM80 RM80 RM80 RM56 RM56 RM56 RM56 Branch kit RBC TWP101E RBC TRP100E RBC DTWP101E Simultaneous twin Simultaneous triple Simultaneous double twin RAV GM280 series RM140 RM140 RM80 RM80 RM80 RM80 RM80 RM80 RM80 Branch kit RBC TWP101E RBC TRP100E RBC DTWP101E ...

Страница 19: ...ow m3 min 153 153 0 0 2 0 0 2 0 0 2 0 0 2 W r o t o M 6 8 2 6 8 2 m m e d i s s a G e p i p g n i t c e n n o C Outdoor unit side Liquid side mm 12 7 12 7 Sound pressure level Cooling Heating dB A 58 60 61 63 Sound power level Cooling Heating dB A 76 76 78 80 C g n i l o o c e r u t a r e p m e t r i a e d i s t u O C g n i t a e h e r u t a r e p m e t r i a e d i s t u O Appearance Silky shade M...

Страница 20: ...oor DB27 C WB19 C outdoor DB35 C Indoor air flow High Pipe length 7 5m Conditions Indoor DB27 C WB19 C Indoor air flow High Pipe length 7 5m 20 110 18 16 14 12 Current A Compressor speed rps 10 8 6 4 2 0 Outdoor temperature C 100 90 80 70 60 50 40 30 20 10 0 GM280 GM224 Conditions Indoor DB20 C Outdoor DB 7 C WB6 C Indoor air flow High Pipe length 7 5m Conditions Indoor DB20 C Indoor air flow High...

Страница 21: ... 21 2 CONSTRUCTION VIEWS EXTERNAL VIEWS 2 1 Outdoor Unit ...

Страница 22: ...iameter Ø28 6 1 pc Units mm Outer diameter Ø25 4 Inner diameter Ø C Inner diameter Ø D Inner diameter Ø D A B 24 22 54 A B C D 74 37 25 4 15 9 42 23 15 9 15 9 43 23 15 9 12 7 35 18 12 7 9 5 34 14 9 5 9 5 36 14 9 5 6 4 Model Gas side RBC DTWP101E Liquid side Q ty 1 2 2 1 2 2 ...

Страница 23: ... 7 Inner diameter Ø15 9 Inner diameter Ø9 52 Insulator 300 80 80 100 80 80 100 Ø12 7 Ø6 4 Ø9 5 100 28 10 24 6 26 9 100 35 3 pcs 3 pcs 1 pc 1 pc 1 pc Inner diameter Ø28 6 Outer diameter Ø25 4 24 22 54 Ø25 4 External diameter Ø15 9 46 12 1 pc 1 pc Gas side Header assemb Units mm ly Liquid side Branch pipe assembly Gas side socket Liquid side socket ...

Страница 24: ...Branch pipe Joint pipe Inner diameter Ø28 6 1 pc Outer diameter Ø25 4 Inner diameter Ø C Inner diameter Ø D Inner diameter Ø D A B 24 22 54 Model RBC TWP101E Gas side Liquid side A B C D Q ty 74 37 25 4 15 9 1 35 18 12 7 9 5 1 Units mm ...

Страница 25: ...Muffler TD Compressor Accumulator Capillary tube Solenoid valve Check valve TS 4 way valve Header TO TL Outdoor heat exchanger TE Distributor Thermistor Connecting pipe inner dia Connecting pipe outer dia Liquid pipe Ø 28 6 Ø 12 7 Ø 19 1 Ø 12 7 Liquid pipe Gas pipe Gas pipe Strainer Strainer Strainer Liquid tank ...

Страница 26: ... 4 3 8 2 2 2 6 3 3 1 8 1 1 1 4 0 7 0 8 1 2 0 2 Cooling Heating Standard Overload Low load Standard Overload Low load 24 5 38 7 22 6 26 5 33 7 18 4 11 2 14 3 6 6 8 2 12 2 2 0 95 7 90 8 52 6 98 5 91 3 89 7 12 2 16 3 8 7 3 0 18 6 28 9 10 0 17 0 1 0 43 0 52 0 30 0 49 5 56 1 39 3 5 9 19 0 14 3 37 6 55 8 13 9 1 5 17 1 27 5 59 4 39 0 31 2 66 6 31 2 105 0 HIGH HIGH LOW HIGH LOW HIGH 27 19 32 24 18 15 5 20...

Страница 27: ...9 IPDU board Compressor MCC 1698 CN203 CN201 CN202 W BLK WHI V RED U 4 5 1 2 3 HWI CN852 CN19 GRY RED WHI RED 250V GRY WHI CH 68 Reactor CH 90 Reactor CN600 WHI BLK P501 4 5 1 2 3 4 5 1 2 3 CM MS 3 1 3 4 5 1 2 3 1 3 1 2 1 7 3 5 5 5 1 3 2 1 3 2 BLK WHI RED MS 3 MS 3 3 1 3 1 1 3 3 1 2 1 3 1 6 4 3 2 1 6 4 3 2 1 5 2 4 3 1 2 6 6 2 1 1 3 5 2 1 TL t 1 3 1 2 1 2 1 3 TD t TO t TE t TS t To INDOOR UNIT 5 1 ...

Страница 28: ...ard MCC 1698 Fuse Mounted on P C board MCC 1698 Fuse Mounted on P C board MCC 1597 Fuse Mounted on P C board MCC 1597 Fuse Mounted on P C board MCC 1675 Fuse Mounted on P C board MCC 1600 Relay Compressor thermostat STF H01AJ1736A1 VPV MOAJ510B0 PQM10441 ACB 4UB83W NSK BH010F 460 CH 90 CH 68 CH 85 FC MCC 1698 MCC 1597 MCC 1675 MCC 1600 MCC 1646 TLC 25A GAC1 31 5A SCT 3 15A GDM 250V 15A SCT 3 15A F...

Страница 29: ...ration cycle may become abnormally high so that a rupture or personal injury may be caused 5 After completion of installation work check to make sure that there is no refrigeration gas leakage If the refrigerant gas leaks into the room coming into contact with fire in the fan driven heater space heater etc a poisonous gas may occur 6 When an air conditioning system charged with a large volume of r...

Страница 30: ...at no other oil other than lubricating oils used in the installed air conditioner is used and that refrigerant does not leak When using lubricating oils in the piping processing use such lubricating oils whose water content has been removed When stored be sure to seal the container with an airtight cap or any other cover 1 Flare Processing Procedures and Precautions a Cutting the Pipe By means of ...

Страница 31: ...B C D 9 1 9 2 6 5 13 13 0 13 5 9 7 20 16 2 16 0 12 9 20 19 4 19 0 16 0 23 23 3 24 0 19 2 34 Flare nut width mm 17 22 24 27 36 Nominal diameter 1 4 3 8 1 2 5 8 3 4 Outer diameter mm 6 4 9 5 12 7 15 9 19 1 Thickness mm 0 8 0 8 0 8 1 0 1 2 Dimension mm A B C D 9 1 9 2 6 5 13 13 2 13 5 9 7 20 16 6 16 0 12 9 23 19 7 19 0 16 0 25 24 0 19 2 28 Flare nut width mm 17 22 26 29 36 Nominal diameter 1 4 3 8 1 ...

Страница 32: ...es designated by manufacturers Table 6 2 6 shows reference values NOTE When applying oil to the flare surface be sure to use oil designated by the manufacturer If any other oil is used the lubricating oils may deteriorate and cause the compressor to burn out 43 to 45 45 to 46 A B C D Fig 6 2 2 Relations between flare nut and flare seal surface Table 6 2 6 Tightening torque of flare for R410A or R3...

Страница 33: ...ant and check no refrigerant remains in the equipment For refrigerant charging see the figure below Connect the charge hose of the vacuum pump adapter Open fully both packed valves at liquid and gas sides Place the handle of the gauge manifold Low in the fully opened position and turn on the vacuum pump s power switch Then evacuating the refrigerant in the cycle When the compound gauge s pointer h...

Страница 34: ...rature brazing filler Low temperature brazing filler is generally called solder and is an alloy of tin and lead Since it is weak in adhesive strength do not use it for refrigerant pipes 1 Phosphor bronze brazing filler tends to react with sulfur and produce a fragile compound water solution which may cause a gas leakage Therefore use any other type of brazing filler at a hot spring resort etc and ...

Страница 35: ...g water to the flux use water which does not contain chlorine e g distilled water or ion exchange water 4 Remove the flux after brazing 6 5 3 Brazing As brazing work requires sophisticated techniques experiences based upon a theoretical knowledge it must be performed by a person qualified In order to prevent the oxide film from occurring in the pipe interior during brazing it is effective to proce...

Страница 36: ... had been recovered In this case if the oil is judged as clearly different compared with normal oil The refrigerator oil is copper rust green There is possibility that moisture is mixed with the oil and rust forms inside of the pipe There is discolored oil a large quantity of the remains or bad smell A large quantity of sparkle remained wear out powder is observed in the refrigerator oil 7 The air...

Страница 37: ...prox 30 minutes or longer recover the refrigerant For cleaning the pipes and recovering oil Refrigerant recovery Pump down method Connect the indoor outdoor units to the existing pipe Use a flare nut attached to indoor outdoor units Do not existing pipe Re machine the flare machining size to size for R32 Airtight test Vacuum dry Refrigerant charge Gas leak check Was largely discolored oil or a lar...

Страница 38: ...dditional refrigerant shall be restricted by the following explanation to ensure the reliability Miss charging leads to the abnormal high pressure in the refrigerant cycle causing a rupture an injury and a compressor malfunction 6 7 1 Assumed gas leak The refrigerant can be charged only when the amount of a leak such as a slow leak found at the installation work can be ensured that it is within th...

Страница 39: ...he compressor body shall be employed to accelerate this process When oil is drained from a system it shall be carried out safely 6 8 2 Decommissioning Before carrying out this procedure it is essential that the technician is completely familiar with the equipment and all its details Only a qualified installer 1 or qualified service person 1 is allowed to do this work It is recommended good practic...

Страница 40: ...C 1698 Compressor IPDU CN02 Connector for MCC 1600 CN17 CN03 Terminal for power relay CN01 Terminal for power relay CN04 Terminal for PTC thermistor CN203 RED CN202 WHI CN201 BLK Compressor output terminal CN09 10 Terminal for CH 90 CN101 WHI Connector for MCC 1597 CN502 CN852 WHI Connector for MCC 1597 CN504 ...

Страница 41: ...r for MCC 1698 CN852 CN602 Black Connector for MCC 1600 CN51 F500 Electric circuit protective fuse 250V 15A P501 Black Lead wire for grounding CN505 Red Connector for MCC 1675 CN802 CN502 White Connector for MCC 1698 CN101 CN700 Blue Fan motor output Down side CN500 Red Connector for MCC 1600 CN22 and reactor CH68 ...

Страница 42: ...isplay CN690 GRN Connector for High Pressure switch CN704 BLU Compressor ON out put CN609 BLU Connector for Case thermostat CN606 WHI Connector for Low pressure sensor CN710 711 WHI Connector for PMV1 PMV2 CN608 WHI Connector for MCC 1600 CN50 CN604 WHI TL sensor CN603 WHI TD sensor CN602 YEL TO sensor CN601 WHI TE sensor CN600 WHI TS sensor CN610 YEL Outside input F01 Protective Fuse F02 Protecti...

Страница 43: ...tor protective fuse 250V 6 3A CN07 Black Power supply terminal L3 F03 Varistor protective fuse 250V 6 3A CN20 White Power supply terminal L2 CN08 Gray Neutral terminal CN10 Red Terminal for MCC 1675 CN02 and Terminal for PTC thermistor CN16 Red Terminal for power relay CN17 White Terminal for MCC 1698 CN02 CN18 Black Terminal for power relay CN19 Gray Terminal for MCC 1675 CN02 CN09 Brown Terminal...

Страница 44: ...g in dramatic reduction in the durable life of the compressor In the event of malfunction and repair of the compressor restart operation after checking that there are no trouble in the resistance values or the refrigerating cycle of each sensor 2 Discharge temperature release control 1 This control lowers the revolution number of the compressor in the event that the discharge temperature is not re...

Страница 45: ...430 470 430 470 500 540 500 540 580 610 580 610 640 680 640 680 680 720 680 720 720 760 720 760 760 800 760 800 820 860 820 860 860 900 860 900 910 950 910 950 960 1000 960 1000 W5 460 500 460 500 GM280 Less than 38rps 38rps or more and less than 52 rps 52rps or more 38 C TO 29 C TO 38 C 15 C TO 29 C 5 C TO 15 C 0 C TO 5 C 5 C TO 0 C TO 5 C TO trouble Min W6 W5 W3 W2 W1 W1 OFF OFF Max WB WA W7 W5 ...

Страница 46: ...ted operation does not constitute a trouble When the operation in 3 above is frequently performed the filter of the intake section of the indoor unit may require cleaning Therefore restart operation after cleaning the filter GM280 Less than 38 rps 38rps or more and less than 52rps 52rps or more Maximum WA WC WF WF WF WF 2 taps 20sec stop timer count Until W1 2 taps 20sec Until W1 WC WF WF WF WF WF...

Страница 47: ...temperature is 7 C TE 12 C for 1 minute Furthermore the defrost operation will be terminated if defrosting operations have continued for 10 minutes even if TE sensor temperature is less than 7 C 3 After defrost operations have been reset the compressor restarts heating operations without stopping The minimum TE value during 10 and 15 minutes after starting heating operation is stored as TEO TE C 5...

Страница 48: ... table 9 Over current protective control 1 Operation of the compressor is stopped when the over current protective circuit detects a trouble current 2 The compressor restarts after 2 minutes 30 seconds using 1 as a trouble count After restart the trouble count is cleared when operation continues for 6 minutes or more 3 A trouble is confirmed when the trouble count takes a value of 8 and operation ...

Страница 49: ...6 C 6 When Ps 0 14 MPa 7 When conditions for defrost satisfied 8 When conditions for defrost satisfied SV2 Valve Close Conditions When operation started after operating or when 30 minutes elapsed after opening SV2 under conditions 1 2 When 8 minutes elapsed after starting operation When Ps 0 27 MPa When 8 minutes elapsed after starting operation or when TC 26 C When Ps 0 19 MPa When 4 way valve is...

Страница 50: ... of current is determined by TD and TO sensors When the TO sensor has a trouble a backup control is automatically performed by the TE sensor When TO sensor has a trouble make a determination using the LED display of the outdoor interface board 4 The power is turned off when TD is 30 C or more NOTE While heating the winding wire by applying a current to it an abnormal sound may be generated It is n...

Страница 51: ... performed from remote controller Does not the central remote controller or the remote location ON OFF control work Is not automatic address being set up When the power is turned on at the first time or when indoor unit address setting is changed the operation cannot be performed for maximum approx 5 minutes after power ON Is not being carried out a test run by operation of the outdoor unit 5 LED ...

Страница 52: ... not forced operation performed Does not the central remote controller or the remote location ON OFF control work Is not automatic address being set up When the power is turned on at the first time or when indoor unit address setting is changed the operation cannot be performed for maximum approx 5 minutes after power ON Is not being carried out a test run by operation of the outdoor unit 5 LED fo...

Страница 53: ...le Communication stop between receiving unit and indoor unit Duplicated indoor unit No Setup trouble Duplicated header units of remote controller Communication trouble between CPUs on indoor unit P C board Wire connection trouble between indoor units Indoor power OFF Communication stop between indoor header and follower or between header and follower indoor twin Miss wiring between indoor unit and...

Страница 54: ...e Temp sensor miss wiring TE TS Indoor EEPROM trouble Outdoor EEPROM trouble Compressor break down Outdoor compressor system trouble 1 Compressor lock Current detection circuit trouble Power supply outdoor P C board trouble Case thermostat worked Compressor overheat outdoor wiring trouble PS pressure sensor trouble Outdoor unit low pressure protective operation low pressure system trouble Duplicat...

Страница 55: ...Timer Ready Simultaneous flash Operation Timer Ready Alternate flash Check code Cause of trouble occurrence During test run Disagreement of cool heat Automatic cool heat setting to automatic cool heat prohibited model or setting of heating to cooling only model ...

Страница 56: ...r is not provided to this model The data value of each item is not the real time but value delayed by a few seconds to ten odd seconds Operation procedure 1 2 3 4 Returned to usual display 2 4 1 3 SET TIME TIMER SET TEST FILTER L RESET TEMP CL FAN SAVE A SWING FIX VENT MODE ON OFF UNIT LOUVER T Indoor unit data CODE No 01 02 03 04 07 F2 F3 F8 Data name Room temperature Remote controller Indoor suc...

Страница 57: ...r P C board part EEPROM trouble was detected F12 Outdoor unit Temp sensor TS trouble ALT Outdoor Open Short of suction temp sensor was detected F13 Outdoor unit Temp sensor TH trouble ALT Outdoor Open Short of heat sink temp sensor Board installed was detected F15 Outdoor unit Misconnection of temp sensor TE TS ALT Outdoor Misconnection of outdoor heat exchanger temp sensor and suction temp sensor...

Страница 58: ...emp TA was detected O F01 Indoor unit Heat exchanger sensor TCJ trouble ALT Indoor Open Short of heat exchanger TCJ was detected O F02 Indoor unit Heat exchanger sensor TC trouble ALT Indoor Open Short of heat exchanger TC was detected O There are multiple communication adapters Network adapter There are multiple communication adapters on remote controller communication line O O By unit with warni...

Страница 59: ...trouble is detected Displayed when trouble is detected Displayed when trouble is detected Displayed when trouble is detected Displayed when trouble is detected Displayed when trouble is detected Displayed when trouble is detected Displayed when trouble is detected Displayed when trouble is detected Displayed when trouble is detected Displayed when trouble is detected Displayed when trouble is dete...

Страница 60: ... P C board trouble H06 Low pressure protective operation Stop Displayed when trouble is detected 1 Check service valves are fully opened Gas side Liquid side 2 Check clogging of outdoor PMV PMV1 2 3 Check SV2 circuit 4 Check Ps sensor trouble 5 Check clogging of indoor filter 6 Check clogging of refrigerant pipe 7 Check of outdoor fan operation In heating mode 8 Check short of refrigerant P07 Heat...

Страница 61: ...Check of outdoor fan operation 3 Check motor trouble of outdoor fan 4 Check clogging of outdoor PMV PMV1 2 5 Check clogging of heat exchanger in indoor outdoor units 6 Short circuit status of suction discharge air in outdoor unit 7 Check outdoor P C board trouble 8 Check fan system trouble Cause of air volume drop at indoor side 9 Check PMV opening status in indoor unit P03 Discharge temp trouble ...

Страница 62: ...er unit wiring 2 Check remote controller 3 Check indoor power wiring 4 Check indoor P C board E02 Signal send trouble to indoor unit Detected by remote controller side Stop Automatic reset If center exists operation continues Displayed when trouble is detected Sending trouble of remote controller 1 Check sending circuit inside of remote controller Replace remote controller E09 There are multiple m...

Страница 63: ...ff or rapidly flashing and that D805 is lit up If D800 to D804 are slowly flashing or D805 is flashing then push and hold down SW01 and SW02 at the same time for at least 5 seconds D800 to D804 will turn off or be rapidly flashing and D805 will change to flashing 2 Push and hold down SW01 for at least 5 seconds D804 will start slowly flashing 3 Push SW01 several times until reaching the LED indica...

Страница 64: ... correct Is resistance value of TE sensor correct YES NO Correct connector Replace TE sensor F07 Heat exchanger temp sensor TL trouble Is connection of CN604 correct Is resistance value of TL sensor correct YES NO Correct connector Replace TL sensor F12 Suction temp sensor TS trouble Is connection of CN600 correct Is resistance value of TS sensor correct YES NO Correct connector Replace TS sensor ...

Страница 65: ...onnector Replace TE sensor Replace Interface P C board Replace Interface P C board Replace Interface P C board Is connection of CN601 correct Is resistance value of TE sensor correct YES F23 Low pressure sensor PS trouble Is the PS sensor connector correct connected NO Connector connection correction PS sensor CN 606 NO NO Replace PS sensor Check compressor YES Is the PS sensor output voltage char...

Страница 66: ...or IPDU P C board When replacing Compressor IPDU P C board replace the fuse Replace compressor IPDU P C board When replacing Compressor IPDU P C board replace the fuse Does an abnormal overload happen NO H02 Compressor lock Is power supply voltage normal AC342 to 457V NO Correct power supply line NO Compressor lock Replace Check wire connection and correct it YES Is wire connection correct Compres...

Страница 67: ...Open service valve fully NO YES YES Replace compressor IPDU P C board When replacing Compressor IPDU P C board replace the fuse NO When shorting the case thermostat can you perform the cooling heating operation NO Correct connector Case thermostat trouble Replace Replace the PMV Is there gas leak Is there refrigerant shortage YES Trouble part repair Recharge refrigerant Is service valve fully open...

Страница 68: ...or P C board YES YES Replace fan motor IPDU P C board YES Is there an outdoor unit heat exchanger clogging NO Is there indoor unit filter or heat exchanger clogging NO When heating the outdoor unit fan operate normally Is the service valve of the outdoor unit fully open YES Is the characteristics of the low pressure sensor normal YES Is the SV2 bypass circuit normal YES YES Service valve fully ope...

Страница 69: ...5 connected YES Replace compressor IPDU P C board When replacing Compressor IPDU P C board replace the fuse L10 Unset model type Only when service P C board is used Cut jumper line according to the explanation sheet packaged with the service P C board P03 Discharge temp trouble Is there gas leak Is there refrigerant shortage NO Replace the PMV Replace TD sensor YES Remove and improve the cause of ...

Страница 70: ... exchanger of the outdoor unit Clogging of heat exchanger Short circuit Is there any element which blocks indoor heat exchanger Filter clogging Clogging of heat exchanger Short circuit Is there no fan breakage or coming off NO NO Are connections of connectors capacitors and fan motor normal Are connections of connectors capacitors and fan motor normal NO YES YES YES YES Power supply trouble Vdc Re...

Страница 71: ... supply trouble Voltage failure open phase YES Correct wiring Check the same items as P04 trouble YES Replace noise filter P C board Interface P C board NO NO P07 Heat sink overheat trouble Is there any looseness in the screw stop of the motor drive element Q21 of the compressor IPDU P C board the sub heat sink and the diode bridge Are radiation grease properly applied Does something block the ven...

Страница 72: ... Is there refrigerant shortage Check temp sensor TD sensor CN603 TS sensor CN600 NO Open service valve fully YES Correct and replace piping YES Trouble part repair Recharge refrigerant Replace the PMV NO Trouble Correct connector Sensor trouble Replace NO YES Is PMV normal YES Replace Interface P C board OK Is service valve fully opened NO Is there crushed pipe ...

Страница 73: ...y Use to check whether there are any problems with the 4 way valve or 4 way valve coil Method of operation 1 Ensure that D800 to D804 are off or rapidly flashing and that D805 is lit up If D800 to D804 are slowly flashing or D805 is flashing then push and hold down SW01 and SW02 at the same time for at least 5 seconds D800 to D804 will turn off or rapidly flash and D805 turn on 2 Push and hold dow...

Страница 74: ... TE sensor correct Resistance value measurement Are resistance values of indoor TC and TCJ sensors normal Replace TE sensor Check the same items as P22 trouble Check overcharge of refrigerant clogging of cycle broken pipe abnormal overload etc Failure Trouble part repair Check overcharge of refrigerant clogging of cycle broken pipe abnormal overload etc Failure Trouble part repair Eliminate interf...

Страница 75: ...alve coil Method of operation 1 Ensure that D800 to D804 are off or rapidly flashing and that D805 is lit up If D800 to D804 are slowly flashing or D805 is flashing then please push and hold down SW01 and SW02 at the same time for at least 5 seconds D800 to D804 will turn off or rapidly flash and D805 turn on 2 Push and hold down SW01 for at least 5 seconds D804 will start slowly flashing 3 Push S...

Страница 76: ...DU P C board YES Does the same trouble occur in operation without compressor lead Check compressor Layer short etc Failure Replace NO P29 Position detection circuit trouble No code Other trouble Compressor step out from sudden changes in load etc Outdoor LED indication occurs but it automatically restarts and does not confirm any trouble May occur also when the compressor is open phase and wiring ...

Страница 77: ...Measure the resistance value of each winding by using the tester Position Red White White Black Black Red Resistance value 18 86 1 9 Ω Under 20 C Measure the resistance value of each winding by using the tester Resistance value 1725 172 5 Ω Under 20 C Connector White 4 2 way valve coil Model VPV M0AJ510B0 Measure the resistance value of each winding by using the tester Resistance value 1435 144 Ω ...

Страница 78: ...TE TS TO sensors Representative value TD TL sensors Representative value TA TC TCJ TE TS TO sensors TD TL sensors Temperature C 0 10 20 25 30 40 50 60 70 80 90 100 Resistance value kΩ Minimum value Standard value Maximum value 32 33 33 80 35 30 19 63 20 35 21 09 12 23 12 59 12 95 9 75 10 00 10 25 7 764 7 990 8 218 5 013 5 192 5 375 3 312 3 451 3 594 2 236 2 343 2 454 1 540 1 623 1 709 1 082 1 146 ...

Страница 79: ...ce check goes on the CODE No 01 is displayed and then the content of the latest alarm is displayed The number and trouble contents of the indoor unit in which a trouble occurred are displayed 2 In order to monitor another check code history push the set temperature buttons to change the check code history No CODE No CODE No 01 01 01 01 01 Latest CODE No 04 04 04 04 04 Old NOTE 4 check code histori...

Страница 80: ...tes Normal Gr normal 1 There is no duplicated indoor unit address 2 There is no invalid indoor unit address 3 Individual unit and master follower units are not intermingled 4 Only a unit for individual 5 A master indoor unit and 1 or more follower indoor units for Gr Automatic address judgment Initial communication Usual regular communication By feed unit Power ON Gr construction check System star...

Страница 81: ... patterns Go ON Go OFF flash 5 times sec flashing 1 time sec The initial state of the LED display is as shown on the right with D805 lit up If not in the initial state D805 flashing then it can be returned to the initial state by pushing and holding down SW01 and SW02 at the same time for 5 seconds D800 to D804 Go Off and flash 5 times sec D805 Go ON D800 D801 D802 D803 D804 D805 Yellow LED Yellow...

Страница 82: ...ress and hold down SW01 and SW02 at the same time for at least 5 seconds to return to step 1 Functions LED display Control content Existing pipe setting D800 D801 D802 D803 D804 Activate when existing Ø19 1 piping is used Note that in this case depending on the outdoor and indoor air temperature the heating capacity may drop Cooling only setting D800 D801 D802 D803 D804 Cooling only setting Can al...

Страница 83: ...factory default settings can be restored using the following procedure 1 Ensure the LED display shows the initial state If not then ensure to return it to the initial state Return to default factory setting LED display D800 D801 D802 D803 D804 D805 Go ON Go OFF Flash 5 times sec Sub P C board switch and LED arrangement diagram D800 LED YEL D801 LED YEL D802 LED YEL D803 LED YEL D804 LED YEL D805 L...

Страница 84: ...e displayed TO sensor trouble only and thus this setting does not display Check using the current trouble setting Discharge temperature sensor TD indication Displays the discharge temperature sensor TD value Outdoor heat exchanger temperature sensor TE indication Displays the outdoor heat exchanger temperature sensor TE value Outdoor heat exchanger temperature sensor TL indication Displays the out...

Страница 85: ...ouble Heat sink overheat trouble Gas leak detection 4 way valve reversal trouble High pressure protective operation Fan system trouble Short circuit of compressor drive element Position detection circuit trouble Go ON Go OFF Flash 5 times sec 1 2 2 Latest including current trouble indication LED indication Name of trouble D800 D801 D802 D803 D804 D805 Normal Discharge temp sensor TD trouble Heat e...

Страница 86: ... D804 YEL D805 GRN Less than 25 25 20 15 10 5 0 5 10 15 20 25 30 35 40 45 50 55 60 65 70 75 80 85 90 95 100 105 110 115 120 Sensor trouble 0 2 4 6 8 10 12 14 16 18 20 22 24 26 28 30 32 34 36 38 40 42 44 46 48 50 52 54 56 58 60 62 or more 0 5 10 15 20 25 30 35 40 45 50 55 60 65 70 75 80 85 90 95 100 105 110 115 120 125 130 135 140 145 150 155 or more 0 39 40 79 80 119 120 159 160 199 200 239 240 27...

Страница 87: ...ks may even be detected because of refrigerant circulation failures due to PMV Pulse Motor Valve blockages operation failures capillary blockages strainer blockages etc Refrigerant leak detection may not be possible depending on the external air temperature conditions during operation If any refrigerant leaks are detected ensure to identify where the leak is recover the remaining refrigerant and t...

Страница 88: ...control Refer to 6 below Special operations LED display Control content The outdoor unit performs cooling operations Indoor units do not operate with just this operation and hence do any fan only operations in advance Refrigerant recovery operation Refer to 1 D800 D801 D802 D803 D804 PMV Pulse Motor Valve fully opens Perform step 6 below or returns to normal control after 2 minutes PMV fully open ...

Страница 89: ... to three levels 75 50 and operation stop 2 Night operation Reduces the capacity of the air conditioner by the input signal from a commercially available timer procured locally regardless of the outside air temperature or load to reduce operating noise When outside temperature TO sensor value is 40 C or more normal control will be performed 3 Compressor output Turns on the no voltage contact outpu...

Страница 90: ...unit Connect one remote controller with one indoor unit 1 1 tentatively with communication wires END Turn on power of outdoor unit Set to all indoor units one by one Do you arbitrarily set the indoor unit address Do you change setting after automatic setting at the first time Is refrigerant line 1 line Is group control performed Setup of automatic address finishes within 4 to 5 minutes After compl...

Страница 91: ...ation Basically sub units do not send receive signals to from the remote controllers Except alarm and response to demand of service data Header unit Representative unit Master Twin This unit communicates with the indoor unit follower which serial communicates with the outdoor units and sends receives signal Command from compressor to from the outdoor units as the representative of the cycle contro...

Страница 92: ... to the header unit Example No 3 1 header unit sends receives signal to from No 3 2 and No 3 3 follower units It is not influenced by the refrigerating line 1 or 2 address indoor unit 1 Single Outdoor Indoor Remote controller 1 1 Individual Master Header 2 Double twin 1 1 Master Header 1 2 Sub Follower 1 3 Sub Follower 1 4 Sub Follower 3 Twin 5 Single group operation 6 Multiple groups operation Si...

Страница 93: ...nits Multiple indoor units only with serial communication 2 1 Sub Header 1 1 Sub Header 3 1 Sub Header 4 1 Master Header 8 1 Sub Header 2 1 Sub Header 1 1 Sub Header 2 1 Sub Follower 3 3 Master Follower 3 1 Sub Header 2 2 Sub Follower 1 2 Sub Follower 3 2 Sub Follower 2 1 Sub Header 1 1 Sub Header 1 2 Sub Follower 1 3 Master Follower 3 1 Sub Header 3 2 Sub Follower 3 3 Sub Follower 3 4 Sub Followe...

Страница 94: ...te controller Remote controller wiring Indoor side Indoor Outdoor connecting wires Outdoor side Indoor side Indoor side Remote controller inter unit wiring Remote controller inter unit wiring Indoor power inter unit wiring Triple Double twin Indoor power inter unit wiring A B 1 2 3 Indoor side Remote controller inter unit wiring Indoor power inter unit wiring 380 415 V 3N 50Hz 380 V 3N 60Hz L1 L2 ...

Страница 95: ...t addresses of the indoor units will be determined prior to piping work after wiring work Set an indoor unit per a remote controller Turn on power supply 1 Push buttons simultaneously for 4 seconds or more 2 Line address Using the temperature setup buttons set the CODE No to 12 12 12 12 12 3 Using timer time buttons set the line address 4 Push button OK when display goes on 5 Indoor unit address U...

Страница 96: ... controller Group control unit other unit numbers are also displayed every pushing UNIT LOUVER button button of left side 2 To know the position of indoor unit body by address To confirm the unit No in the group control Follow to the procedure during operation in this procedure the indoor units in group control stop Procedure The indoor unit numbers in the group control are successively displayed ...

Страница 97: ...an the indoor outdoor units regularly will cause shortage of capacity freezing water leakage or trouble on the compressor Part name Heat exchanger Fan motor Filter Fan Suction Discharge grille Drain pan Front panel Louver External appearance Object Indoor Outdoor O O O O O O O O O O O Contents of check Blocking with dust damage check Audibility for sound Visual check for dirt and breakage Visual c...

Страница 98: ... Setting Model switching Jumper wire J800 J803 Cut these jumper wires according to the following table J 800 J 801 J 802 J 803 Model name Factory setting default RAV GM2241AT RAV GM2801AT O Connected Cut O O O O O O O O O CN708 F01 CN02 F02 CN608 CN802 CN805 CN807 CN700 CN702 CN01 R500 R510 F500 CN703 CN609 CN690 C701 C808 C705 C143 C141 C801 CN800 CN600 CN601 CN602 CN603 CN604 CN801 CN606 CN710 C...

Страница 99: ...ervice compressor Leakage check Vacuuming Charge the refrigerant END Turn off the circuit breaker NO Open PMV forcedly and then recover refrigerant using a refrigerant recovery unit Never recover the refrigerant to the outdoor unit For the refrigerant recovery work during reinstallation of repair work be sure to use the refrigerant recovery unit Recovery of refrigerant to the outdoor unit is unava...

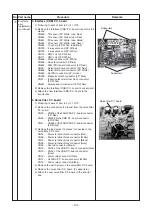
Страница 100: ...move the front panel 3 Remove the terminal cover 2 pcs Ø4 8 4 Remove the power and indoor outdoor connection wires from the wire clamps and terminals 5 Remove the top cover 6 pcs Ø4 10 hexagon screws 2 Attachment 1 Attach the top cover 6 pcs Ø4 10 hexagon screws 2 Connect the power and indoor outdoor connection wires to the terminal and fix in place using the code clamps NOTE The power and indoor ...

Страница 101: ...et and heat exchanger 4 pcs Ø4 8 e Side cabinet right 1 Following to work of item 1 of c 2 Remove the screws securing the inverter assembly and side cabinet right 3 pcs Ø4 8 3 Remove the screws from the side cabinet right and valve fixing plate 2 pcs Ø4 8 4 Remove the screws from the side cabinet right and piping panel rear 2 pcs Ø4 10 hexagon screws 5 Remove the screws from the side cabinet right...

Страница 102: ...places CN01 Power relay connector Red CN02 CN12 of the noise filter P C board connector White CN03 Power relay connector Black CN04 PTC thermistor connector Red CN203 Compressor connector Red CN202 Compressor connector White CN201 Compressor connector Black CN09 Reactor CH90 connector CN10 Reactor CH90 connector 5 Remove the screws fixing the heat sink to the A3 IPDU P C board 4 pcs Ø4 15 6 Remove...

Страница 103: ...2 CN101 of the A3 IPDU P C board connector 2P White CN504 CN852 of the A3 IPDU P C board connector 5P Blue CN602 CN51 of the noise filter P C board connector 2P Black 3 Remove the screws from the FAN IPDU P C board and heat sink 5 pcs Ø3 14 4 Remove the FAN IPDU P C board 3 supporters 5 Apply radiator grease to back of the new FAN IPDU P C board where it will be attached to the heat sink before th...

Страница 104: ... 4 Attach the new Interface CDB P C board to the inverter box 4 Noise filter P C board 1 Following to work of item to 2 of 1 of g 2 Remove the connectors 3 places from the noise filter P C board CN22 CN500 of the FAN IPDU P C board connector 2P Red CN50 CN608 of the CDB P C board connector 2P White CN51 CN602 of the FAN IPDU P C board connector 2P Black 3 Remove the lead wires 10 places connected ...

Страница 105: ...work of item to 2 of 1 of g 2 Following to work of item f 3 Remove the lead wires attached to CN09 and CN10 of the A3 IPDU P C board 4 Remove the fixing screws of the reactor 2 pcs Ø4 8 5 Attach a new reactor in the inverter box 8 Power relay 1 Following to work of item to 2 of 1 of g 2 Remove the fixing screws of the lead wires connected to the power relay 3 Remove the power relay 2 pcs Ø4 12 4 A...

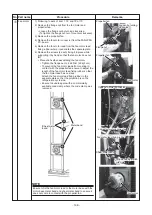
Страница 106: ... the fan motor lead fixing rubber to the separate plate so that the projection is on the refrigeration cycle side Ensure to bundle again with a commercially available code clamp where the code clamp was removed Propeller fan Propeller fan Loosen by turning Loosen by turning clockwise clockwise Flange nut Fan motor Fan motor Fan motor Fan motor Upper fan motor connector Upper fan motor connector Lo...

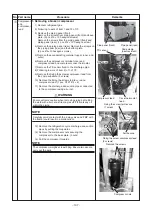
Страница 107: ...d from the comp substrate 3 screws 10 Remove the fixing the screws ferrite core and compressor lead 1 pcs ST3T Ø4 8 11 Remove the discharge and suction pipes connected to the compressor using a burner WARNING Ensure extreme caution when removing piping by melting the weld with a burner as fire may result if there is any oil within the piping NOTE Carefully avoid contact with the 4 way valve and PM...

Страница 108: ...t up If D805 is not lit up off or flashing then push and hold down SW01 and SW02 at the same time for at least 5 seconds and check that D805 lights up Push and hold SW01 down for at least 5 seconds or to confirm that D804 is slowly flashing once second Push SW01 several times until the LED indications D800 to D804 become the following Push SW02 and D805 will start rapidly flashing Push and hold SW...

Страница 109: ...o prevent the product from being scratched 2 Remove the outlet cabinet and place the fan guard side facing down 3 Remove the claws 8 places of the fan guard 2 Attachment 1 Hook the hooks from the front side and press the claws 8 places by hand to fix them in place NOTE Ensure that all the claws are fixed in their specified position l Reference Sensor mount positions Outlet cabinet claws Claw Fan g...

Страница 110: ... 110 14 EXPLODED VIEWS AND PARTS LIST 14 1 Outdoor Unit RAV GM2241AT8 J E RAV GM2801AT8 J E RAV GM2241AT8 J TR RAV GM2801AT8 J TR ...

Страница 111: ...TOR FAN ICF 340 A200 1 FAN PROPELLER PS561 NUT FLANGE NUT FLANGE COMPRESSOR RX640A3F 21M NUT NUT COMP LEAD ASSY COMPRESSOR THERMOSTA BIMETAL HOLDER THERMOSTAT RUBBER CUSHION INSULATOR SOUND IN INSULATOR SOUND OUT INSULATOR SOUND UP CONDENSER ASSY CONDENSER ASSY VALVE PLUS MODULATING COIL PMV VALVE 2 WAY VPV 603D COIL SOLENOID VPV MOAJ510B0 VALVE 4WAY STF H0731 COIL SOLENOID STF H01AJ1736A1 VALVE C...

Страница 112: ...TOR FAN ICF 340 A200 1 FAN PROPELLER PS561 NUT FLANGE NUT FLANGE COMPRESSOR RX640A3F 21M NUT NUT COMP LEAD ASSY COMPRESSOR THERMOSTA BIMETAL HOLDER THERMOSTAT RUBBER CUSHION INSULATOR SOUND IN INSULATOR SOUND OUT INSULATOR SOUND UP CONDENSER ASSY CONDENSER ASSY VALVE PLUS MODULATING COIL PMV VALVE 2 WAY VPV 603D COIL SOLENOID VPV MOAJ510B0 VALVE 4WAY STF H0731 COIL SOLENOID STF H01AJ1736A1 VALVE C...

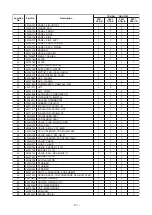
Страница 113: ...0 43F63248 SENSOR ASSY SERVICE TS SENSOR ASSY SERVICE TO SENSOR ASSY SERVICE TE SENSOR ASSY SERVICE TD SENSOR ASSY SERVICE TL HOLDER SENSOR HOLDER SENSOR TE TERMINAL BLOCK 3P AC250V 20A TERMINAL BLOCK 30A 4P FUSE 25A 250V FUSE 6 3A 250VAC FUSE BLOCK REACTOR CH 68 REACTOR CH 85 REACTOR CH 90 PC BOARD ASSY MCC 1600 N F PC BOARD ASSY MCC 1597 FAN IPDU PC BOARD ASSY MCC 1675 CDB PC BOARD ASSY MCC 1698...

Страница 114: ...72 34 Horikawa cho Saiwai ku Kawasaki shi Kanagawa 212 8585 JAPAN Copyright 2019 TOSHIBA CARRIER CORPORATION ALL Rights Reserved ...

Отзывы: