e-STUDIO162/162D/151/151D UNPACKING AND INSTALLATION 5 - 7
11) You will return to the window of step 8). If you wish to install Button Man-
ager or Desktop Document Manager, click the "Utility Software" button.
If you do not wish to install the Utility Software, click the "Close"
button and go to step 14).
Note: After the installation, a message prompting you to restart your
computer may appear. In this case, click the "Yes" button to
restart your computer.
Installing the Utility Software
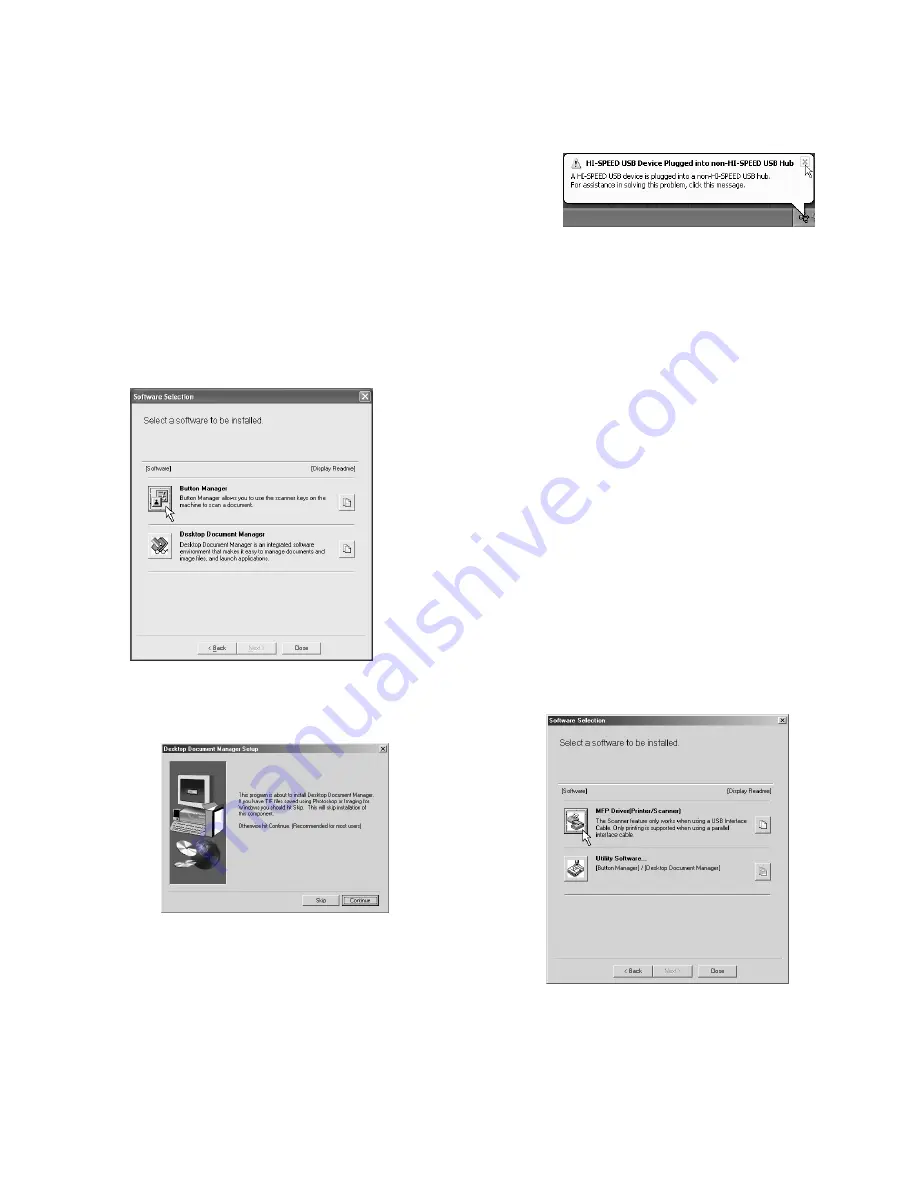
12) Click the "Button Manager" button.
To view detailed information on the software, click the "Display
Readme" button.
Follow the on-screen instructions.
If you wish to install Desktop Document Manager, click the "Desk-
top Document Manager" button in this window and follow the on-
screen instructions.
Caution:
• Button Manager can only be used when the machine is connected
by a USB cable.
• The scanner function of Desktop Document Manager can only be
used when the machine is connected by a USB cable.
Caution: If the following screen appears during installation of Desktop
Document Manager, click the "Skip" button or the "Continue"
button as appropriate to continue the Desktop Document
Manager installation.
If "Skip" is selected, the Desktop Document Manager installation will
continue without installing Desktop Document Manager imaging.
If "Continue" is selected, Desktop Document Manager Imag-
ing will be installed. If Imaging for Windows is installed on
your computer, Desktop Document Manager Imaging will
overwrite Imaging for Windows.
13) When installation of Button Manager is finished, you will return to
the window of step 12). Click the "Close" button.
A message will appear instructing you to connect the machine to
your computer. Click the "OK" button.
Note: After the installation, a message prompting you to restart your
computer may appear. In this case, click the "Yes" button to
restart your computer.
14) Make sure that the power of the machine is turned on, and then
connect the USB/parallel cable.
Windows will detect the machine and a Plug and Play screen will
appear.
Caution: If the following message appears on your computer screen,
close it.
A window regarding "HI-SPEED USB Device" will then
appear. Close the window.
This message appears when the machine's USB 2.0 mode is
not set to "HI-SPEED". For information on switching the USB
2.0 mode.
15) Follow the instructions in the plug and play window to install the
MFP driver.
Follow the on-screen instructions.
Caution: If you are running Windows XP and a warning message
appears regarding the Windows logo test or digital signature,
be sure to click "Continue Anyway".
Note: A "USB 2.0 Composite Device" installation window may appear
prior to this procedure. In this case, follow the instructions in the
window to install the USB 2.0 Composite Device.
This completes the installation of the MFP driver.
• If you installed Button Manager, set up Button Manager as explained
in "C. Setting up button manager".
(2) Windows 98/Me/2000 (USB)
1) The USB cable must not be connected to the machine. Make sure
that the cable is not connected before proceeding.
If the cable is connected, a Plug and Play window will appear. If this
happens, click the "Cancel" button to close the window and discon-
nect the cable.
Note: The cable will be connected in step 8).
2) Perform steps 2) through 7) in "Custom installation".
3) Click the "MFP Driver" button.
To view detailed information on the software, click the "Display
Readme" button.
4) The "Welcome" window will appear. Click the "Next" button.
e-STUDIO162_151.book 7
ページ
2004年12月2日 木曜日 午後9時37分
Содержание e-studio 151
Страница 156: ...e STUDIO162 162D 151 151D CIRCUIT DIAGRAM 14 30 6 7 8 9 10 11 12 6 7 8 9 10 11 12 A B C D E F G H 1 1 ...
Страница 157: ...e STUDIO162 162D 151 151D CIRCUIT DIAGRAM 14 31 A 1 2 3 4 5 6 B C D E F G H 1 2 3 4 5 6 POWER SUPPLY 220V 240V ...
Страница 158: ...e STUDIO162 162D 151 151D CIRCUIT DIAGRAM 14 32 6 7 8 9 10 11 12 6 7 8 9 10 11 12 A B C D E F G H 1 1 ...
Страница 170: ...Memo ...
Страница 171: ...Memo ...
Страница 172: ...Memo ...
Страница 176: ...2 17 2 HIGASHIGOTANDA SHINAGAWA KU TOKYO 141 8664 JAPAN ...


