e-STUDIO162/162D/151/151D FIRMWARE DOWNLOAD PROCEDURES 15 - 5
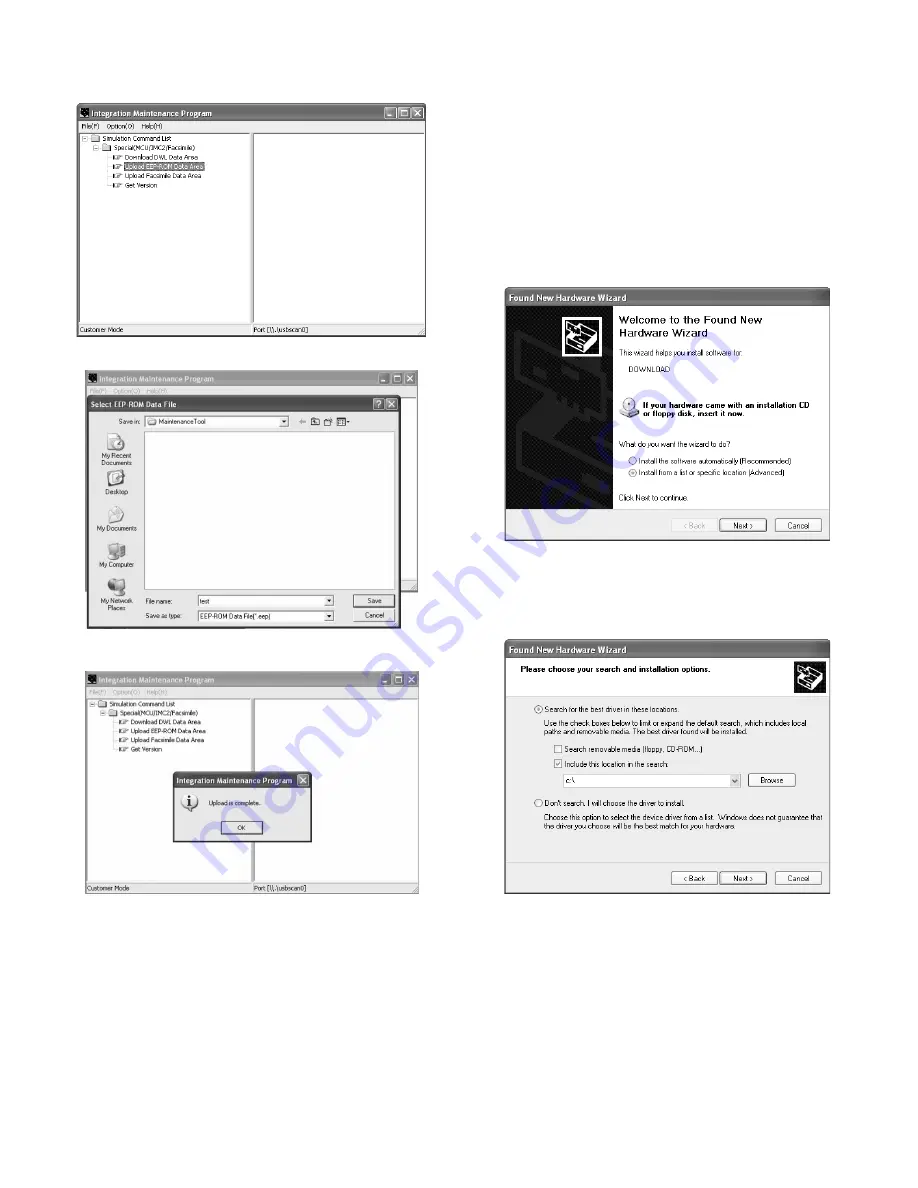
7) PC side: Double-click "Special (MCU/IMC2/Facsimile)" to develop
its sub trees, and select "Upload EEPROM Data Area" in the sub
trees.
8) PC side: Enter a desired file name, and select "Save."
9) PC side: When upload is completed, the complete message is dis-
played.
With the above procedure, the EEPROM data acquisition is completed.
Data acquired by the EEPROM data acquisition procedure are saved
in a file with extension of .eep.
5. Installing procedures
<USB integration maintenance program installation>
Driver installation is made on plug-and-play.
<Installation on Windows XP>
1) Main unit side: Execute Test command No. 49-01 (Flash ROM pro-
gram write mode).
Check that "DOWNLOAD MODE" is displayed on the LCD of the
operation panel. (Press and hold [CA] key and [DOWN] key (left
key) together, and turn on the power simultaneously.)
2) Connect the machine and the PC with a USB cable.
3) The following display is shown.
Select [Install from a list or specific location] and press <Next> but-
ton.
4) Select [Include this location in the search;]. If the search location is
not the folder which includes the maintenance tool driver
(Mainte.inf), select <Browse>. If the search location is the folder
which includes the maintenance tool driver, press <Next> button to
go to procedure 7).
e-STUDIO162_151.book 5
ページ
2004年12月2日 木曜日 午後9時48分
Содержание e-studio 151
Страница 156: ...e STUDIO162 162D 151 151D CIRCUIT DIAGRAM 14 30 6 7 8 9 10 11 12 6 7 8 9 10 11 12 A B C D E F G H 1 1 ...
Страница 157: ...e STUDIO162 162D 151 151D CIRCUIT DIAGRAM 14 31 A 1 2 3 4 5 6 B C D E F G H 1 2 3 4 5 6 POWER SUPPLY 220V 240V ...
Страница 158: ...e STUDIO162 162D 151 151D CIRCUIT DIAGRAM 14 32 6 7 8 9 10 11 12 6 7 8 9 10 11 12 A B C D E F G H 1 1 ...
Страница 170: ...Memo ...
Страница 171: ...Memo ...
Страница 172: ...Memo ...
Страница 176: ...2 17 2 HIGASHIGOTANDA SHINAGAWA KU TOKYO 141 8664 JAPAN ...


