background image

5. SYSTEM MODE


EM18-33031


5.10 RFID


5-78 

5.10.5.2 MULT 

WRITE 


OFF 


ON 

NOTES

1.  Gen2-compatible Hibiki tag (HITACHI) has a function which reduces the time to write data on the RFID 

chips. This is called “Multi-word write”. Use of this function enables a speed-up of the data write 
operation. However, this function is unique to the Hibiki tag, and not usable with the other Gen2-
compatible chips.  

2.  The following modules do not support this function. 


 B-EX706-RFID-U4-R 


 B-EX706-RFID-U4-EU/US/AU-R 


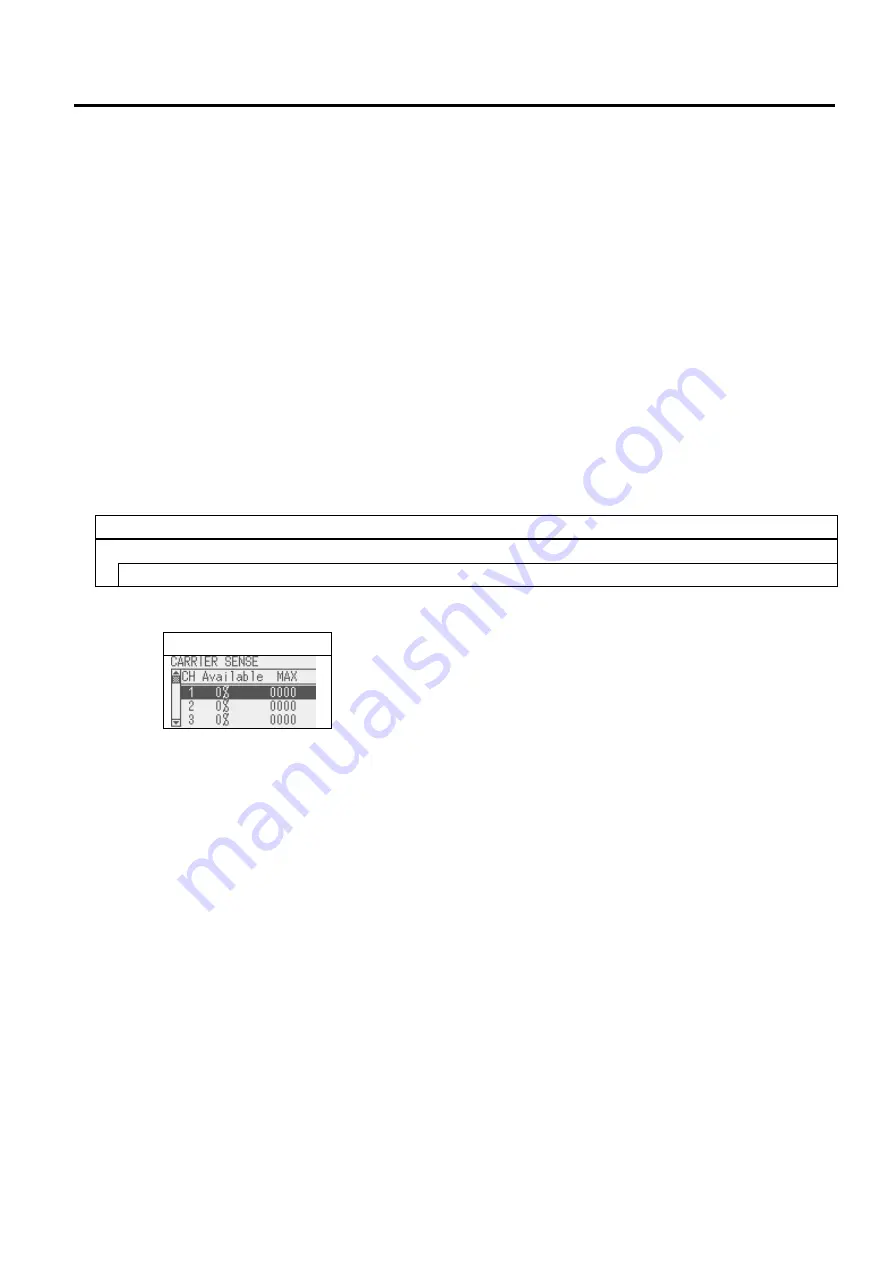
5.10.6  CARRIER SENSE 

The printer enters the carrier sense mode, and performs a carrier sense. Environmental radio wave of 
each channel is picked up for about 30 times during 5 seconds.  
 
The menu structure of CARRIER SENSE 

Menu item 
<7>RFID 
 CARRIER 

SENSE 


Display example 

Display 


NOTES

1.  This function is supported only by the B-EX706-RFID-U4-R. 
2.  The left-most number indicates a channel number. The percentage means the availability of the channel, 

which is determined by performing approx. 30 carrier senses. Thus, “100%” means that any other devices 
do not use this channel. 

3.  The MAX column shows the value of the maximum radio wave picked up. The larger the value is, the 

stronger radio wave source exists nearby. 

4.  The display can be scrolled up or down, from Channel 1 (1CH) to channel 9 (9CH), by using the [UP] or 

[DOWN] key.  

5.  Pressing the [ENTER] key causes the printer to perform a carrier sense again. To exit a carrier sense, 

press the [CANCEL] key. 

6.  When the RFID module type is set to “NONE” or a communication cannot be established, a message, 

“NO RFID MODULE”, is displayed. 

7.  When the RFID module type is set to other than U2, a message, “NOT AVAILABLE” is displayed. 
8.  When the RFID module type is set to U2 but effective data cannot be obtained, a message, “NO 

RESPONSE” is displayed. 

9.  If the RFID module’s country setting is not specified (user-inaccessible setting), an “RFID CONFIG ERR” 

message is displayed.    

Содержание B-EX6 Series

Страница 1: ...PRINTED IN JAPAN TOSHIBA Barcode Printer B EX6 SERIES Document No EO18 33031K Original Nov 2016 Revised Mar 2020 Maintenance Manual ...

Страница 2: ...N2 QM R 4 27 4 6 PARALLEL INTERFACE BOARD B EX700 CEN QM R 4 34 4 7 SERIAL INTERFACE BOARD B EX700 RS QM R 4 36 4 8 UHF RFID KIT B EX706 RFID U4 US EU CN R 4 38 4 9 4 ROTARY CUTTER B EX206 R QM S 4 60 5 SYSTEM MODE 5 1 5 1 OUTLINE OF THE SYSTEM MODE 5 1 5 2 REFLECTING THE SYSTEM MODE SETTINGS TO THE PRINTER 5 2 5 3 RESET 5 2 5 4 DIAGNOSTIC 5 3 5 4 1 MAINTENANCE COUNTER 5 3 5 4 1 1 COUNTER PARAMETE...

Страница 3: ...ON TORQUE 5 42 5 5 29 FRONT RIBBON MOTOR 5 42 5 5 215 1 Normal Torque 5 42 5 5 215 2 Low Torque 5 42 5 5 30 REAR RIBBON MOTOR 5 43 5 5 30 1 Normal Torque 5 43 5 5 30 2 Low Torque 5 43 5 5 31 Ribbon Width 5 43 5 6 TEST PRINT 5 44 5 6 1 PRINT CONDITION 5 44 5 6 1 1 ISSUE COUNT 5 45 5 6 1 2 PRINT SPEED 5 45 5 6 1 3 SENSOR 5 45 5 6 1 4 PRINT TYPE 5 45 5 6 1 5 ISSUE TYPE 5 45 5 6 1 6 LABEL PITCH 5 45 5...

Страница 4: ... ADDRESS 5 62 5 9 1 6 DHCP 5 62 5 9 1 7 DHCP CLIENT ID 5 62 5 9 1 8 DHCP HOST NAME 5 62 5 9 1 9 SOCKET PORT 5 62 5 9 1 10 PORT NUMBER 5 62 5 9 1 11 LPR 5 62 5 9 1 12 WLAN 5 63 5 9 1 13 SNMP 5 63 5 9 1 14 WEB PRINTER 5 63 5 9 2 USB 5 64 5 9 2 1 USB SERIAL ID 5 64 5 9 2 2 USB I F STATUS 5 64 5 9 3 RS 232C 5 65 5 9 3 1 BAUD RATE 5 65 5 9 3 2 DATA LENGTH 5 65 5 9 3 3 STOP BIT 5 65 5 9 3 4 PARITY 5 65 ...

Страница 5: ...ENSE 5 78 5 11 RTC 5 79 5 11 1 DATE TIME 5 79 5 11 2 BATTERY CHECK 5 79 5 11 3 RENEWAL 5 79 5 12 USB MEMORY 5 80 5 12 1 USB TO PRINTER 5 80 5 12 2 PRINTER TO USB 5 81 5 13 FACTORY TEST 5 82 5 13 1 HEAD UP ADJUST 5 82 5 13 2 PANEL TEST 5 82 5 13 3 KEY TEST 5 84 5 14 BASIC 5 86 5 14 1 BASIC 5 86 5 14 2 FILE MAINTENANCE 5 86 5 14 3 TRACE 5 86 5 14 4 SYSTEM PROGRAM 5 86 5 15 EMULATION MODE 5 87 5 16 X...

Страница 6: ...tting Display 10 2 10 2 LED FUNCTION 10 3 10 3 LCD FUNCTION 10 3 10 4 ONLINE MODE LCD DISPLAY 10 4 10 4 1 Online Mode LCD Display Example 10 4 10 4 2 Icon 10 5 10 4 3 Online Mode Display Transition Operation example 10 7 10 5 HELP SCREEN 10 8 10 5 1 Explanation of Help Screen 10 8 10 5 2 Help Screen Transition and Operation Example 10 9 10 6 MANUAL THRESHOLD SETTING 10 10 10 6 1 Outline of Thresho...

Страница 7: ...ING 14 1 15 MAJOR UNIT REPLACEMENT 15 1 15 1 POWER SUPPLY UNIT 15 2 15 2 MAIN PC BOARD 15 4 15 3 OPERATION PANEL ASS Y 15 6 15 4 STEPPING MOTOR ASS Y 15 7 15 5 RIBBON MOTORS TAKE UP FEED 15 9 15 5 1 Ribbon Motor Take up 15 9 15 5 2 Ribbon Motor Feed 15 10 15 6 RIBBON MOTOR SENSORS TAKE UP FEED 15 11 15 6 1 Ribbon Motor Sensor Take up 15 11 15 6 2 Ribbon Motor Sensor Feed 15 13 15 7 PRINT HEAD 15 1...

Страница 8: ... 2 Adjustment procedure for a spare print head 17 3 17 2 3 Adjustment procedure for the installed print head 17 4 18 PRINT HEAD PRESURE ADJUSTMENT LEVER B EX4 B EX6 18 1 CAUTION 1 This manual may not be copied in whole or in part without prior written permission of Toshiba Tec 2 The contents of this manual may be changed without notification Copyright 2017 2020 by Toshiba Tec Corporation All Right...

Страница 9: ...ING 1 1 PROCEDURE 1 Open the carton 2 Unpack the accessories and the front pad from the carton 3 Unpack the pads and the printer from the carton 4 Remove the four pieces of tape and the rear pad from the printer Tape Tape Carton Accessories Front Pad ...

Страница 10: ...ACKING EO18 33031 1 1 PROCEDURE 1 2 5 Open the top cover and remove the five pieces of tape and remove the bubble sheet cushion Top Cover Print Head Block Holder Plate Tape Tape OPEN Anti static bubble sheet ...

Страница 11: ...manual NOTES Keep the carton and pads for later transport 2 PRINTER INSTALLATION 1 Place the printer on the level surface 2 Keep the slit free or the printer will be overheated Also keep enough space for replacing and maintenance works while the top cover is opened Side panel Top Cover Contents Bar code printer application BarTender Ultra Lite Windows Driver Owner s Manual Specifications Programmi...

Страница 12: ...sembling assembling and cleaning just after printing Doing so may cause you to be injured by the print head and the inner parts of the printer being hot 3 When cleaning the cutter be careful not to be injured by the cutter blade 4 Be careful not to pinch your fingers or hands with the covers CAUTION 1 Fix the harnesses and the cord bushes with the cable clamp Failure to do this may cause the cover...

Страница 13: ...he feed gap or the black mark correctly causing improper printing 4 When replacing parts or performing maintenance on the printer be careful not to damage the print head with a hard object like a watch or a ring Since the print head element can be easily damaged by shock please treat it carefully by not hitting a hard object against it Printer Block Screw Sensor Window Care must be taken not to al...

Страница 14: ...ING THE TOP COVER When opening the top cover fully open the top cover to the open position When closing gently close it to the close position 3 2 REMOVING THE SIDE PANEL L Remove the three M3x6 screws from the side panel L Move the side panel L to the back and push up it to remove Open position Close position M3x6 Screw M3x6 Screw Side Panel L ...

Страница 15: ...ver 2 Turn the head lever counterclockwise to FREE position 3 Open the print head block holder plate 4 Raise the print head block until it stops NOTE DO NOT excessively push down the print head block to close it Dosing so may cause a failure of the print head block or damage to the print head Head Lever Standard Lock Position FREE position Print Head Block Holder Plate Print Head Block ...

Страница 16: ...e side panel L from the printer Refer to section 3 2 3 Fully open the top cover otherwise the operation panel ass y is stuck on the tab and cannot be removed from the printer 4 Push the operation panel ass y out through the top hooks direction 5 Lift the operation panel ass y to release the bottom hook and then remove the operation panel ass y by moving it forward Top Cover Operation Panel Ass y T...

Страница 17: ...QUIPMENT INSTALLATION MAJOR UNIT REPLACEMENT EO18 33031 MAINTENANCE 3 4 REMOVING THE OPERATION PANEL 3 6 6 Disconnect the operation panel harness from the operation panel ass y Operation Panel Ass y Operation Panel Harness ...

Страница 18: ... close under its own weight resulting in an injury CAUTION When replacing parts or performing maintenance on the printer be careful not to damage the print head with a hard object like a watch or a ring Since the print head element can be easily damaged by shock please treat it carefully by not hitting a hard object against it The following optional kits are provided for this printer B EX206 QM R ...

Страница 19: ...R 4 2 4 1 DISC CUTTER B EX206 QM R All the following parts are supplied with the kit Make sure you have all items shown below Cutter Unit 1 pc Paper Guide for B EX6T3 1pc Inspection Paper 4pcs Cord bush 1 pc M 4x6 Screw 2 pcs ST 3x6 Screw 1 pc Cable Clamp 1 pc Installation Manual 1 copy ...

Страница 20: ... R 4 3 Difference between Type 1 and Type 3 cutters The B EX206 disc cutter module is basically the same except for the Paper Guide used for Type 1 and Type 3 To attach to Type 3 the parts shown in P4 need to be changed in advance Type 3 Paper Guide Type 1 Paper Guide Paper Metal guide ...

Страница 21: ... the two FL 3 x 6 screws holding the metal guide 2 A Paper Guide is exchanged for Paper guide of Type3 3 Prepare four sheets of Tag paper and insert them between the guides 4 Press both sides of the Paper Guide against the 4 tag papers 5 Tightened the SAME FL 3 x 6 screws after proper checking and adjustment is confirmed 6 Perform a test cut to check for a proper operation Repeat the procedure if ...

Страница 22: ...r off and disconnect the Power Cord 2 Remove the three B 4x5 screws from the Side Panel L 3 Slide the Side Panel L backward and raise it to remove from the printer 4 Fully open the Top Cover 5 Release the tab on the right end by pushing it then remove the Front Panel Right B 4x5 Screw Side Panel L B 4x5 Screw Top Cover Tab Front Panel Right ...

Страница 23: ...UTTER B EX206 QM R 4 6 6 Remove the Front Panel Left 4 1 2 Mounting the Cutter Unit 1 Turn the Head Lever to FREE position and open the Print Head Block Holder Plate 2 Open the Print Head Block Front Panel Left Print Head Block Head Lever Print Head Block Holder Plate 1 ...

Страница 24: ...sh the hook through the rectangle hole with a tool with a fine tip to remove the Platen Holder Cover 4 Remove the Strip Plate 5 Restore the Platen Holder Cover NOTE The strip plate is not used Keep it safe for future use Platen Holder Cover Hook Push Rectangle Hole Strip Plate Platen Holder Cover ...

Страница 25: ...Cord Bush onto the Harness Ass y in the orientation as shown below 8 Attach the Cable Clamp to the printer base Fasten the Harness Ass y with the Cable Clamp NOTE Make sure the wires will not touch or obstruct any moving parts Cord Bush Cable Clamp Printer Base Harness Ass y Cable Clamp Plastic Head Screw Plastic Head Screw Cutter Cover ...

Страница 26: ... R 4 9 9 Place the hook at the left side of the Cutter Unit on the cut in the printer main frame 10 Secure the right side of the Cutter Unit with the ST 3x6 screw 11 Secure the bottom of the Cutter Unit with the two M 4x6 screws ST 3x6 Screw Cutter Unit Cut Hook M 4x6 Screw Cutter Unit ...

Страница 27: ... sure the wires will not touch or obstruct any moving parts 13 Attach the Cutter Cover to the Cutter Unit with the Plastic Head Screws 14 Close the Print Head Block and Print Head Block Holder Plate NOTE DO NOT excessively push down the print head block to close it Doing so may cause a failure of the print head block or damage to the print head Hole Main Frame Harness Ass y Plastic Head Screw Cutt...

Страница 28: ... y through the Cable Protector 2 Fasten the Harness Ass y with the Cable Clamp 3 Connect the Harness Ass y to J11 on the Main PC board 4 Re install the Side Panel L and close the Top Cover 5 Refer to the Service Manual for the parameter settings and check the cutter operation Main PC Board J11 Harness Ass y Cable Protector Harness Ass y Cable Clamp ...

Страница 29: ...e module for the B EX6T Series All the following parts are supplied with the kit Make sure you have all items shown below Fanfold Paper Guide rear 1 pc M 4x6 Screw 1 pc Installation Manual 1 copy 4 2 1 Removing the Covers 1 Turn the printer power off and disconnect the Power Cord 2 Open the top cover 3 Secure the fanfold paper guide rear with the M 4x6 screw M 4x6 Screw Fanfold Paper Guide rear In...

Страница 30: ...Cable Clamp 2 pcs Installation Manual 1 copy M 4x4 Screw 2 pcs ST 3x6 Screw 6 pcs PT 3x6 Screw 2 pcs NOTE 1 This module cannot be used together with the B EX206 QM R disc cutter 2 When the peel off module is used together with an RFID module be sure to install the RFID module prior to this module 4 3 1 Removing the Covers 1 Turn the printer power off and disconnect the Power Cord 2 Remove the thre...

Страница 31: ...ULE B EX906 H QM R 4 14 4 Fully open the Top Cover 5 Release the tab on the right end by pushing it then remove the Front Panel 4 3 2 Installing the Rewinder Ass y 1 Detach the Rewinder Motor Cover by removing the two screws Top Cover Tab Front Panel Rewinder Motor Cover Screw ...

Страница 32: ...EL OFF MODULE B EX906 H QM R 4 15 2 Disconnect the Rewinder Harness from CN1 on the Rewinder PC Board 3 Disconnect the PSU Harness from the MAIN PC board and remove the screw to detach the PSU Rewinder Harness CN1 Rewinder PC Board Screw PSU Harness PSU Main PC Board ...

Страница 33: ...e connector of Rewinder Harness disconnected from the Rewinder PC Board in Step 2 into the hole in the main frame 5 Pull out the Rewinder Harness from the opposite side and re connect it to CN1 on the Rewinder PC Board Rewinder Harness Hole Rewinder Harness CN1 Rewinder PC Board Hole Tabs of Blind Plate Step 7 ...

Страница 34: ... other side of the Main Frame through the hole 7 From the MAIN PC board side unfold the tabs of the Blind Plate See Step 4 then pull and remove the Blind Plate 8 Tilt the Rewinder Ass y forward to avoid the Supply Holder and put it against the main frame as shown below Tab Blind Plate Supply Holder Rewinder Ass y Supply Holder Main Frame Main Frame Rewinder Motor Cover Rewind Full Sensor Harness H...

Страница 35: ...d Full Sensor with the dowel hole in the base Secure the Rewind Full Sensor to the printer base with the ST 3x6 screw 10 Fit the Cord Bush to the Rewinder Harness and Rewind Full Sensor Harness together in the orientation shown below Then fit the Cord Bush into the hole Rewinder Harness Rewind Full Sensor ST 3x6 Screw Cord Bush Cord Bush Hole ...

Страница 36: ... y with those in the printer main frame and secure the Rewinder Ass y with the five ST 3x6 screws 12 Align the screw holes in the Core Shaft Support with those in the printer base frame and secure the Core Shaft Support with the five M 4x4 screws Rewinder Ass y ST 3x6 Screw ST 3x6 Screw ST 3x6 Screw ST 3x6 Screw M 4x4 Screw Core Shaft Support ...

Страница 37: ...tor of the Rewinder Harness with Cable Clamp and Cable Protector And then insert the 4 pin Connector of the Rewinder Harness into the hole of the main frame 16 Fit the Cord Bush to the 4 pin Connector of the Rewinder Harness in the orientation shown below Then fit the Cord Bush into the hole Main PC Board Rewinder Harness J11 3 pin Connector of the Rewinder Harness Cable Protector 4 pin Connector ...

Страница 38: ...FF MODULE B EX906 H QM R 4 21 17 Re install the PSU in the reverse order of removal 4 3 3 Installing the Strip Sensors 1 Release the hook on the top of Operation Panel by pushing it up and then Detach the Operation Panel Main PC Board PSU Harness PSU Hook Operation Panel ...

Страница 39: ... printer 4 Connect the harnesses of the Strip Sensor LED and Strip Sensor Tr with the black connectors 5 Connect the Strip Sensor Tr and the 4 pin connector of the Rewinder Harness NOTE Make sure the wires will not touch or obstruct any moving parts Front Panel R Operation Panel Strip Sensor Tr PT 3x6 Screw Strip Sensor LED PT 3x6 Screw Cable Hook Cable Clamp 4 pin Connector of the Rewinder Harnes...

Страница 40: ...l or a paper core When using the Take up Spool detach the holder stopper by removing the B 3x5 screw Otherwise it may be difficult to pull out the wound backing paper roll When using a paper core put the core on the Take up Spool with the Holder Stopper on it and attach the top edge of the backing paper to the core with adhesive tape The Take up clip is not necessary Selection Switch Holder Stoppe...

Страница 41: ...e following parts are supplied with the kit Make sure you have all items shown below Expansion I O Board M 3x6 Screw 2 pc Installation Manual 1 copy 1 Turn the printer power off and disconnect the Power Cord 2 Remove the three B 4x5 screws from the Side Panel L 3 Slide the Side Panel L backward and raise it to remove from the printer B 4x5 Screw Side Panel L B 4x5 Screw ...

Страница 42: ...abs of the Blind Plate indicated by the arrow then pull and remove the Blind Plate from the printer back 5 Fit the Expansion I O Connector of the Expansion I O Board into the slot from the inside and secure it with the two M 3x6 screws from the outside as shown below Blind Plate Tab Tab Expansion I O Connector M 3x6 Screw M 3x6 Screw ...

Страница 43: ...700 IO QM R 4 26 6 Connect the Interface Cable to J3 on the Main PC Board 7 Re install the Side Panel L 8 Refer to Section 5 9 5 EXP I O to select the operating mode 9 Perform a loop back test to confirm the expansion I O board functions properly J3 Main PC Board Interface Cable Expansion I O Board ...

Страница 44: ...efore mounting the covers so that an end user can know the MAC address 2 Be careful not to hit or damage the antenna when installing this kit A damaged antenna may affect the performance 3 This module cannot be used together with the B EX700 RS QM R Serial Interface Board Country Code As available frequency bands are different from country to country a proper country code must be set before instal...

Страница 45: ...nd disconnect the Power Cord 2 Remove the three B 4x5 screws from the Side Panel L 3 Slide the Side Panel L backward and raise it to remove from the printer 4 Unfold the upper tabs of the Blind Plate indicated by the arrow then pull and remove the Blind Plate from the printer back Blind Plate Tab Tab B 4x5 Screw Side Panel L B 4x5 Screw ...

Страница 46: ...t from the inside and secure it with the two M 3x6 screws from the outside as shown below 6 Attach the Antenna Cover to the printer back with the two M 3x6 screws as shown below 7 Connect the Interface Cable to J6 on the Main PC board Wireless LAN Card Slot M 3x6 Screw M 3x6 Screw M 3x6 Screw M 3x6 Screw J6 Main PC Board Interface Cable Antenna Cover ...

Страница 47: ... B EX6T3 series 1 The B EX700 WLAN2 QM R will automatically start updating the firmware of the wireless LAN automatically at the first startup Therefore the printer display will be blank for a while The time spent on upgrading is about 30 seconds After upgrading it starts normally This firmware version upgrade operation is only the first time when installing the WLAN 2 board It will not be updated...

Страница 48: ...rresponding to each regulatory domain Regulatory Domain Country Code Country Name Regulatory Domain Country Code Country Name FCC CAN CANADA ETSI IRA IRELAND MEX MEXICO ISL ICELAND TPE TAIWAN ITA ITALY USA UNITED STATES KOR KOREA REPUBLIC OF ETSI AUS AUSTRALIA LAT LATVIA AUT AUSTRIA LIE LIECHTENSTEIN BEL BELGIUM LTU LITHUANIA BUL BULGARIA LUX LUXEMBOURG CHN CHINA MLT MALTA CYP CYPRUS NED NETHERLAN...

Страница 49: ...including interference that may cause undesired operation of the device For Taiwan Caution 根據低功率電波輻射性電機管理辦法 For safety Do not use this product in locations where use may be forbidden for example in an aeroplane or a hospital If you do not know the forbidden areas please refer to and follow the airline company or medical institution guidelines Otherwise flight instrument or medical equipment may be...

Страница 50: ...dden areas please refer to and follow the airline company or medical institution guidelines Flight instrument or medical equipment may be affected causing a serious accident Since this product uses extremely low power compared with mobile phones it cannot possibly interfere the pacemakers and defibrillators However if the use of this product should be likely to have affected the pacemaker or defib...

Страница 51: ... Parallel Interface Board 1 pc M 3x6 Screw 2 pcs Installation Manual 1 copy 1 Turn the printer power off and disconnect the Power Cord 2 Remove the three B 4x5 screws from the Side Panel L 3 Slide the Side Panel L backward and raise it to remove from the printer 4 Unfold the upper tabs of the blind plate indicated by the arrow then pull and remove the blind plate from the printer back Blind Plate ...

Страница 52: ...nterface board into the slot from the inside and secure it with the two M 3x6 screws from the outside as shown below 6 Connect the interface cable to J2 on the Main PC board 7 Re install the Side panel L 8 Refer to Section 5 9 4 CENTRONICS in 5 9 INTERFACE for the interface parameter settings M 3x 6 Screw Parallel Interface Connector Main PC Board J2 Interface Cable Parallel Interface Board ...

Страница 53: ...tallation Manual 1 copy NOTE This module cannot be used together with the B EX700 WLAN QM R wireless LAN board 1 Turn the printer power off and disconnect the Power Cord 2 Remove the three B 4x5 screws from the Side Panel L 3 Slide the Side Panel L backward and raise it to remove from the printer 4 Unfold the upper and lower tabs of the Blind Plate indicated by the arrow then pull and remove the B...

Страница 54: ...ard into the slot from the inside and secure it with the two M 3x6 screws from the outside as shown below 6 Connect the interface cable to J6 on the Main PC board 7 Re install the Side panel L 8 Refer to Section 5 9 3 RS 232C in 5 9 INTERFACE for the interface parameter settings Main PC Board J6 Interface Cable Serial Interface Board Serial Interface Connector M 3x6 Screw M 3x6 Screw ...

Страница 55: ... a printer embedded with this product to the countries or areas where a use of this product is not allowed without permission Doing so is against the law and you may be punished When exporting this product check the laws and regulations of a destination country and take necessary procedures 3 Follow all manual instructions Failure to do so could create safety hazards such as fire or electrocution ...

Страница 56: ...RFID U4 US R UHF 902 75 927 25MHz USA UHF 920 9 923 3MHz Korea UHF 920 625 924 375MHz China B EX706 RFID U4 EU R UHF 869 85MHz EU EFTA B EX706 RFID U4 AU R UHF 918 926MHz AU PACKING LIST All the following parts are supplied with the kit Make sure you have all items shown below If any part is missing please contact your TOSHIBA TEC sales agent RFID Module PT 3x6 screw 1pc Bush 1 pc Cable ties 2 pcs...

Страница 57: ...ers 1 Turn the printer power off and disconnect the Power Cord 2 Remove the three B 4x5 screws from the Side Panel L 3 Slide the Side Panel L backward and raise it to remove from the printer 4 Fully open the Top Cover 5 Release the tab on the right end by pushing it then remove the Front Panel B 4x5 Screw Side Panel L B 4x5 Screw Top Cover Tab Front Panel ...

Страница 58: ...follow the combination described in RFID label recommended setting sheet 1 Attach the selected Shield Label to the bottom of the Platen Holder Block 2 Disconnect the shielding plate from the RFID module Shield Label Guide of Attachment Position Attach the Shield Label along the rib When viewed from the bottom Platen Holder Block CAUTION DO NOT DISASSEMBLE the Platen Holder Block Doing so will chan...

Страница 59: ...e main frame and pass through it the black connector of the red interface cable that is connected to the RFID 4 Fit the RFID module to the bottom of the Platen Holder Block as shown below Guide of Attachment Position When viewed from the bottom Attach the RFID module to the 4 alignment slots enclosed in circles Platen Holder Block RFID module Bush Interface Cable To Lock ...

Страница 60: ...as shown in the photo and secure it with screws PT 3x6 6 Pull out the interface cable from the opposite side and pass it through the opening 7 Arrange the cables properly and secure it on the cable clamp as shown below Cut the old cable ties and fasten the cables together with the interface cable with new cable ties Cable Clamp Screw PT 3x6 Ground Wire Ground Wire Cable Guard Interface Cable ...

Страница 61: ...n PC Board with the Interface Cable 4 8 3 Attaching the Paper Guide RFID paper guide is not required when using the RFID module with the cutter peel off option 1 Turn the Head Lever to FREE position and gently put down to the side the Print Head Block Holder Plate 2 Open the Print Head Block Print Head Block Holder Plate Head Lever Print Head Block J1 Connector Main PC Board ...

Страница 62: ...t the tip of a thin tool into the square hole remove the platen holder cover and remove the Strip plate 4 Install the RFID paper guide and return the platen holder cover to the original position NOTE Since the release plate will not be used please keep it in a safe place Platen Holder Cover Platen holder cover Hook Push Square Hole Strip Plate RFID Paper Guide ...

Страница 63: ...ule configuration press the ENTER key to select the UHF band U2 U4 4 Set the country code to EU Press the ENTER Key Enter PASSWORD RFID and 1048 then save by pressing the ENTER key Confirm the COUNTRY CODE is set to EU and press the ENTER key 5 Turn off the printer power and back to on again Enter the system mode 6 Under the module setting select EPC C1 Gen2 as the Tag Type and press the ENTER key...

Страница 64: ...ea indicated in the following photo and perform a read test Select TEST and press the ENTER key Select ID READ and press the ENTER key Execute an ID READ test The read ID appears on the display That s all for the installation of the RFID module Please proceed to the RFID setting ID READ Tag 1 1 Performance 9 00010203 04050607 08090A0B 0C0D0E0F Display Test Tag RFID Tag ...

Страница 65: ...el indication of the mounting position 4 8 5 1 Guidelines for the antenna position and shield label selection media specification confirmation 1 Confirm below your media specification A Media pitch B Gap length C RFID chip position distance from front edge of the paper 2 Guidelines for the antenna position selection Start No Use offset print function Refer table 1 Refer table 2 Yes ...

Страница 66: ...er C Disabled over 20 20 to 34 Front F Disabled 34 to 41 Center C Disabled over 41 Rear R Disabled Offset printing Characteristics is the mode of execution of writing for one piece back word tag from the printing Tag and it should be effective for plural RFID tag is printing continuously When this function is enabled the back feed to write data is unnecessary and the throughput should be improved ...

Страница 67: ...ack with the new antenna position 1 After the antenna shield and antenna screws have been removed detach the connector of the PCB from the antenna Connector 2 Reroute the black wire to the other side as shown in the figure above Black wire 3 Re connect the black wire to the antenna as shown in figure above 4 Attach the antenna and secure with 2 screws the proper alignment shown in the figure above...

Страница 68: ...LD WRITE AGC THRESHOLD WRITE RETRY MIN AGC OTHER TAG CHECK MULTI WRITE Key functions in the system mode Key Function MODE Returns to the mode menu screen CANCEL or FEED RESTAR Returns to the upper hierarchy ENTER or PAUSE Displays a next screen Saves the setting and returns to the upper hierarchy UP or RESTART Moves the cursor upward Increases a value DOWN or FEED Moves the cursor downward Decreas...

Страница 69: ... When data is less than 32 digits the vacant digits will be filled with spaces If more than one tag is read at one time especially when short pitch tags are used pressing the UP or DOWN key shows the other tags data 4 8 6 2 MODULE 1 MODULE TYPE NONE No RFID module is installed H1 not supported H2 not supported U2 U4 B EX706 RFID U4 US EU AU R U4 module preinstall model B EX6T1 GS18 TS18 CN R NOTE ...

Страница 70: ... 2CH 8CH 6CH 4CH 3CH 7CH 5CH 2CH Though this setting is applicable to all models it works effectively only for the B EX706 RFID U4 R UHF for Japan If writing data on a tag failed the printer feeds the RFID tag forward or backward for specified length in order to retry data write When 0 is set for this parameter this function and a retry are not performed Only the value of 3mm or less or 3mm or mor...

Страница 71: ...s pre read Set the timeout period during which RFID tag read retries are allowed with the UP or DOWN key If the printer has retried for the max number of times within the RFID read retry timeout the printer stops the retries at the time Whenever the printer writes data onto an RFID tag the tag is read first The read retry timeout set by this parameter becomes also effective in this pre read 255 0 ...

Страница 72: ...g even if a data write succeeds When the AGC threshold is set to 0 all tags are writable When set to 8 for example only tags with the AGC threshold level of 9 or greater are writable The optimum value is different depending on the tag types The factory default is 0 If default value fails then try it with the recommended value of 9 15 0 14 1 When the Q value is set to 1 or greater the AGC threshold...

Страница 73: ...selected as factory default a 4 digit password entry will be requested when you access this menu for the first time Enter the default password 0000 or a 4 digit password programmed in step 6 2 When the password matches TAG CHECK parameter setting screen appears Selecting OFF or ON ID disables password setting and the screen returns to the upper hierarchy If the entered password does not match an e...

Страница 74: ...et to other than U2 a message NOT AVAILABLE is displayed When the RFID module type is set to U2 but effective data cannot be obtained a message NO RESPONSE is displayed If the RFID module s country setting is not specified user inaccessible setting an RFID CONFIG ERR error message is displayed Example Channel number The availability of the channel which is determined by performing approx 30 carrie...

Страница 75: ...e Top Cover NOTE If an RFID tag is not positioned above the Antenna while the Print Head is at a print start position use 003 command to adjust the media position so that an RFID tag is positioned above the Antenna For detail of the command refer to the External Equipment Interface Specification Printer Command Manual 2 Start the printer in the system mode and perform a read test to measure the AG...

Страница 76: ...write WRITE AGC THRESHOLD In the case of this example set 8 and press the ENTER key 6 AGC threshold setting is completed Reference Recommended setting for RFID tag and Label Example B EX6T1 Recommended setting for RFID Tag and Label Answer date 5 Sep 2016 Basic Information Dealer SI XXXXXXXX End User YYYYY Label Manufacturer ZZZZ Label Size W 80mm X L 60mm Gap 5 mm Antenna Position F C R Kinds of ...

Страница 77: ...6 Screw 2 pcs Bracket 1 pc Cord Bush 1 pc Installation Manual 1 copy NOTE This module cannot be used together with the B EX906 H QM S strip module or B EX206 QM R disc cutter When this cutter is used together with an RFID module be sure to install the RFID module prior to the cutter 4 9 1Removing the Covers and Strip plate 1 Turn the printer power off and disconnect the Power Cord 2 Remove the thr...

Страница 78: ...031 Revision Date Oct 2018 4 9 4 ROTARY CUTTER B EX206 R QM S 4 61 4 Fully open the Top Cover 5 Release the tab on the right end by pushing it then remove the Front Panel Right 6 Remove the Front Panel Left Tab Front Panel Right Top Cover Front Panel Left 1 ...

Страница 79: ...62 7 Turn the Head Lever to FREE position and open the Print Head Block Holder Plate 8 Open the Print Head Block 9 Push the hook through the rectangle hole with a tool with a fine tip to remove the Platen Holder Cover Platen Holder Cover Hook Push Print Head Block Head Lever Rectangle Hole Print Head Block Holder Plate ...

Страница 80: ... Remove the Strip Plate 11 Restore the Platen Holder Cover NOTE The strip plate is not used Keep it safe for future use 4 9 2 Mounting the Cutter Drive Unit 1 Put the Cord Bush onto the Harness Ass y 2 Connect the Harness Ass y to J5 on the Cutter Driver Unit J5 Harness Ass y Cutter Drive Unit Strip Plate Platen Holder Cover ...

Страница 81: ...the Cord Bush which was put onto the Harness Ass y in Step 1 into the hole Be sure to route the harness inside the hook NOTE Make sure the wires will not touch or obstruct any moving parts 4 Place the Cutter Drive Unit under the Platen Holder Block and secure it with the three M 4x8 screws M 4x8 Screw M 4x8 Screw Platen Holder Block Bush Harness Ass y Hook Hook Harness Ass y Hole Main Frame Bush M...

Страница 82: ... 65 4 9 3Attaching the Cutter Unit 1 Attach the metal bracket to the back of the cutter using the 2 M 4X6 screws 2 Turn the Head Lever to FREE position and open the Print Head Block Holder Plate 3 Open the Print Head Block Print Head Block Print Head Block Holder Plate Head Lever M 4x6 Screws Metal Bracket M 4x6 Screws ...

Страница 83: ...r harnesses of the Cutter Unit to J1 J2 J3 and J4 on the Cutter Drive Unit 5 Place the hook at the left side of the Cutter Unit on the cut in the printer main frame Fit the tab of the Cutter Drive Unit into the slit in the Cutter Unit Cutter Unit Cutter Drive Unit J1 J2 J4 J3 Fit the tab into the slit Place the hook on the cut Cut Hook Cut ...

Страница 84: ...that the tab of the Cutter Cover turns on the Cutter Cover Open Switch NOTES 1 Be careful not to pinch the cutter harness by the cutter cover 2 Make sure that the anti static brush is protruding from the media outlet 4 9 4 Wiring of the Harness Ass y 1 Pass the Harness Ass y through the Cable Protector Cutter Cover M 4x8 Screw Cable Protector Harness Ass y Cutter Cover Open Switch Tab Screw Anti s...

Страница 85: ... the cable clamp if the harness is too long 4 Close the Print Head Block and Ribbon Shaft Holder Plate NOTE DO NOT excessively push down the print head block to close it Doing so may cause a failure of the print head block or damage to the print head 5 Re install the Side Panel L and close the Top Cover 6 Refer to the Service Manual for the parameter settings and check the cutter operation Main PC...

Страница 86: ...bliquely adjust the cut angle using the following procedure 1 Loosen the two SM 4 x8B screws 2 Move the guide plate back or forth so that the cutter is perpendicular to the media Tighten the same SM 4x8B screws As viewed from the top of the cutter unit 3 Perform a test cut to check for a proper operation Repeat the procedure if necessary SM 4x8B Screw Guide Plate SM 4x8B Screw ...

Страница 87: ...ds 2 The system mode is intended for performing self test and various parameter settings 3 When the top menu is displayed the main firmware version is shown on the right side of the title 4 The language displayed on the LCD is Japanese when Japanese is selected for the LCD language parameter and English when a language other than Japanese is selected See 14 LCD PANEL 5 The key operations for the s...

Страница 88: ...rs 8 RTC Set the date time of the real time clock and choose a real time renewal timing 9 USB MEMORY Copy data including firmware to from USB memory 10 FACTORY TEST Adjust the printer before shipment 11 BASIC Set the functions of the BASIC program to be downloaded to the printer 12 EMULATION MODE Same as BASIC function 13 XML Set XML functions 14 LCD PANEL Select a language for the display choose ...

Страница 89: ...ERMAL NO YES DISPLAY NOTES 1 The MAINTENANCE COUNTER enables selecting whether to print or display the self diag test result maintenance counter data and parameter settings When THERMAL TRANSFER or DIRECT THERMAL is selected the test result is printed When DISPLAY is selected the test result is displayed on the LCD 2 When an error occurs while printing the error message is displayed the ERROR LED ...

Страница 90: ...ress the ENTER key 3 PRINT TYPE menu is displayed 4 When THERMAL TRANSFER or DIRECT THERMAL is selected Note When DISPLAY is selected go to step 5 4 1 PRINT TYPE C1 6 DIRECT THERMAL THERMAL TRANSFER DISPLAY 1 Select either THERMAL TRANSFER or DIRECT THERMAL 2 Press the ENTER key 3 PAPER CUTTING Menu is displayed 4 2 PAPER CUTTING C1 6 YES NO Printing CHECKING PRINT PRINTING 1 Select YES or NO 2 Pr...

Страница 91: ...ecovers from the error the ERROR LED turns off and the ONLINE LED turns on Note that the printer does not reprint the label automatically 5 In the case DISPLAY is selected 5 1 PRINT TYPE C1 6 DIRECT THERMAL THERMAL TRANSFER DISPLAY 1 Select DISPLAY 2 Press the ENTER key 3 DISPLAY menu is displayed 5 2 DISPLAY COUNTER ADJUSTMENT PC USB SERIAL NUMBER STORAGE AREA 1 Select an item to be displayed 2 P...

Страница 92: ...VE TIME 15min RIBBON TORQUE Normal BASIC OFF BASIC TRACE OFF PANEL LANGUAGE ENGLISH MODEL NAME ON PRINTED COUNTER ON IP ADDRESS ON CONTRAST 40 SYSTEM PASSWORD OFF STORAGE AREA TTF AREA 0KB EXT CHR AREA 0KB BASIC AREA 0KB PC SAVE AREA 0KB USB SERIAL NUMBER DISABLE XXXXXXXXXXXX RS 232C BAUD RATE 9600 DATA LENGTH 8 STOP BIT 1 PARITY EVEN CONTROL XON READY AUTO CENTRO ACK BUSY Rising edge INPUT PRIME ...

Страница 93: ...el distance covered Range 0 0 to 3200 0 km Counting condition Counted when the media feed motor is driven to feed or print the media Reverse feed is also counted When the power is turned off the media distance of 50 0 cm or less may be rounded down when backed up FEED1 to FEED4 Description History of last 4 label distances Range 0 0 to 3200 0 km Counting condition When the maintenance counter is R...

Страница 94: ...232C hardware error occurred Range 0 to 255 Counting condition Counted when a parity error overrun error or framing error occurs SYSTEM ERR Description The number of times a system error occurred Range 0 to 15 Counting condition Counted when a system error occurs POWER FAIL Description The number of times a momentary power interruption occurred Range 0 to 15 Counting condition Counted when a momen...

Страница 95: ...position after printing is set to ON Value to be printed 2 5 0mm to 5 0mm Description 3 Feed mode Value to be printed 3 MODE1 Feeds the media for 16 5 mm MODE2 Feeds the media backward for 6 mm then feeds it forward for 3 mm Only when the cut mode thermal transfer and feed gap sensor are selected In other conditions the printer feeds the media for 16 75 mm MODE3 Feeds the media for 34 0 mm This is...

Страница 96: ...ibration is performed with transmissive sensor then the media is reversely fed ON REFL BF Auto calibration is performed with reflective sensor then the media is reversely fed ON ALL BF Auto calibration is performed with both sensors then the media is reversely fed CODE PAGE 1 2 Description 1 Character code selection Value to be printed 1 PC 850 PC 852 PC 857 PC 8 PC 851 PC 855 PC 1250 PC 1251 PC 1...

Страница 97: ...d OFF Not performed ON Performed WEB PRINTER Description Whether to use the printer as a web printer Values to be printed OFF Not used ON INTERNAL Used Internal memory is used ON EXTERNAL Used External memory is used RIBBON NEAR END Description Ribbon near end detection Values to be printed OFF Disabled 30m Ribbon near end status is detected when the remaining ribbon length is approximately 30 m 7...

Страница 98: ... SET Command specified value is used THRESHOLD SEL T Description Threshold value for the transmissive sensor Values to be printed MANUAL SET Manually set value is used COMMAND SET Command specified value is used ENERGY TYPE T Description Energy level applied to the print head in thermal transfer mode Values to be printed Generic General purpose rsv1 Reserved1 Reserved rsv2 Reserved2 Reserved rsv3 ...

Страница 99: ...dard Low Low BASIC Description Basic interpreter setting Values to be printed OFF Basic interpreter is disabled ON Basic interpreter is enabled BASIC TRACE Description Basic interpreter trace setting Values to be printed OFF Trace is disabled ON Trace is enabled PANEL LANGUAGE Description Selection of a language for displaying LCD messages Values to be printed ENGLISH English GERMAN German FRANCH ...

Страница 100: ...TrueType Font storage area size Values to be printed 0KB to 3072KB EXT CHR AREA Description External character storage area size Values to be printed 0KB to 3072KB BASIC AREA Description Basic file storage area size Values to be printed 0KB to 3072KB PC SAVE AREA Description PC command storage area size Values to be printed 0KB to 3072KB USB SERIAL NUMBER 1 2 Description 1 Whether to enable USB se...

Страница 101: ...ff XON XOFF AUTO XON XOFF mode XON output when the power is on XOFF output when the power is off READY BUSY RTS RTS mode No XON output when the power is on no XOFF output when the power is off XON XOFF XON XOFF mode No XON output when the power is on no XOFF output when the power is off READY BUSY READY BUSY DTR No XON output when the power is on no XOFF output when the power is off CENTRO ACK BUS...

Страница 102: ...to be printed OFF Disabled ON Enabled IP ADDRESS Description Printer IP address Values to be printed xxx xxx xxx xxx v6 L Description IPv6 Link local address Values to be printed xxxx xxxx xxxx xxxx xxxx xxxx xxxx xxxx v6 G Description IPv6Global address Values to be printed xxxx xxxx xxxx xxxx xxxx xxxx xxxx xxxx SUBNET MASK Description Subnet mask Values to be printed xxx xxx xxx xxx GATEWAY ADD...

Страница 103: ...ption Wireless LAN ESS ID Values to be printed Max 32 characters ENCRYPTION Description Wireless LAN Encryption key setting Values to be printed OFF Note This parameter is set by using the Printer Setting Tool WEP40 WPA MODE Description Wireless LAN WPA setting Values to be printed OFF Note This parameter is set by using the Printer Setting Tool WPA Personal WPA2 Personal WPA Enterprise WPA2 Enter...

Страница 104: ...EL Description Wireless LAN 11b connection channel setting Values to be printed 1 to 14 LPR Description Whether to enable LPR Values to be printed OFF Disabled ON Enabled RFID MODULE TYPE Description RFID module type Values to be printed NONE No RFID kit is installed U4 B EX706 RFID U4 EU US AU R B EX7060 RFID U4 R TAG TYPE Description RFID tag type Values to be printed NONE I Code Tag it C220 ISO...

Страница 105: ...ues to be printed 2 0 to 9 9 sec WRITE RETRY Description 1 The number of times tag write is retried Values to be printed 1 0 to 255 times Description 2 Timeout for tag write retry Values to be printed 2 0 to 9 9 sec POWER LEVEL Description Radio output level Values to be printed 0 to 18 B EX706 RFID U4 EU US AU R B EX7060 RFID U4 R Q VALUE Description RFID module Q value Values to be printed 0 to ...

Страница 106: ...rinted 2 OFF Disabled ON Enabled Description 3 Auto unlock function Note Only when ON ACCESS PASSWORD is selected for TAG CHECK Values to be printed 3 OFF Disabled ON Enabled MULTI WRITE Description Hibiki tag multi word write Values to be printed OFF Disabled ON Enabled CALIB MODE Description RFID calibration function Values to be printed OFF Disabled ON Enabled CALIB AGC Description Optimum AGC ...

Страница 107: ...inted 0 to 9999999 VOID PRINT TAGS Description The number of times data write failed Values to be printed 0 to 9999999 RTC BATTERY CHECK Description Battery check Values to be printed OFF Disabled ON Enabled RENEWAL Description Time update timing Values to be printed start of JOB Every batch every PAGE Every page ...

Страница 108: ...able shows the menu structure from top menu of the system mode to AUTO DIAGNOSTIC The menu structure of AUTO DIAGNOSTIC Menu item 1 DIAGNOSTIC AUTO DIAGNOSTIC THERMAL TRANSFER NO YES DIRECT THERMAL NO YES DISPLAY NOTE When an error occurs while printing the error message is displayed the ERROR LED turns on and the ONLINE LED turns off Though the error can be cleared by pressing the ENTER CANCEL or...

Страница 109: ...1 0 F100 BOOT XXXXXXXXX C1 0B 0000 WMON XXXXXXXXX V1 0 6100 FONT AE00 KANJI NONE 0000 NONE 0000 EEPROM 256B SDRAM 32MB SENSOR1 00000000 00000111 SENSOR2 H 23 ゚ C A 22 ゚ C R 4 2V T 2 5V E 0 6V PE LV R 1 8V T 2 5V M THRE R 1 8V T 2 5V HEAD RANK 7 305DPI LAN MAC 11 22 33 44 55 66 EXP I O NG EX 232C NG SIO NG 0111 RFID OK 00RV972 EU0 R01 WLAN OK Ver1 1 3 MAC 00 11 22 33 44 55 RTC NG USB MEMORY NG BASI...

Страница 110: ... the system mode to HEAD CHECK The menu structure of HEAD CHECK Menu item 1 DIAGNOSTIC HEAD CHECK Types of message during head check While checking HEAD CHECK CHECKING Normal end HEAD CHECK NORMAL END When broken dots are detected At this time the ONLINE LED turns off and the ERROR LED turns on HEAD CHECK HEAD ERROR 16 832 dots ...

Страница 111: ...ROFF FW BK ACT RIBBON SAVE HEAD UP CUT RWD PRE PEEL OFF BACK FEED SPEED AUTO HEAD CHECK RIBBON NEAR END PAPER RBN END CALIBRATE POWER SAVE TIME CODE PAGE ZERO FONT CTRL CODE PEEL OFF STATUS KANJI CODE EURO CODE MAXICODE SPEC FEED ADJ CUT ADJ BACK ADJ X ADJUST HEAT ENERGY TYPE TONE ADJ T TONE ADJ D RIBBON TORQUE FRONT RIBBON MOTOR REAR RIBBON MOTOR RIBBON WINDING ...

Страница 112: ...bling ECO Backfeed Hardware Optional ribbon saving module solenoid is installed Parameter RIBBON SAVE parameter is set to TAG or LABEL Operation Media pitch falls between 20mm and 100mm The previous issue mode was Batch The issue mode is not reset by a power off or a printer reset Caution Even if the hardware requirement is not satisfied i e the optional ribbon saving module is not installed the p...

Страница 113: ...t issue with media forwarded 3 mm MODE3 for RFID The printer waits for a next issued after media is forwarded 34 0 mm to prevent RFID media jam NOTES 1 When MODE2 is selected and the printer starts printing feed from the forwarded position it feeds the media for 3 mm from this position and temporarily stops The feed speed for this 3 mm distance to the home position is the max speed that can be acc...

Страница 114: ...the print speed may be corrected depending on the EX I O parameter setting as follows EXI O TYPE 1 Standard 203 dpi model 10 ips 305 dpi model 8 ips EX I O TYPE 2 Inline Specified speed 2 The pre peel off speed is the min forward feed speed 3 ips 5 5 8 BACK FEED SPEED STD 3 ips LOW 2 ips 5 5 9 AUTO HEAD CHECK OFF Disables the auto print head check ON Enables the auto print head check 5 5 10 RIBBON...

Страница 115: ...s at the time of printing stop including the half finished label If a label end is detected while the last one of the specified number of labels is printed the remaining number of labels on the LCD will be blank Printer behavior at restart When the printing is restarted first the initial feed is performed then the printer starts printing from the next label In case the label end was detected while...

Страница 116: ...labels 1st 2nd 4th and 5th labels 3 Ribbon end detection In the case unfinished label length is less than 30 mm Printer behavior When a label end is detected in the middle of printing the printer completes the half finished printing and stops when the next label is at the home position displaying the error message Printing of the half finished label is completed LCD message NO RIBBON The remaining...

Страница 117: ...specified by commands are ignored Sensor type The values obtained through the calibration will take effect after the calibration is completed Afterward the sensor specified by a command is ignored Media Media pitch After the automatic calibration is performed the values obtained through the calibration will take effect until next calibration is performed or the printer power is turned off Settings...

Страница 118: ...ON REFL BackFeed or ON ALL BackFeed is selected and if the following conditions are satisfied the printer feeds the media backward for the media pitch length while lifting the print head Hardware Optional ribbon saving module solenoid is installed Parameter setting RIBBON SAVE parameter is set to TAG or LABEL Operating condition Media pitch falls between 20mm and 100mm The previous issue mode was ...

Страница 119: ... support zero with slash Therefore even if a zero with slash is selected a zero without slash is used Bit map fonts OCR A OCR B GOTHIC725 Black Japanese Kanji Chinese Outline fonts Price fonts 1 2 and 3 DUTCH801 Bold BRUSH738 Regular GOTHIC725 Black TrueTypeFont 5 5 16 CTRL CODE AUTO ESC LF NUL MANUAL 5 5 16 1 MANUAL CODE1 CODE2 CODE3 Max value Min value Step Display Sign Integer digit Decimal pla...

Страница 120: ...it Decimal place 0 padding Unit of measure 0xFF 0x20 1 Hex None 2 0 None h 5 5 20 MAXICODE SPEC TYPE1 Compatible Compatible with the current version TYPE2 Special Spec Special specification NOTE The mode specified by the command may be different from the actual mode depending on the status of this parameter Also the data transmission method differs partly For details refer to the B EX Series Exter...

Страница 121: ... system mode by key operation and set by command from the PC The max value is 50 0mm 2 A value which is equal to or larger than the media pitch FEED ADJ Media pitch must not be set If the set fine adjustment value causes the printer to feed the media backward from the print stop position to the next print start position the printer operation is not guaranteed 0 0 mm 3 0 mm Print start position One...

Страница 122: ...the proper home position By performing either method below the problem will be solved Method 1 Lift the head When the following conditions are all met the cut operation is performed as follows Head lifted Forward feed to the cut position Head lowered Cut Head lifted Reverse feed to the home position Head lowered Conditions Issue Command Feed Command and Eject Command received Label pitch of 25 5 m...

Страница 123: ...ue The cut position fine adjustment value can be calculated using the following method If a calculated value does not work to feed the media backward to the proper home position the cut position needs to be re adjusted with another value Note When this procedure is used one or more printed labels are left between the print head and the cutter Therefore these labels need to be removed by an issue o...

Страница 124: ...print head can be lifted lowered only when the optional ribbon saving module is mounted and the ribbon saving function is set to ON with the parameter setting menu When the ribbon saving module is not installed the print head is not lifted or lowered If the bottom edge of the last label advances past the feed roller while the print head is lifted during label feed to cut the sensor may not be able...

Страница 125: ...s even if the media is fed backward for the same amount as the forward feed For issuing media with the media sensor if the label pitch is almost the same as the distance between the print head and the media sensor 75 5 mm the media may not be returned to the home position when operations including a reverse feed such as cut issues strip issues automatic forward feed are performed It may result in ...

Страница 126: ...nd parameter settings and auto diagnosis 3 The X coordinate fine adjustment value is the sum of the fine adjustment values set in the system mode by key operation and set by command from the PC The max value is 99 5mm 5 5 25 HEAT ENERGY TYPE TRANS RIBBON DIRECT THERMAL NOTES 1 The HEAT ENERGY TYPE parameter is intended to make the printer perform appropriate printing for the supplies used media su...

Страница 127: ...e 20 20 1 Decimal Exist 2 0 None Step NOTES 1 Setting a value in the positive direction the print tone becomes darker And setting a value in the negative direction the print tone becomes lighter 20 Darker 0 Lighter 20 2 The print tone fine adjustment value thermal transfer is the sum of the fine adjustment values set in the system mode by key operation and set by command from the PC The max value ...

Страница 128: ...value 10 to 6 5 to 1 0 to 15 3 The ribbon motor torque fine adjustment value is the sum of the fine adjustment values set in the system mode by key operation and set by command from the PC The max value is 15 or 10 5 5 29 2 Low Torque Max value Min value Step Display Sign Integer digit Decimal place 0 padding Unit of measure 10 15 1 Decimal Exist 2 0 None Step NOTES 1 The fine adjustment value is ...

Страница 129: ...djustment values set in the system mode by key operation and set by command from the PC The max value is 15 or 10 5 5 30 2 Low Torque Max value Min value Step Display Sign Integer digit Decimal place 0 padding Unit of measure 10 15 1 Decimal Exist 2 0 None Step NOTES 1 The fine adjustment value is not effective for the reverse rotation 2 The fine adjustment value for the ribbon supply motor is app...

Страница 130: ...ED 2 Each fine adjustment value is effective for test print However the X coordinate fine adjustment is excluded 3 When an error occurs during a test print an error message is displayed and printing is stopped At this time the error LED turns on and the online LED turns off 4 The error is cleared by pressing the CANCEL key and ENTER key and the display returns to the test print menu At this time t...

Страница 131: ... Supported Supported Supported Supported Supported Supported NOTE When the peel off issue mode is selected the maximum speed is limited to 10 ips 5 6 1 3 SENSOR NONE TRANSMISSIVE REFLECTIVE MANUAL TRANS MANUAL REFL 5 6 1 4 PRINT TYPE THERMAL TRANSFER DIRECT THERMAL 5 6 1 5 ISSUE TYPE NO CUT WITH CUT PEEL OFF 5 6 1 6 LABEL PITCH Max value Min value Step Display Sign Integer digit Decimal place 0 pa...

Страница 132: ...5 SYSTEM MODE EM18 33031 5 6 TEST PRINT 5 46 5 6 2 SLANT LINE 3DOT 3 dot slant lines Magnification of slant lines 3 dot slant lines Black area ratio 16 7 ...

Страница 133: ...5 SYSTEM MODE EM18 33031 5 6 TEST PRINT 5 47 5 6 3 CHARACTERS Gothic Mincho Gothic Chinese ...

Страница 134: ...5 SYSTEM MODE EM18 33031 5 6 TEST PRINT 5 48 5 6 4 BARCODE 5 6 5 NON PRINTING The printer feed white paper 5 6 6 FACTORY TEST ...

Страница 135: ...smissive sensor Print method Thermal transfer Issue mode Batch issue Label pitch 76 mm Print density fine adjustment value 0 5 6 8 AUTO PRINT REFL The factory test print is performed on the following conditions Therefore the parameter settings and the print density fine adjustment value are ignored Key functions after printing of each test pattern are as follows ENTER key or its substitute key Nex...

Страница 136: ...DJUSTMENT REFLECTIVE SENSOR TRANSMISSIVE SENSOR PAPER END LEVEL RIBBON SENSOR 5 7 2 1 REFLECTIVE SENSOR The sensor level of the reflective sensor is registered Place the tag paper to be used on the reflective sensor so that the sensor can detect a print blank area The display of the currently detected value is updated every 200 msec Hold down the ENTER key for 3 seconds or more When the registrati...

Страница 137: ...value is updated every 200 msec Hold down the ENTER key for 3 seconds or more When the registration of the paper end level is completed Adjustment Complete is displayed and an asterisk is shown on the right side of the voltage If the registration failed due to sensor failure SENSOR ERROR is displayed and the ERROR LED turns on The ERROR LED turns off when the upper level menu is displayed The sett...

Страница 138: ...ANS Threshold value for the transmissive sensor is selected 5 7 3 1 REFLECT MANUAL THRESHOLD Threshold set in the manual threshold setting mode is used By COMMAND Threshold set by command is used 5 7 3 2 TRANS MANUAL THRESHOLD Threshold set in the manual threshold setting mode is used By COMMAND Threshold set by command is used ...

Страница 139: ...gn Integer digit Decimal place 0 padding Unit of measure 4 0 0 0 0 1 Decimal None 1 1 None V NOTE If 0 0 V is set the value 0 0 V is automatically corrected to the initial value 1 0 V 5 7 4 2 TRANS Max value Min value Step Display Sign Integer digit Decimal place 0 padding Unit of measure 4 0 0 0 0 1 Decimal None 1 1 None V NOTE If 0 0 V is set the value 0 0 V is automatically corrected to the ini...

Страница 140: ...EED PRINT CUT OTHER NOTES 1 Maintenance counter data to be cleared and the initial values after maintenance counter clear Maintenance counter item Initial value Parameter and cleared items ALL COUNTER FEED PRINT CUT OTHER Label distance covered 0 km Cleared Cleared Print distance 0 km Cleared Cleared Cut count 0 Cleared Cleared Head up down count 0 Cleared Cleared Ribbon motor drive time 0 hours C...

Страница 141: ...is performed Display While clearing ALL COUNTER CLEAR After the maintenance counter clear is completed ALL COUNTER COMPLETED Turn off the printer 3 After the maintenance counter clear is completed turn off the printer when COMPLETED Turn off the printer is displayed 5 8 3 PARAMETER CLEAR The parameter settings are cleared and reset to the initial values for each destination When the printer is sta...

Страница 142: ...ue PC KEY FEED Feed amount fine adjustment value PC 0 0mm KEY 0 0mm CUT Cut position Strip position fine adjustment value PC 0 0mm KEY 0 0mm BACK Reverse feed amount fine adjustment value PC 0 0mm KEY 0 0mm TONE T Print tone fine adjustment value Thermal transfer PC 0step KEY 0step TONE D Print tone fine adjustment value Direct thermal PC 0step KEY 0step RIBBON TORQUE NORM RBN FW Ribbon motor driv...

Страница 143: ... SPEED Reverse feed speed STD CALIBRATION Note Auto calibration OFF CODE PAGE Character code selection PC 850 Character 0 selection 0 without slash CTRL CODE Control code type AUTO PEEL OFF STATUS Whether to send a peel off wait status to the host OFF USB I F STATUS Whether to return a response to the host via USB OFF FEED KEY FEED key function FEED KANJI CODE Kanji code type TYPE1 Windows EURO CO...

Страница 144: ...PE JAPANESE CN TYPE Simplified CHINESE MODEL NAME Whether to display the model name ON PRINTED COUNTER Whether to display the number of labels printed ON IP ADDRESS Whether to display the IP address ON CONTRAST Contrast of the LCD 40 SYSTEM PASSWORD System mode password Not cleared The password is not cleared either STORAGE AREA Item Description Initial value TTF AREA TrueTypeFont storage area siz...

Страница 145: ...red CONNECTION MODE WLAN Communication mode INFRASTRUCTURE ESS ID WLAN ESS ID TOSHIBATEC ENCRYPTION WLAN Encryption OFF WPA MODE WLAN WPA OFF AUTHENTICATION WLAN Authentication method OPEN 802 1X SUPPLICANT WLAN Authentication method OFF DEFAULT KEY WLAN Encryption key 1 802 11bgn CHANNEL WLAN AP Mode channel 1 LPR Whether to enable LPR ON RFID Item Description Initial value MODULE TYPE RFID modul...

Страница 146: ...data write failed Not cleared RTC Item Description Initial value BATTERY CHECK Battery check Not cleared RENEWAL Time update timing Not cleared Settings not printed on the maintenance counter parameter setting data printout System mode 12 Z MODE Item Initial value Z MODE OFF User system mode 5 SHOW ISSUE COND Item Initial value Sensor Note TRANSMISSIVE Mode BATCH Print Speed 203 dpi 5 ips 305 dpi ...

Страница 147: ...s different depending on your operating environment Contents of INTERFACE menu Menu item 6 INTERFACE LAN WLAN USB RS 232C CENTRONICS EXP I O 5 9 1 LAN WLAN The menu structure of LAN WLAN Menu item 6 INTERFACE LAN WLAN LAN WLAN BASIC INFORMATION IP ADDRESS SUBNET MASK GATEWAY ADDRESS DHCP DHCP CLIENT ID DHCP HOST NAME SOCKET PORT PORT NUMBER LPR WLAN SNMP WEB PRINTER 5 9 1 1 LAN WLAN OFF ON AUTO Wh...

Страница 148: ...1 5 GATEWAY ADDRESS Gateway address is displayed and set 5 9 1 6 DHCP Select whether to enable DHCP OFF ON 5 9 1 7 DHCP CLIENT ID Enter a DHCP client ID with Hex code Setting range 00 to 63 64 bytes 5 9 1 8 DHCP HOST NAME Enter a DHCP host name with ASCII code Setting range 00 to 31 32 bytes 5 9 1 9 SOCKET PORT Select whether to enable the socket communication OFF ON 5 9 1 10 PORT NUMBER Socket po...

Страница 149: ...ESSID Enter an ESSID with ASCII code Setting range 00 to 31 32 bytes 5 9 1 12 3 WEP DEFAULT KEY Max value Min value Step Display Sign Integer digit Decimal place 0 padding Unit of measure 4 1 1 Decimal None 1 0 None None 5 9 1 12 4 802 11bgn CHANNEL Max value Min value Step Display Sign Integer digit Decimal place 0 padding Unit of measure 14 1 1 Decimal None 2 0 None None 5 9 1 13 SNMP OFF ON 5 9...

Страница 150: ... on the setting of this parameter Example When this parameter is set to ON and a WS or WB command is sent to the printer via LAN the printer returns the status via both LAN and USB In the case only the USB cable is connected to the printer A status will be returned regardless of the setting of this parameter 2 Status related commands other than WS WB and WN Whether a status is returned or not depe...

Страница 151: ... bps 9600 bps 19200 bps 38400 bps 115200 bps 5 9 3 2 DATA LENGTH 8 bits 7 bits 5 9 3 3 STOP BIT 1 bit 2 bits 5 9 3 4 PARITY NONE EVEN ODD 5 9 3 5 CONTROL XON READY AUTO Outputs XON at power on XOFF at power off XON XOFF AUTO Outputs XON at power on XOFF at power off READY BUSY RTS Outputs no XON OFF at power on off XON XOFF Outputs no XON OFF at power on off READY BUSY Outputs no XON OFF at power ...

Страница 152: ... of CENTRO Menu item 6 INTERFACE CENTRONICS ACK BUSY INPUT PRIME PLUG PLAY 5 9 4 1 ACK BUSY Rising edge Trailing edge 5 9 4 2 INPUT PRIME OFF ON 5 9 4 3 PLUG PLAY OFF ON NOTE Plug play function of USB is always enabled regardless of this setting 5 9 5 EXP I O TTEC Standard Inline ...

Страница 153: ...r description MODULE TYPE ERROR RFID module type has been set to NONE or a communication cannot be established COUNTRY CONFIG ERROR Country code has not been set READ ERROR Confirm Setting or set other Tag The type of the tag to be read and one selected by the RFID tag type selection do not match NOT AVAILABLE Not supported NO RESPONSE No response from the tag READ TIMEOUT Set a RF Tag on Ant Time...

Страница 154: ... or more data only the first 16 bytes are displayed When data is less than16 bytes the vacant digits will be filled with spaces If more than one tag is read at one time especially when short pitch tags are used pressing the UP or DOWN key shows the other tags data 5 10 2 MODULE The information related to the module setting is displayed The menu structure of MODLE Menu item 7 RFID MODULE MODULE TYP...

Страница 155: ...module mount condition Module Type parameter Module type and status Message NONE No module installed NONE U4 No module installed No RFID Module B EX706 RFID U4 R B EX706 RFID U4 EU R B EX706 RFID U4 US R B EX706 RFID U4 AU R No country setting Need Setting for use ENTER for Setting 1 Selectable country codes differ depending on the RFID module type Multiple country codes may be displayed when sett...

Страница 156: ...TRY POSITION RETRY LABELS READ RETRY WRITE RETRY 5 10 3 1 RETRY POSITION Max value Min value Step Display Sign Integer digit Decimal place 0 padding Unit of measure 99 99 1 Decimal None 2 0 None mm If writing data on a tag failed the printer feeds the RFID tag forward or backward for specified length in order to retry data write When 0 is set for this parameter a retry is not performed Only the va...

Страница 157: ...ter has retried for the specified number of times within the RFID read retry period the printer stops the retries at the time Whenever the printer writes data onto an RFID tag the tag is read first The read retry timeout set by this parameter is also used for this pre read 5 10 3 4 WRITE RETRY The number of times tag write is retried and the timeout for write retry are set 1 The number of times ta...

Страница 158: ...put level is 18 approx 100mW to 0 approx 1mW 5 10 4 2 Q VALUE Max value Min value Step Display Sign Integer digit Decimal place 0 padding Unit of measure 15 0 1 Decimal None 2 0 None None In the case multiple RFID tags are read at the same time this menu is useful to focus on a target tag Set the Q value to 1 or above 2 is recommended Q value 0 causes the tags to interfere with each other and disa...

Страница 159: ... 11 a value between 8 and 14 enables the printer to write data only to the tag just above the antenna When the threshold is set to 0 a data write operation is performed regardless of the gain of a tag Both of the AGC threshold and the AGC threshold for data write are used to determine whether a tag is defective or not but the timing of a gain measurement is different In the case of the AGC thresho...

Страница 160: ...ain of a tag is not always the same When the same value is set for the AGC threshold for data write and the AGC threshold lower limit for retry respectively the threshold will not be changed for a retry The optimum value differs depending on the tag type However the problem that multiple tags are read at the same time does not occur with most RFID tag types It is not necessary to change the defaul...

Страница 161: ...m NOTES 1 This parameter is effective only when the CALIB MODE parameter is set to ON 2 The printer will automatically feed RFID media forward backward for the distance specified by CALIB POSITION parameter before writing reading RFID tag which is normally performed with 003 command 3 The feed direction is indicated by backward and forward 4 Setting values ranging from 2 9mm to 2 9mm do not reflec...

Страница 162: ...g whatever data is set as the header data ON ID Error tag detection is enabled A tag EPC area for GEN2 tags is read before writing data on it and data is written on the tag only when the header data is A5A5 ON ACCESS PASSWORD Error tag detection is enabled Error tag detection is enabled only for GEN2 tags The access password area of a tag is read before writing data on it Only when the data read m...

Страница 163: ...hen ON is selected ENTER key 5 Tag check setting protection password setting screen Enter a 4 digit protection password ENTER key This menu is ended and the upper level screen is displayed 4 Example of operation when the tag check setting protection password has been set when ON is set on the tag check setting protection password setting screen Display Operation 1 SYSTEM MODE 7 RFID OTHER TAG CHEC...

Страница 164: ...ft most number indicates a channel number The percentage means the availability of the channel which is determined by performing approx 30 carrier senses Thus 100 means that any other devices do not use this channel 3 The MAX column shows the value of the maximum radio wave picked up The larger the value is the stronger radio wave source exists nearby 4 The display can be scrolled up or down from ...

Страница 165: ...only when the optional RTC module is installed Date and time are set 5 11 2 BATTERY CHECK OFF ON 5 11 3 RENEWAL Start of JOB As the real time clock data is read only for the first media in a batch the same time is printed on the all media Every PAGE As the real time clock data is read at the start of printing each media a real time can be printed on each media ...

Страница 166: ...the remaining memory size or the USB memory status a write error may occur even in the case of insufficient free space 3 Usable USB memory s file system is as follows To use other file system in USB memory they need to be formatted to either of the following on the PC in advance File system Max size FAT FAT16 2GB FAT32 8GB 5 12 1 USB TO PRINTER COPIED DATA CONFIG FILE NOTES 1 The data store in USB...

Страница 167: ... by the destination printer are read but not applied Also even if the destination printer has the same parameters with the source printer options may be different 9 When an error occurs during an access to the USB memory the error message described in Section 5 12 USB MEMORY is displayed The printer does not retry the operation 5 12 2 PRINTER TO USB ALL NOTES 1 The firmware BOOT MAIN CG KANJI HTML...

Страница 168: ... language is English regardless of the LCD Language parameter setting LCD Operation and LCD LED status Backlight test ONLINE LED turns on ERROR LED turns on Backlight turns on Press any key ONLINE LED turns on ERROR LED turns on Backlight turns off Press any key Missing dot test ONLINE LED turns on ERROR LED turns on Backlight turns on 1 dot line is displayed along the edges of the LCD Press any k...

Страница 169: ...INE LED turns on ERROR LED turns on Backlight turns on Character display Press any key Contrast test ONLINE LED turns on ERROR LED turns on Backlight turns on Displays with the minimum contrast Press any key ONLINE LED turns on ERROR LED turns on Backlight turns on Displays with the default contrast Press any key ONLINE LED turns on ERROR LED turns on Backlight turns on Displays with the maximum c...

Страница 170: ...est ENTER key test End The display language is English regardless of the LCD Language parameter setting LCD Operation and LCD LED status FEED KEY TEST Press the FEED key RESTART KEY TEST Press the RESTART key PAUSE KEY TEST Press the PAUSE key UP KEY TEST Press the UP key RIGHT KEY TEST Press the RIGHT key DOWN KEY TEST Press the DOWN key LEFT KEY TEST Press the LEFT key MODE KEY TEST Press the MO...

Страница 171: ... to return to the upper level menu NOTES 1 If a key other than designated is pressed the printer waits until the designated key is pressed The test does not proceed to the next 2 If the key test does not proceed to the next test even after the designated key is pressed the key may be broken In this case turn off the printer ...

Страница 172: ... The block numbers and BASIC program file names up to 12 characters stored in the BASIC program storage area are displayed If the file name exceeds 12 characters the overflowing characters are not displayed When no file is stored Place of the file name is displayed with a hyphen is 5 14 3 TRACE OFF ON 5 14 4 SYSTEM PROGRAM The printer changes the mode to execute the BASIC program ...

Страница 173: ...ng B EX6T1 T3 QM ECO 2 When AUTO DETECT ON or AUTO DETECT ON SET is selected the printer starts in the auto detection mode which automatically determines whether to enable Z Mode or D Mode by a first control character the printer receives Also EMULATION MODE is displayed on the LCD After Z Mode or D Mode is selected mode detection is not performed until the printer power is turned off and back to ...

Страница 174: ...andard specification external memory is used ORACLE EXT memory Specification for Oracle external memory is used SAP EXT memory Specification for SAP external memory is used NOTE When the XML feature is enabled the user system mode functions are not guaranteed It is required to terminate the user system mode with reset For the functions covered by the system mode settings configured in the system m...

Страница 175: ... the language displayed on the LCD panel is JAPANESE when JAPANESE is selected and ENGLISH when ENGLISH GERMAN FRENCH DUTCH SPANISH ITALIAN PORTUGUESE Simplified CHINESE KOREAN TURKISH or POLISH is selected 5 17 2 DISPLAY The menu structure of DISPLAY Menu item 14 LCD PANEL DISPLAY MODEL NAME PRINTED COUNTER IP ADDRESS 5 17 2 1 MODEL NAME OFF Model name is hidden ON Model name is displayed 5 17 2 ...

Страница 176: ...SS OFF IP address is hidden ON IP address is displayed 5 17 3 CONTRAST Max value Min value Step Display Sign Integer digit Decimal place 0 padding Unit of measure 50 24 2 Decimal None 2 0 Enabled None NOTE Contrast setting Plus Higher contrast Minus Lower contrast ...

Страница 177: ...nabled When the password is enabled the password entry screen is displayed at the time the system mode or user system mode is started Password entry for system mode Display Procedure Turn on the printer while holding down the FEED and RESTART keys at the same time The password entry screen is displayed Enter the password The printer enters the system mode When a wrong password is entered or the CA...

Страница 178: ...PAUSE key to place the printer in pause state Then hold down the MODE key for 3 seconds The password entry screen is displayed Enter the password The printer enters the user system mode When a wrong password is entered or the CANCEL key or MODE key is pressed Password invalid message is displayed A wrong password was entered for 3 times consecutively The printer locks Turn off printer and back to ...

Страница 179: ...YSTEM TOOLS 1 EXIT 3 DETECTION LEVEL Top menu list English 1 EXIT 2 SET PARAMETERS 3 DETECTION LEVEL 4 SYSTEM TOOLS 5 SHOW ISSUE CONDITION 6 RESET Outline of the top menu 1 EXIT Used to return the printer to online state The printer is not reset 2 SET PARAMETERS Used to set the parameters for each printer function 3 DETECTION LEVEL Used to set the thershold value 4 SYSTEM TOOLS Used to print data ...

Страница 180: ...INT 2 TRANS PRE PRINT Same as Section 5 7 4 THRESHOLD LEVEL 6 5 SYSTEM TOOLS Menu item 4 SYSTEM TOOLS DUMP RS 232C USB PRINT 1 ON DEMAND ALL CENTRONICS The subsequent menus are same as 1 LAN WLAN The subsequent menus are same as 1 BASIC1 The subsequent menus are same as 1 BASIC2 The subsequent menus are same as 1 USB The subsequent menus are same as 1 RFID The subsequent menus are same as 1 LOG PR...

Страница 181: ... current setting value for each parameter is shown in the position of 1 The options for the parameters are as follows 1 Sensor NO REFLECTIVE TRANSMISSIVE TR Threshold RE Threshold 2 Mode BATCH CUT yyy yyy Cut interval 1 to 100 PEEL OFF PEEL OFF Appl 3 Print speed Selectable print speed differs depending on the model 3ips B EX6T1 T3 G T 5ips B EX6T1 T3 G T 8ips B EX6T1 T3 G T 10ips B EX6T1 T3 G T 1...

Страница 182: ...31 6 7 RESET 6 4 5 Direction BOTTOM TOP BOTM Mir TOP Mir 6 Media pitch 10 0 1500 0 mm 7 Print length 6 0 1498 0 mm 8 Print width 10 0 160 0 mm 9 Media width 50 0 165 0 mm 6 7 RESET Contents of RESET menu Menu item 6 RESET ...

Страница 183: ... display Start of download 4 Send a download command 5 The printer starts receiving the data 6 The printer is receiving the data 7 Data is being checked 8 Data is being checked 9 The flash ROM is being erased 10 Downloaded data is being written 11 Downloading is completed 12 After downloading is completed the printer will be automatically restarted and placed in the online state ...

Страница 184: ...played the expansion I O output status becomes indefinite 4 When there is a difference in the model name between the boot program and the actual printer MODEL TYPE ERROR is displayed and the printer stops 5 When the checksum for the boot program does not end with 00H CHECKSUM ERROR is displayed and the printer stops with error 6 After receiving the all data of the boot program the printer compares...

Страница 185: ... CANCEL is selected the printer returns to the online state without downloading the firmware 7 The firmware is being downloaded 8 After downloading is completed the printer will return to the online state 8 2 PREPARATION FOR USB MEMORY To execute the auto configuration mode the firmware file bin should be downloaded and the dedicated CFG file need to be created in the USB memory in advance To ente...

Страница 186: ... downloaded ATA0 SYSTEM B EX CG Vx x xx bin Firmware file to be downloaded 8 3 2 Model Information Applicable model s information is stored The information is comma separated The first half is the model name the above example indicates B EX6T Type 1 203 dpi model and the second half is the PC board information If the actual printer and this model information do not match the auto configuration mod...

Страница 187: ...ate instructed through the expansion I O The printer receives U1 U2 command Forward feed reverse feed command The printer receives T command Feed command The printer receives XS command Issue command The printer receives IB command Eject command The printer receives RFID related command accompanied by printer action The head lever is locked unlocked because the message notifying the head lever unl...

Страница 188: ...ditions for displaying usual messages in the power save mode When the following occurs in the power save mode the power save mode is terminated key is pressed The head lever is unlocked or locked in the power save mode This is because there is a message indicating the head lever unlock There is a change in the pause signal line or active signal line of the expansion I O This is because there is a ...

Страница 189: ...e cut issue mode when the disc cutter is used How to issue the label stock having the minimum label pitch or less for each print speed in the cut issue mode when the rotary cutter is used In the strip mode feeds labels even when the peel off sensor is detecting a label When Media Load parameter is enabled a media feed is performed to find the print start position depending on the condition For det...

Страница 190: ...EFT 1 Returns to the previous help page 2 Ends help display RIGHT 1 Goes to the next help page 2 Ends help display 10 1 3 Manual Threshold Setting Display Key Function FEED 1 Moves the cursor upward 2 Re sets RESTART 1 Moves the cursor downward PAUSE 1 Sets the threshold 2 Fixes the selection MODE No function CANCEL No function ENTER 1 Fixes the selection 2 Ends manual threshold setting UP 1 Moves...

Страница 191: ... a ribbon near end condition is detected at a 1 second interval ON 500 ms OFF 500 ms Flashes when a system error occurs at a 1 second interval ON 500 ms OFF 500 ms Flashes at a 500 msec interval ON 250ms OFF 250ms in synchronization with the ONLINE LED when the printer is turned off NOTE If the wireless LAN is being linked at power off time both ONLINE and ERROR LEDs turn on not flash 10 3 LCD FUN...

Страница 192: ...t is reset to zero when the printer is turned on During an issue with the cut interval specified the number of labels is updated when the label is cut normally 2 The number of remaining labels to print Specified number of labels to print The number of normally printed labels before occurrence of an error or placing the printer in pause When the number of remaining labels to print is zero it is not...

Страница 193: ...he same as 4 10 4 2 Icon Five kinds of icon are displayed in the bottom line of the online mode display These icons are displayed only in the online mode display Icon Explanation Wireless LAN icon Displayed and used when the wireless LAN module is mounted The graph shows the strength of radio wave Graph 0 Outside the communication range Graph 1 Strength of radio wave is weak Graph 2 Strength of ra...

Страница 194: ...dule even when no radio wave is output Blinks while the module stops outputting radio wave or changing the channel under the influence of other carrier ON Module type is set and ready to communicate Blink Communicating Ribbon near end icon Ribbon near end is detected Blinks when the ribbon is close to the end Ribbon near end is detected depending on the diameter of unused ribbon 38 mm is equivalen...

Страница 195: ...O PAPER 1 1 The icon flashes at a 1 second interval ON 500 msec OFF 500 msec If the print head is opened while printing If an error occurs while printing When PAUSE key is pressed while printing When RESTART key is pressed the printer resumes printing if there is remaining data Close the print head Load media When RESTART key is pressed the printer resumes printing if there is remaining data Press...

Страница 196: ... be displayed by scrolling down Example of help message Help message Display example Up to 4 lines Finish Next Feeding or printing was attempted with head block open 1st line of help message 2nd line of help message 3rd line of help message 4th line of help message Help guide Since the help message is within three lines the scrollbar arrows are not shown 5 lines or more Finish Next The media has r...

Страница 197: ... set Scroll the screen with the UP or DOWN key Press the RIGHT or ENTER key to go to the next page Press the LEFT or CANCEL key to go to the previous page Help 2 Troubleshooting Prev Next Load new media Load the media Read just the media sensor level Scroll the screen with the UP or DOWN key Press the RIGHT or ENTER key to go to the next page Press the LEFT or CANCEL key to go to the previous page...

Страница 198: ...ed label for the sensor type of the Issue Command and data is printed at a constant print position correctly since the print positions are detected based on this threshold When the media with black marks printed on the back side is used the printer automatically corrects the print position by detecting the black marks by using the reflective sensor However if there is reflective rate variation on ...

Страница 199: ...ll the screen with the UP or DOWN key Press the PAUSE key 5 Threshold setting Calibration 1 REFL PRE PRINT THRESHOLD MODE Calibrating Hold down the PAUSE key to keep feeding the media Release the PAUSE key Media feed stops When the judgment result is OK go to 6 Threshold setting When the judgment result is NG go to 7 Threshold setting 6 Threshold setting 6a Judgment result OK After threshold setti...

Страница 200: ... is fine adjusted again ENTER key 2 Pause state Threshold setting is completed RIGHT key 6b Details of the result Result and the threshold value are displayed 7 Threshold setting 7a Judgment result NG 1 REFL PRE PRINT Result Failed 1 Threshol Baseline Retry FEED Detail FEED key 3 Media sensor selection Threshold is set again ENTER key 2 Pause state Threshold setting is completed RIGHT key 7b Detai...

Страница 201: ...ressing the LEFT key returns the screen to the calibration result NOTES 1 When the PAUSE key is released within 3 seconds while the printer is paused the PAUSE key is invalid 2 To set the threshold 1 5 pieces or more label shall be fed If the label feed amount is insufficient the threshold may not be properly set In this case the threshold setting needs to be retried 3 While the print head is lift...

Страница 202: ... menu is displayed 7 Turn off the power and back to on The printer is placed in the online state 8 Press the FEED key to feed the media If a paper jam occurs or the media does not stop at the print start position retry the threshold setting Sending Issue command 1 While the judgment result is displayed press the FEED key to terminate the threshold setting The printer is placed in the pause state 2...

Страница 203: ...ensor when using a manual threshold value No setting is necessary 6 Press the MODE key The system mode menu is displayed 7 Turn off the power and back to on The printer is placed in the online state 8 Send an Issue Command to make the printer print If a paper jam occurs or the media does not stop at the print start position retry the threshold setting ...

Страница 204: ...g types are as follows Module B EX700 RFID U4 EU R Tag The following tag type only The others are unusable TSE Web Supplier SMARTRAC Chip NXP U Code G2iL Tag name Label pitch mm Label length mm Label width mm Remarks Left Right TSE Web 60 54 34 The dimensions on the left are actual measurement values Feed direction ...

Страница 205: ...other words an automatic calibration must be performed each time before performing RFID calibration 3 If an RFID calibration is performed without placing the media at the print start position an improper value may be set which may cause an error message RFID WRITE ERROR to be shown during writing reading data or data to be written on read with a wrong tag 4 Be sure to select a usable antenna posit...

Страница 206: ...reen to 1 Normal state As the tag is not found no value is saved NOTES 1 The position and AGC value obtained through an RFID calibration are the optimum read write position and the optimum AGC value for the media at the print start position 2 When the ENTER key is released within 3 seconds in the pause state the ENTER key is invalid 3 After performing an RFID calibration the printer returns the RF...

Страница 207: ...this feed amount 1 Reverse feed Forward feed to the strip position Pre strip feed Auto forward feed Void printing on RFID media RFID tag position adjustment command 003 command Pre reverse feed when an expansion I O device is connected Printing in offline Diag test print maintenance counter print test print dump printing in the information mode manual threshold automatic calibration and RFID calib...

Страница 208: ...automatic call at power on parameter is enabled in the Saved data call command saved data will be called after a quick reset 2 Previous print conditions are applied to the printing performed in this mode except Print orientation When the mirror printing has been specified only the mirror printing is not performed Therefore the bottom first mirror printing and top first mirror printing will be chan...

Страница 209: ...ine Serial number 2 11 to 32 digit half size alpha numeric A to Z a to z 0 to 9 space hyphen 5th line Feed amount in information mode unit cm 0 to 320000000 6th line Feed amount in information mode unit inch 0 to 125984251 9 1 When an optional real time clock is not installed data areas in this line will be blank E g 2 In the case a serial number has never been registered to the printer MAC addres...

Страница 210: ...y For details refer to Section10 10 LCD MESSAGES AND LED INDICATIONS A command error may occur if the CANCEL key is released before the all received data has been discarded 10 9 2 Job Cancellation Operation Example Online mode 1 Normal state B EX4T1 T C1 6 PRINTED 000000 IP 192 168 010 020 ONLINE Occurrence of an error or press the PAUSE key Online mode 2 1 Error state TO DO 3 A media feed error o...

Страница 211: ...C Yes Yes 5 PAPER JAM A paper jam occurred during paper feed The media is not set properly The media actually used and the selected media sensor type do not match The media sensor position does not align with the black mark position The actual media size and the specified media length do not match The media sensor level is not suitable for the actual media The gap of pre printed label cannot be de...

Страница 212: ...W LOADING Downloading TrueType font or BASIC program Yes 17 MEMORY WRITE ERR An error has occurred while writing data into the memory for storage USB memory flash ROM on the CPU board No Yes 18 FORMAT ERROR An erase error has occurred while formatting the memory for storage USB memory flash Rom on the CPU board No Yes 19 MEMORY FULL Saving failed because of the insufficient capacity of the memory ...

Страница 213: ...inter did not succeed in writing data onto the RFID tag after having retried for the specified times Yes Yes 26 RFID ERROR The printer cannot communicate with the RFID module No Yes 27 INPUT PASSWORD The printer is waiting for an entry of password No No 28 PASSWORD INVALID A wrong password was entered consecutively for three times No No 29 RFID CONFIG ERR B EX700 RFID U2 EU US R B EX700 RFID U4 EU...

Страница 214: ...SC T20G30 LF NUL LCD Example 3 ESC PC002 0100 0300 15 15 A 00 00 J0101 000000000A Z10 P1 LF NUL LCD 3 When a command error is displayed the code other than 20H 7FH and A0H DFH is displayed as 3FH 4 The battery check does not work when the printer is being reset and the RTC is not installed 5 It is necessary to follow the procedure below to use RTC function under a low battery condition Turn off th...

Страница 215: ... FORMAT KB KB 15 FORMAT KB KB FORMAT KB FORMAT KB FORMAT KB 16 NOW LOADING 16 NOW LOADING 16 CHARGEMENT 17 SETTING MODE 17 SETTING MODE 17 MODE REGLAGES 18 MEMORY WRITE ERR 18 MEMORY WRITE ERROR 18 ERR ECRITURE MÉMOIRE 19 FORMAT ERROR 19 FORMAT ERROR 19 ERREUR DE FORMAT 20 MEMORY FULL 20 Speicher voll 20 MÉMOIRE PLEINE 21 SYNTAX ERROR 21 SYNTAX ERROR 21 ERREUR DE SYNTAXE 22 POWER FAILURE 22 POWER ...

Страница 216: ...4 SALVAR KB KB 14 OPSLAAN KB SALVAR KB 15 FORMAT KB KB 15 FORMATO KB KB 15 FORMAT KB FORMATO KB 16 LADEN 16 CARGANDO 16 17 INSTELMODUS 17 MODO CONFIG 17 18 MEM SCHRIJF FOUT 18 ERROR DE ESCRITURA 18 19 FORMAT FOUT 19 ERROR DE FORMATO 19 20 GEHEUGEN VOL 20 MEMORIA LLENA 20 21 SYNTAX FOUT 21 ERROR DE SINTAXIS 21 22 VOEDING FOUT 22 FALLO DE ALIMENTACION 22 23 FOUT EEPROM 23 ERROR EN LA EEPROM 23 24 SY...

Страница 217: ...存 KB 15 FORMAT KB KB 15 FORMATO KB KB 15 格式化 KB KB FORMAT KB FORMATO KB 格式化 KB 16 CARICAMENT 16 A CARREGAR 16 正在加载 17 Configurazione 17 MODO CONFIG 17 设置模式 18 Err Scritt memoria 18 ERRO DE ESCRITA 18 内存写入错误 19 ERRORE FORMATTAZIONE 19 ERRO DE FORMATO 19 格式化错误 20 Memoria piena 20 MEMORIA CHEIA 20 内存满 21 SYNTAX ERROR 21 ERRO DE SINTAXE 21 语法错误 22 ERRORE ALIMENT 22 FALHA DE ALIMENTACAO 22 电源故障 23 Erro...

Страница 218: ...5 초기화 KB KB 15 FORMAT KB KB 15 FORMAT KB KB 초기화 K B FORMAT KB FORMAT KB 16 등록중 16 YÜKLÜYOR 16 ŁADOWANIE 17 설정 모드 중 17 AYAR MODU 17 TRYB USTAWIEŃ 18 메모리 쓰기 에러 18 Hafızaya yazma hatası 18 BŁĄD ZAPISU PAMIĘCI 19 초기화 에러 19 FORMAT hatası 19 BŁĄD FORMATOWANIA 20 메모리 오버 20 Hafıza dolu 20 PAMIĘĆ PEŁNA 21 커맨드 에러 21 SYNTAX HATASI 21 BŁĄD SKŁADNI 22 전원 이상 22 GÜÇ HATASI 22 BŁĄD ZASILANIA 23 EEPROM 에러 23 EEPRO...

Страница 219: ... 6 1 DIAGNOSTIC 3 TEST PRINT 0 RESET 2 SET PARAMETERS Menu screen with setting value COUNTER TOTAL FEED 4 8km FEED 0 0km FEED1 4 8km FEED2 0 0km Setting value selection screen PRINT TYPE C1 6 DIRECT THERMAL THERMAL TRANSFER DISPLAY Key function Menu screen Key Substitute Key Function MODE None Returns to the top menu without saving changes CANCEL FEED RESTART Returns to the upper level menu withou...

Страница 220: ...hanges ENTER PAUSE Saves the changes and returns to the upper level menu UP RESTART Moves the cursor upward When the cursor is positioned at the top of the list it scrolls from the top to the bottom DOWN FEED Moves the cursor downward When the cursor is positioned at the bottom of the list it scrolls from the bottom to the top LEFT None No function RIGHT None No function NOTE Printer operation is ...

Страница 221: ...ANEL 15 PASSWORD 12 Z MODE Press the DOWN key The entire menu list moves up by one line and the cursor moves down to the next item SYSTEM MODE C1 6 13 XML 14 LCD PANEL 15 PASSWORD 12 Z MODE Press the DOWN key The position of the menu list remains unchanged and only the cursor moves down to the next item SYSTEM MODE C1 6 1 DIAGNOSTIC 3 TEST PRINT 0 RESET 2 SET PARAMETERS Press the DOWN key When the...

Страница 222: ...displayed When the MODE key is pressed while the main menu of the system mode or user system mode is displayed the cursor is positioned at the topmost item 5 When the CANCEL key is pressed while the main menu is displayed When the CANCEL key is pressed while the main menu of the system mode or user system mode is displayed the cursor does not move from the current position ...

Страница 223: ...laced horizontally IP ADDRESS 192 168 010 002 Setting screen with multiple fields placed vertically READ RETRY 5 times 4 0 sec 0 0 9 9 sec 0 255 times Key function Setting screen with one field Key Substitute Key Function MODE None Returns to the top menu without saving changes CANCEL FEED RESTART Returns to the upper level menu without saving changes ENTER PAUSE Saves the changes and returns to t...

Страница 224: ...her when the left most field is selected RIGHT None Moves the cursor to the right field The cursor does not move any further when the right most field is selected Key function Setting screen with multiple fields vertical Key Substitute Key Function MODE None Return to the top menu without saving changes CANCEL FEED RESTART Return to the upper level menu without saving changes ENTER PAUSE Save the ...

Страница 225: ...s the upper level menu UP RESTART No function DOWN FEED No function LEFT None No function RIGHT None No function Key function Scroll Key Substitute Key Function MODE None Displays the top menu CANCEL FEED RESTART Displays the next screen or upper level menu ENTER PAUSE Displays the next screen or upper level menu UP RESTART Moves the cursor upward When the cursor is positioned at the top of the li...

Страница 226: ... without saving changes CANCEL FEED RESTART Displays the upper level menu without saving changes ENTER PAUSE RFID tag is read again UP RESTART Displays the data of the previous tag The display does not change when the first tag data is being shown DOWN FEED Displays the data of the next tag The display does not change when the last tag data is being shown LEFT None No function RIGHT None No functi...

Страница 227: ... 4 5V Adjust Complete Key function before adjustment Key Substitute Key Function MODE None Displays the top menu CANCEL None Displays the upper level menu ENTER None When held down for 3 seconds or more the sensor adjustment is performed When this key is released within 3 seconds the screen returns to the upper level menu UP None No function DOWN None No function LEFT None No function RIGHT None N...

Страница 228: ...r displaying the print head temperature and ambient temperature It is comprised with the following Display example TEMPERATURE THERMAL HEAD 20 OPEN AIR 13 Display Display of temperatures TEMPERATURE THERMAL HEAD 20 OPEN AIR 13 Key function Key Substitute Key Function MODE None Displays the top menu CANCEL None Displays the upper level menu ENTER None Displays the upper level menu UP None No functi...

Страница 229: ... screen CFG file selection screen Key function Key Substitute Key Function MODE None Displays the top menu without selecting a file CANCEL FEED RESTART Displays the upper level menu without selecting a file ENTER PAUSE Displays the next page UP RESTART Moves the cursor upward The cursor does not move any further when it is positioned at the top DOWN FEED Moves the cursor downward The cursor does n...

Страница 230: ...on RAM clear with QM type selected 1 Clears a parameter QM TYPE CLEAR QM TYPE COMPLETED Turn off the printer Power OFF ON B EX Series Initializing 2 The initial setting wizard is started STARTUP SETTINGS PRESS ENTER ENTER key 3 Select a language LANGUAGE ENGLISH ENGLISH GERMAN Select ENTER Set FRENCH Choose an option with the UP or DOWN key ENTER key 4 Print mode PRINT MODE w RIBBON With RIBBON Wi...

Страница 231: ...S LABEL GAP Select ENTER Set BLACK MARK Choose an option with the UP or DOWN key ENTER key 6 2 2 Media length PAPER LENGTH 76mm Select ENTER Set 76 mm 10 1500mm Set a value with the UP or DOWN key ENTER key 6 2 3 Finish INITIAL CONFIGURATION FINISH Prev ENTER Finish ENTER key 7 The settings are saved 7 The settings are saved SAVING SETTING 8 DHCP client is initialized DHCP CLIENT INIT 9 Online mod...

Страница 232: ...s the next screen UP RESTART Moves the cursor upward When the cursor is positioned at the top of the list it scrolls from the top to the bottom DOWN FEED Moves the cursor downward When the cursor is positioned at the bottom of the list it scrolls from the bottom to the top LEFT None Displays the next screen without saving the changes RIGHT None Displays the upper level screen without saving the ch...

Страница 233: ... the print head element can be easily damaged by shock please treat it carefully by not hitting a hard object against it NOTE Before starting the periodic maintenance be sure to read carefully and understand the Service Manuals especially warnings cautions and adjustment 1 Ask an operator or a manager about any machine trouble 2 Check the run distance on the maintenance counter 3 Turn the power of...

Страница 234: ...the cutter unit clean the cutter blade and the media path WARNING When cleaning the cutter be careful not to be injured by the cutter blade 1 Loosen the two FL 3x6 screws to remove the Cutter Cover 2 Remove the jammed paper 3 Clean the Cutter with a soft cloth slightly moistened with alcohol 4 Attach the Cutter Cover Media Path Cutter Unit FL 3x6 screws ...

Страница 235: ...tive action 8 Replace the following parts periodically if necessary The following table shows approximate product life for each part No Part Name Standard interval of replacement 1 Cutter unit Option B EX206 QM R 300 000 cuts 2 Platen 50 km 3 Feed Roller 50 km 4 Pinch Roller 50 km NOTES 1 The above values of the cutter life are obtained on condition that the periodically maintained cutter is used ...

Страница 236: ...oved media and ribbon Print tone print head position etc 2 Print start position adjustment Horizontal media position vertical sensor adjustment adjustment by issuing commands 3 Communication test 4 Abnormal noise 5 Confirm that there are not any other errors 11 Close the top cover 12 Clean the outside of the printer 13 Fill out a report form Hand it to the manager and obtain a signature ...

Страница 237: ... PC board or operation panel Replace the operation panel harness Replace the MAIN PC board Poor printing 1 Poor media quality 2 Dirty print head 3 The print head block is not set completely Use the media approved by TOSHIBA TEC Clean the print head Close the print head block completely Printer does not print 1 Print head failure 2 Connection of the print head connector is incomplete a bad contact ...

Страница 238: ... mark sensor 6 The cutter mechanism is not installed properly 7 Failure of the stepping motor Set the media properly Use the media approved by TOSHIBA TEC Re adjust the sensor Set the threshold correctly Replace the feed gap sensor or black mark sensor Install the cutter module properly Replace the stepping motor or MAIN PC board Communication error 1 Failure of the communication cable 2 Failure o...

Страница 239: ...k please treat it carefully by not hitting a hard object against it NOTE Be sure to disconnect all cables of the printer from the PC and the option devices Never remove the screws fixing the print head block See Caution in Section 3 WARNING Turn the power off and disconnect the power cord before replacing the main parts Care must be taken not to allow the metal or glass part of a watch to touch th...

Страница 240: ...1 POWER SUPPLY UNIT 1 Remove the side panel L Refer to Section 3 2 2 Disconnect the power supply harness from the Main PC board 3 Remove the SMW 4x6 screw to detach the power supply unit from the printer Power Supply Unit Main PC Board SMW 4x6 Screw Power Supply Harness ...

Страница 241: ...15 MAJOR UNIT REPLACEMENT EM18 33031 15 1 POWER SUPPLY UNIT 15 3 4 Replace the power supply unit with a new one then reassemble in the reverse order of removal Power Supply Unit ...

Страница 242: ...MAIN PC board is replaced the printer settings will be reset Therefore a copy of the current printer settings needs to be taken in advance using any of the following methods 1 By using the Printer Setting Tool save the current settings prior to a replacement of the MAIN PC board and download these settings to the printer after the replacement 2 Print out the maintenance counter values and paramete...

Страница 243: ...9 MAJOR UNIT REPLACEMENT EM18 33031 15 2 MAIN PC BOARD 15 5 4 Replace the Main PC board with a new one then reassemble in the reverse order of removal MAIN PC Board ...

Страница 244: ...ION PANEL ASS Y 15 6 15 3 OPERATION PANEL ASS Y 1 Remove the side panel L Refer to Section 3 2 2 Remove the operation panel ass y Refer to Section 3 4 3 Replace the operation panel ass y with a new one then reassemble in the reverse order of removal ...

Страница 245: ...emove the side panel L Refer to Section 3 2 2 Remove the SMW 3x6 screw to detach the USB connector 3 Disconnect the stepping motor harness from the stepping motor ass y 4 Remove the two SMW 4x8 screws to detach the stepping motor ass y SMW 4x8 Screw Stepping Motor Harness SMW 4x8 Screw Stepping Motor Ass y SMW 3x6 Screw ...

Страница 246: ...15 MAJOR UNIT REPLACEMENT EM18 33031 15 4 STEPPING MOTOR ASS Y 15 8 5 Replace the stepping motor ass y with a new one then reassemble in the reverse order of removal ...

Страница 247: ... detach the ribbon motor take up 4 Replace the ribbon motor take up with a new one then reassemble in the reverse order of removal Fit the positioning tabs of the ribbon motor take up into the positioning holes in the ribbon motor mounting plate Apply FLOIL HTM 308 to the pulley using a soft cloth 5 Refer to Section 5 5 28 to fine adjust the ribbon motor torque Positioning Tab Pulley Ribbon Motor ...

Страница 248: ...lace the ribbon motor feed with a new one then reassemble in the reverse order of removal At this time take care of the following points Fit the positioning tabs of the ribbon motor feed into the positioning holes in the ribbon motor mounting plate Apply FLOIL HTM 308 to the pulley using a soft cloth 5 Refer to Section 5 5 28 to fine adjust the ribbon motor torque Positioning Tab Pulley Ribbon Mot...

Страница 249: ...r ass y take up 4 Detach the ribbon motor sensor take up from the ribbon sensor plate take up in the following steps NOTE The ribbon motor sensor take up is attached to the plate with the four hooks 1 Pull the ribbon motor sensor take up in the direction indicated by the arrow to unhook the two hooks on the connector side 2 Move the ribbon motor sensor take up in the direction indicated by the arr...

Страница 250: ...rder of removal At this time take care of the following points Attach the ribbon motor sensor take up to the ribbon sensor plate take up in the correct direction Fit the positioning tabs of the ribbon sensor plate take up into the positioning holes in the ribbon motor mounting plate Positioning Tab Positioning Hole Ribbon Sensor Plate Take up Ribbon Motor Mounting Plate ...

Страница 251: ...feed 4 Detach the ribbon motor sensor feed from the ribbon sensor plate feed in the following steps NOTE The ribbon motor sensor feed is attached to the plate with the four hooks 1 Pull the ribbon motor sensor feed in the direction indicated by the arrow to unhook the two hooks on the connector side 2 Move the ribbon motor sensor feed in the direction indicated by the arrow to unhook the other hoo...

Страница 252: ...order of removal At this time take care of the following points Attach the ribbon motor sensor feed to the ribbon sensor plate feed in the correct direction Fit the positioning tabs of the ribbon sensor plate feed into the positioning holes of the ribbon motor block Positioning Tab Positioning Hole Ribbon Sensor Plate Feed Ribbon Motor Mounting Plate Gear with Slits ...

Страница 253: ...le blurred print etc 5 When replacing parts or performing maintenance on the printer be careful not to damage the print head with a hard object like a watch or a ring Since the print head element can be easily damaged by shock please treat it carefully by not hitting a hard object against it WARNING Never perform the replacement just after printing Doing so may cause you to be injured by the print...

Страница 254: ...FREE position to open the ribbon shaft holder plate Refer to Section 3 3 3 Open the print head block 4 Pull the print head ass y in the direction indicated by the arrow and disconnect the two harnesses to detach the print head ass y Print Head Ass y Print Head Harness Printer Block Printer Head Block Holder Plate Print Head Block ...

Страница 255: ... head harness doesn t appear out of the print head block If so the print head harness may touch the ribbon and the media causing a print failure 7 Perform a test print Make sure that printing is performed correctly If the print tone is improper refer to Section 5 5 5 Density fine tune Thermal transfer to fine adjust the print tone 8 Refer to Section 5 8 2 to perform a maintenance counter clear Pos...

Страница 256: ...through the rectangle hole with a fine tool to remove the platen holder cover 4 Remove the platen holder and the strip plate 5 Pull the platen ass y to the right until the entire pulley appears 6 Pull the pulley forward 7 Pull the platen to the left to detach it from the printer Platen Holder Cover Hook Push Platen Holder Strip Plate Platen Pulley 6 7 5 ...

Страница 257: ...ne then reassemble in the reverse order of removal NOTES 1 Apply FLOIL to the platen pulley before installing the platen 2 When installing the platen first fully insert the pulley into the printer Also make sure that the platen holder cover is fixed with the hook Platen Platen Pulley Hook ...

Страница 258: ...2 Open the print head block 3 Make sure that the media guide is closed In this condition you can easily remove the pinch roller holder cover on the left side of the feed roller 4 Push the hook through the rectangle hole with a fine tool to open the pinch roller holder cover Media Guide Pinch Roller Holder Cover Pinch Roller Lower Ass y Push Hook ...

Страница 259: ...semble in the reverse order of removal NOTES 1 Apply FLOIL to the pinch roller gear before installing the pinch roller lower ass y 2 When reassembling make sure that the pinch roller lower ass y is attached correctly Also make sure that the pinch roller holder cover is fixed with the hook Pinch Roller Holder Pinch Roller Lower Ass y Pinch Roller Holder Cover Pinch Roller Gear Pinch Roller Lower As...

Страница 260: ...op cover Refer to Section 3 1 2 Open the print head block 3 Remove the SMW 3x6 screw to remove the pinch roller side plate 4 Remove the three SMW 4x8 screws to detach the pinch roller cover Pinch Roller Cover Pinch Roller Side Plate SMW 3x6 Screw SNW 4x8 Screw SNW 4x8 Screw View from under the pinch roller upper ass y ...

Страница 261: ...1 15 10 PINCH ROLLER UPPER ASS Y 15 23 5 Release the two springs to remove the pinch roller upper ass y 6 Replace the pinch roller upper ass y with a new one then reassemble in the reverse order of removal Spring Pinch Roller Upper Ass y ...

Страница 262: ...eed gap sensor photo diode 1 Remove the side panel L Refer to Section 3 2 2 Open the top cover Refer to Section 3 1 3 Turn the head lock lever to the FREE position to open the ribbon shaft holder plate 4 Press and hold the lock downwards Slide the media sensor ass y in the direction of the arrow until it stops Push the media sensor ass y toward the print head block to disengage it from the pinch r...

Страница 263: ...SENSORS ASS Y 15 25 6 Replace the media sensor ass y with a new one then reassemble in the reverse order of removal NOTE After replacing the media sensor ass y refer to Section 5 7 to adjust the sensor level for the media to be used Media Sensor Ass y ...

Страница 264: ... 1 Remove the side panel L Refer to Section 3 2 2 Squeeze the four hooks of the head up sensor to remove it from the head up sensor plate 3 Replace the head up sensor with a new one then reassemble in the reverse order of removal Head up Sensor Head up Sensor Hook Head up Sensor Plate ...

Страница 265: ...head lock lever to FREE position and open the Print Head Block Holder Plate 3 Open the print head block 4 Remove the Print Head See Section 15 7 for Details 5 Push the Ribbon Guide down both sides to remove the assembly Head Lever Print Head Block View from the lower right side Ribbon Guide Hook Print Head Block Holder Plate Ribbon Guide Sensor ...

Страница 266: ...sensor harness from the ribbon end sensor 6 Replace the ribbon end sensor with a new one then reassemble in the reverse order of removal NOTE After replacing the ribbon end sensor refer to Section 5 7 to adjust the sensor level for the ribbon to be used Ribbon End Sensor Ribbon End Sensor Harness ...

Страница 267: ...er Refer to Section 3 1 3 Turn the head lock lever to FREE position and open the Print Head Block Holder Plate 4 Open the print head block 5 Go to the left side of the machine and remove the screw as indicated in the picture below Print Head Block Paper Guide Assembly Center Aligned Front panel cover Stepping Motor Ass y Head Lever Print Head Block Holder Plate ...

Страница 268: ...aten rollers by unhooking the respective platen holders After that remove the 2 screws indicated in the picture below 8 By this time you can already remove the whole Paper Guide Assembly 9 Replace the Paper Guide Assembly with a new one then reassemble in the reverse order of removal Paper Guide Assembly Paper Guide Assembly Platen Roller Platen Holder ...

Страница 269: ...s being held by 2 screws 3 After removing the 2 screws push the card to the inside and remove the connector from the Main PCB Board Expansion I O Interface Serial Interface Parallel Interface Note For GS TS16 models this slot is used for WLAN Interface See Section 4 6 for details Expansion I O Interface Card Expansion I O Interface Card Back View Side View ...

Страница 270: ...5 INTERFACE CARDS 15 32 4 Replace the respective Interface Cards with a new one then reassemble in the reverse order of removal Parallel Interface Card Parallel Interface Card Parallel Interface Card Parallel Interface Card WLAN Card WLAN Card ...

Страница 271: ...HEAD UP SOLENOID 15 33 15 16 HEAD UP SOLENOID 1 Remove the side panel L Refer to Section 3 2 2 Remove the Operation Panel Refer to Section 3 4 3 Remove the 7 screws holding the Solenoid 4 Detach the 2 connectors from the PCB Side View Front View ...

Страница 272: ...rom the Solenoid assembly and remove the Solenoid assembly from the frame Take note of the spring hook when pulling 6 Replace the Head up Solenoid with a new one then reassemble in the reverse order of removal Solenoid Shaft Solenoid Shaft Spring hook Solenoid Assembly Solenoid Assembly ...

Страница 273: ...ng the print head element forward tends to improve blurred print and moving it backward tends to improve smudges 17 2 PRINT HEAD POSITION ADJUSTMENT PROCEDURE The position adjustment range of the print head for the B EX4 B EX6 series is 0 4mm 0 8mm in total Move the print head element forward in the case of blurred print and move it backward in the case of smudge within the adjustment range to fin...

Страница 274: ...determined tighten the print head fixing screws The above mentioned procedures are the basic of print head position adjustment for TTEC barcode printers 17 2 1 Print head position adjustment using adjustment jigs These jigs are used when replacing the print head to adjust the position of a newly installed print head in the same way as the original one The jigs also help you secure proper print qua...

Страница 275: ... sheet Step 2 Completely remove Loctite adhesive applied to the print head fixing screws Failure to do this disables accurate measurement of the adjustment value Note DO NOT loosen the print head fixing screws at this stage Step 3 Remove the print head fixing clip green part and check the adjustment value for the original print head by fitting the jigs one by one in the order from 0mm to 0 4mm Ins...

Страница 276: ...ad fixing screws Step 5 Re attach the print head fixing clip green part and the adjustment is completed Install the spare print head on the printer perform a test print If print quality is still poor refer to Section 17 2 3 Adjustment procedure for the installed print head and follow the procedure 17 2 3 Adjustment procedure for the installed print head Step 1 Remove the print head from the printe...

Страница 277: ...ach the print head fixing clip green part and perform a print test to check the print quality When there is no problem with the print quality the adjustment is completed Step 4 If poor print still occurs repeat the above Step 2 and Step 3 to find the best position Use the jigs in the following order 1 0 2mm 2 0 3mm 3 0 4mm 4 0 1mm 5 0mm 6 0 1mm When print quality becomes proper the adjustment is c...

Страница 278: ...ed Before operating the print head pressure adjustment lever turn the head lever to Free position 1 B EX4T2 series Ribbon is left aligned In the case of the B EX4T2 series the ribbon and the media are left aligned Therefore the print head pressure against the ribbon tends to become uneven If the ribbon wrinkles basically adjust the left side printer frame side to High and the right side to Low to ...

Страница 279: ... B EX6T series Ribbon is centered As the effective print width is wide on the B EX6T series the print head pressure against the ribbon tends to become uneven If the ribbon wrinkles basically adjust the center to High the wrinkle side to Low and the normal side to Middle or High to make the print head pressure balance equal Ribbon wrinkle problem tends to occur depending on the various conditions s...

Отзывы: