6.
Then tighten nut until the next set of slots line up
with the cross hole in shaft. Do not loosen nut to
align the slot. If required, tighten to the next set
of slots.
7.
Install a new cotter pin.
Note:
Do Not use anti-seize on wheel hub.
Adjusting the Caster Pivot
Bearing
Service Interval:
Every 500 hours/Yearly (whichever comes
first)
1.
Disengage the blade control switch (PTO), move the
motion control levers to the neutral locked position
and set the parking brake.
2.
Stop the engine, remove the key, and wait for all moving
parts to stop before leaving the operating position.
3.
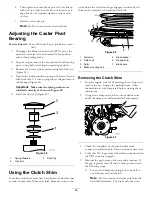
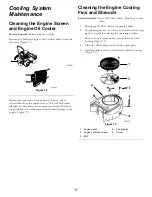
Remove the dust cap from caster and tighten lock nut
(Figure 65).
4.
Tighten the locknut until the spring washers are flat and
then back off a 1/4 turn to properly set the pre-load on
the bearings (Figure 65).
Important:
Make sure the spring washers are
installed correctly as shown in Figure 65.
5.
Install the dust cap (Figure 65).
Figure 65
1.
Spring Washers
3.
Dust Cap
2.
Lock Nut
Using the Clutch Shim
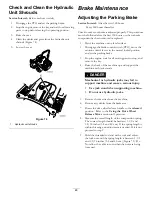
Some later model year units have been built with clutches that
contain a brake shim. When the clutch brake has worn to the
point where the clutch no longer engages consistently, the
shim can be removed to extend the clutch life.
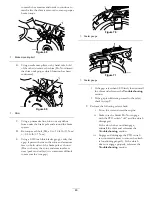
Figure 66
1.
Armature
5.
Brake spacer
2.
Field shell
6.
Re-gap shim
3.
Rotor
7.
Brake pole
4.
Brake mounting bolt
Removing the Clutch Shim
1.
Stop the engine, wait for all moving parts to stop, and
remove the key. Engage the parking brake. Allow
the machine to cool completely before starting these
instructions.
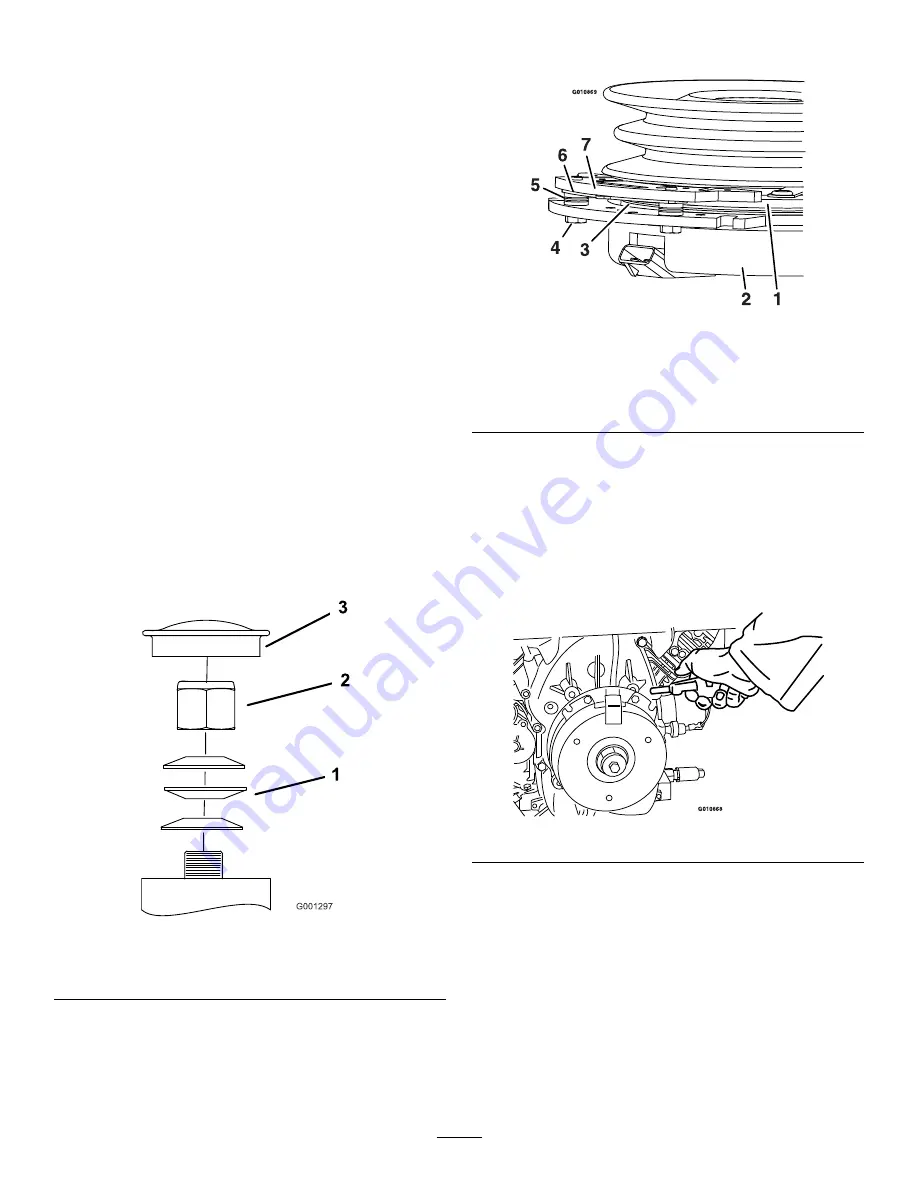
2.
Using an air compressor, blow out any debris from
under the brake pole and around the brake spacers.
Figure 67
3.
Check the condition of the wire harness leads,
connectors, and terminals. Clean or repair as necessary.
4.
Verify that 12V is present at the clutch connector when
the PTO switch is engaged.
5.
Measure the gap between the rotor and armature. If
the gap is greater than .04 inch (1 mm), proceed with
the following steps:
A.
Loosen both brake mounting bolts one-half to
one full turn as shown below.
Note:
Do Not remove the brake pole from the
field shell/armature. The brake pole has worn
45
Содержание 74901 Z Master 5000
Страница 28: ...Figure 40 1 Trailer 3 Not greater than 15 degrees 2 Full width ramp 4 Full width ramp side view 28 ...
Страница 66: ...Schematics Wire Diagram Rev A 66 ...
Страница 67: ...Notes 67 ...

